
Alignment of corners on lighthouses. How to plaster corners: detailed instructions
Analyzing the requests by which visitors come to the site, I see that some people ask the question: how to plaster the corners?
So, it’s worth writing a separate note on this topic, and at the same time I’ll finish uploading photos that didn’t fit in the article about.
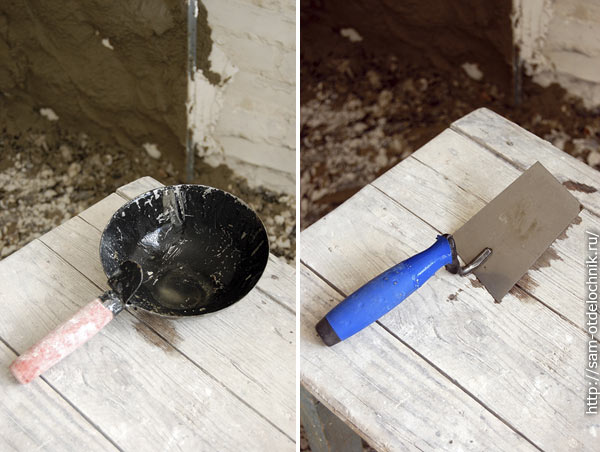
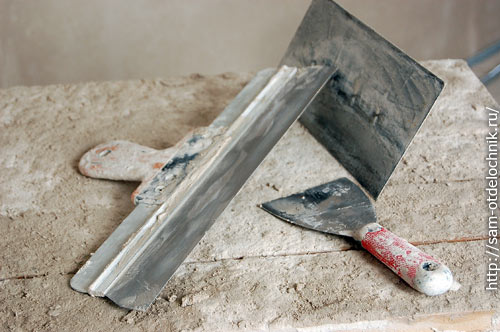
The main tool is still the same: a rule, a level, a ladle or a trowel, narrow and wide spatulas, a trowel.

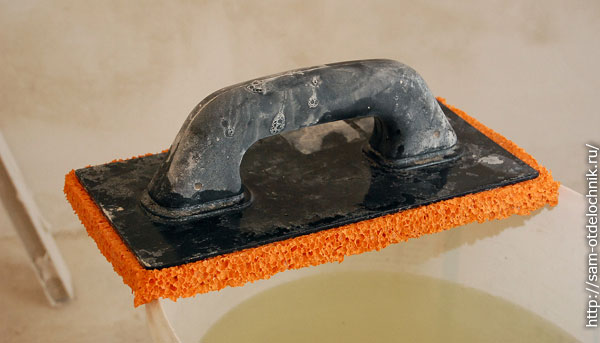
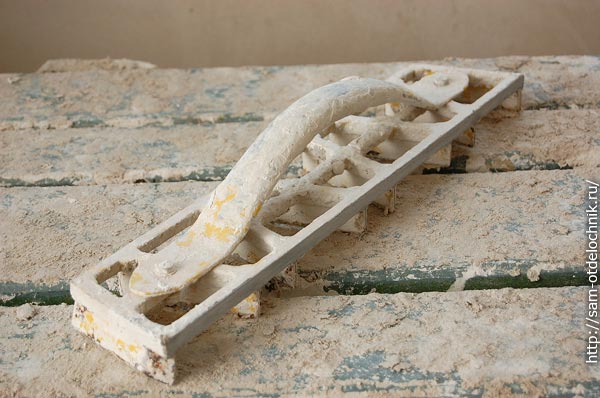
If you plaster surfaces with a gypsum mixture, you will also need a grater with a rubber sponge.
Well, for the corners, such a special spatula (trowel) and an angular equalizer are also used.

I will not dwell on how the walls are prepared and processed, you can read about this in and more in.
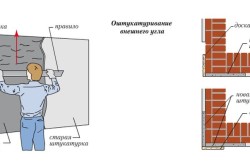
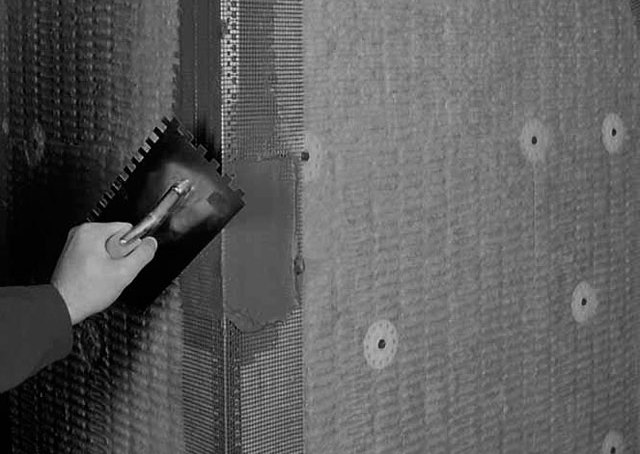
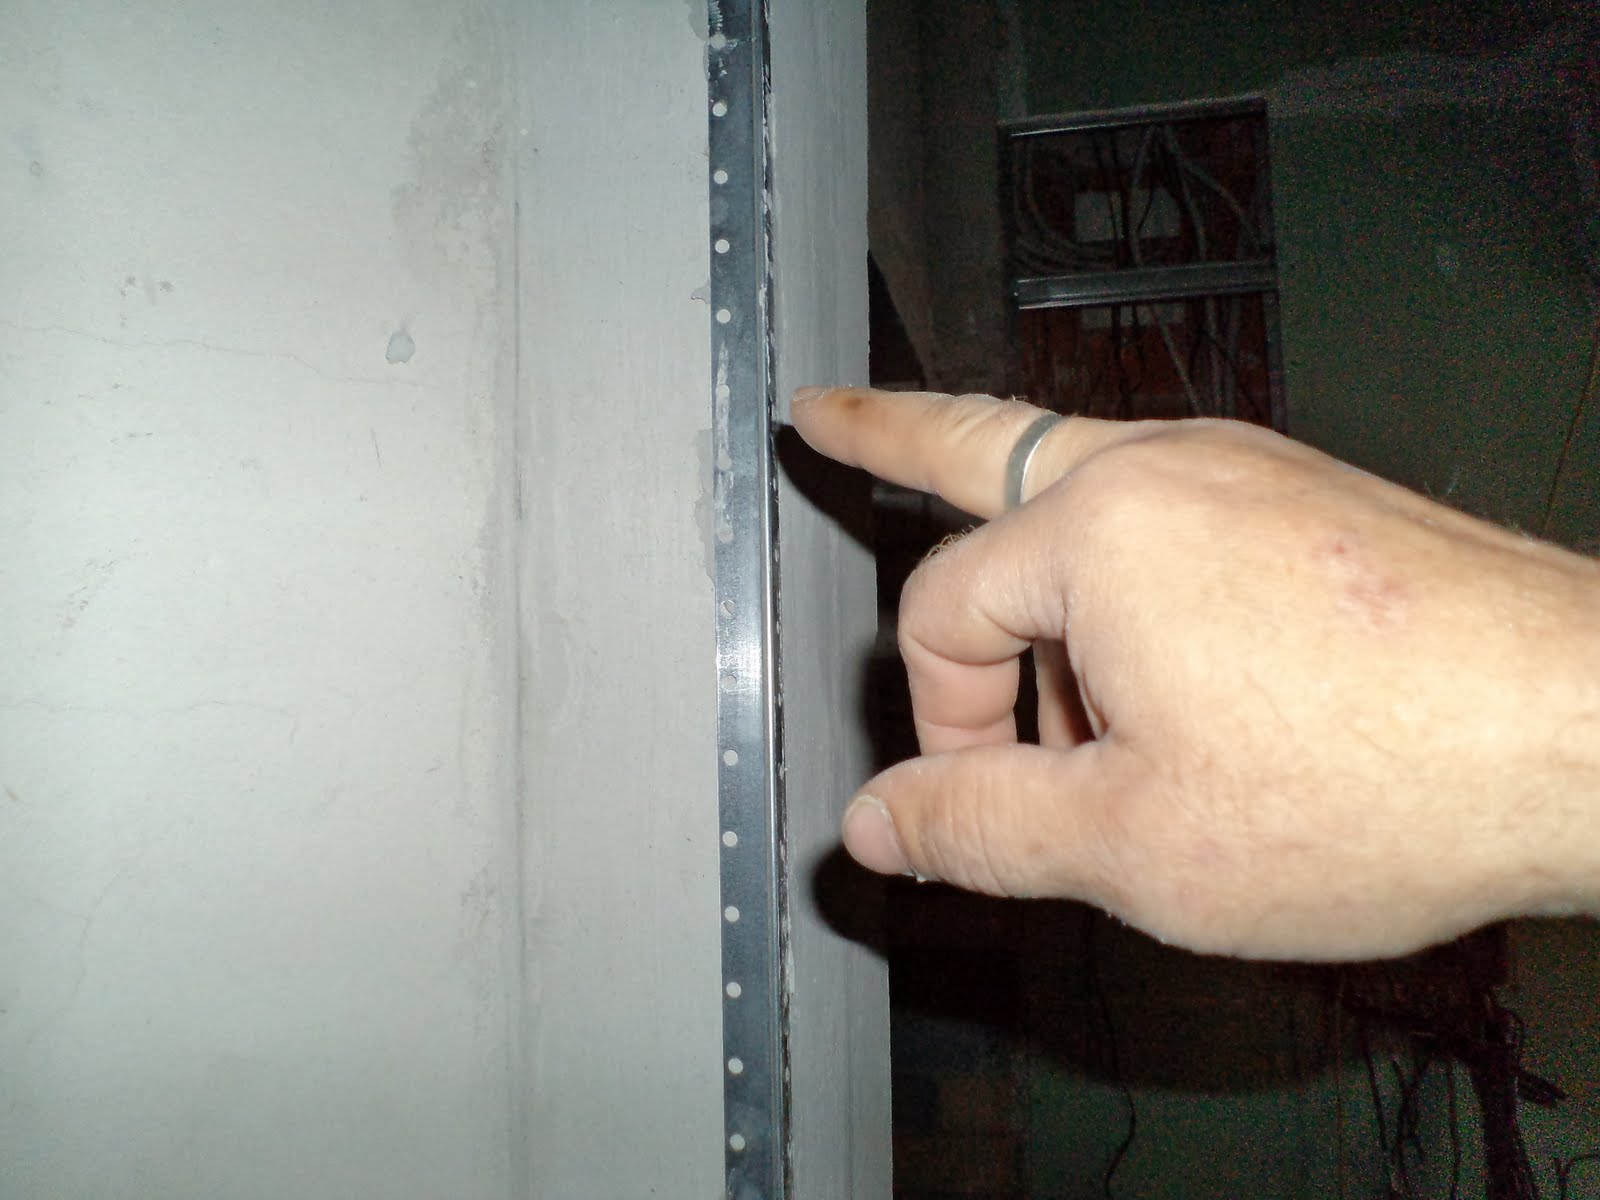
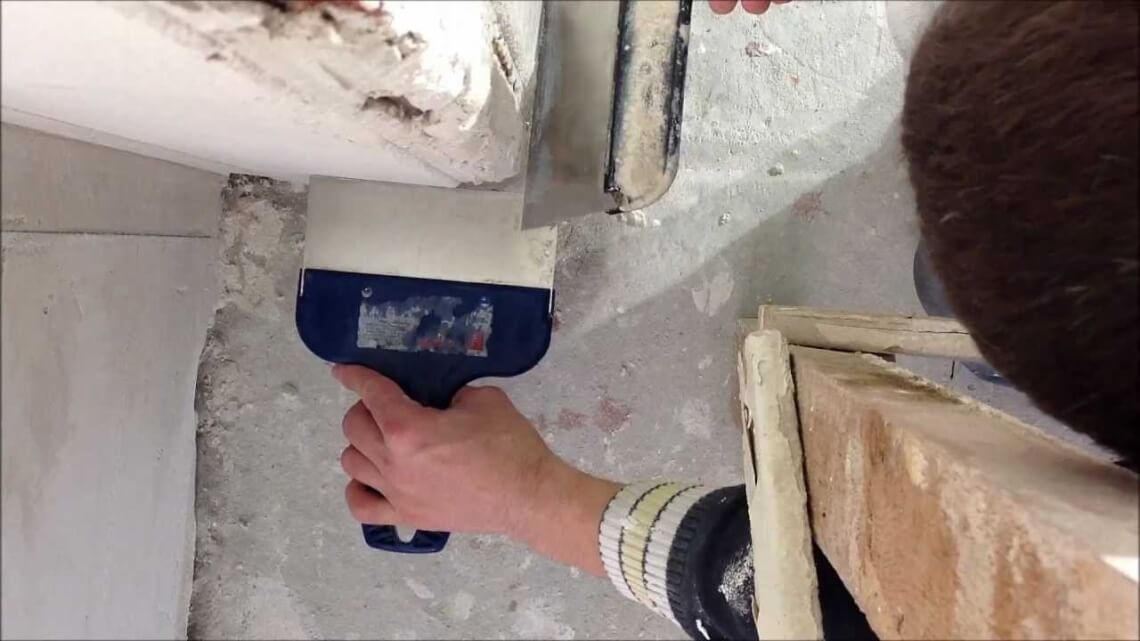
The installation technology is exactly the same as for lighthouses - the required amount of gypsum mixture (Rotband or similar) is mixed. With the help of a spatula, the mixture is applied with moldings with an interval of 20 centimeters along the entire height of the corner.
The corner profile is slightly pressed into the plaster and then aligned vertically using the eye level rule. First, it is aligned in the plane of one wall, which forms the outer corner, then in the plane of the second wall. Excess gypsum mixture is carefully removed with a spatula. After hardening, you can plaster.

If the walls converging into the outer corner are even, without any protrusions, then we can assume that the job is done - it remains to throw a solution on the surface and level it with a rule, pressing it against the beacons and the corner profile.
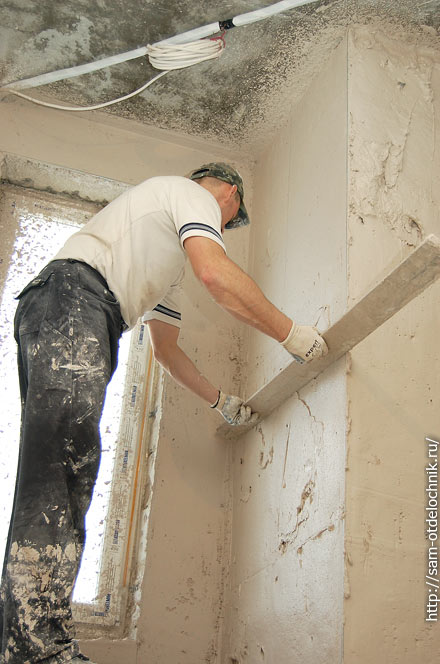
The main thing is that the beacons and the profile are set correctly - and the outer corner will turn out by itself, smooth and beautiful.

It happens that on a short interval there are three corners at once. For example - two internal and one external.
Then we need to decide which angles are important to us in principle. That is, which ones need to be done exactly at an angle of 90 degrees, and which ones you can ignore.
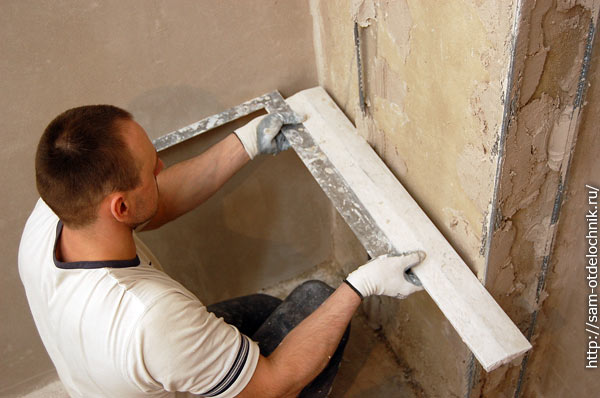
We will make the inner corners right, and the outer - as it turns out. First, install the corner profile. Then we put the beacons and align them vertically.
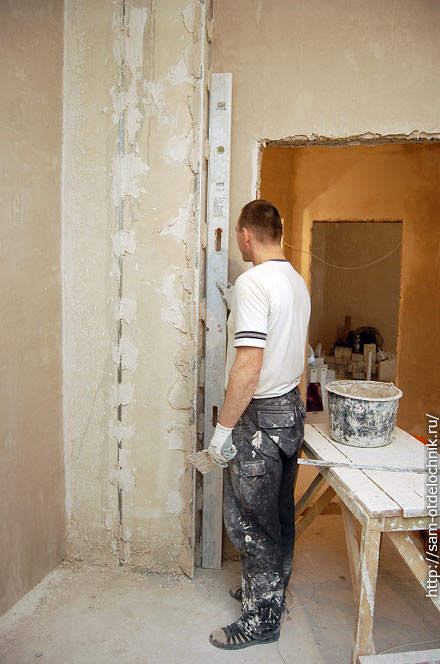
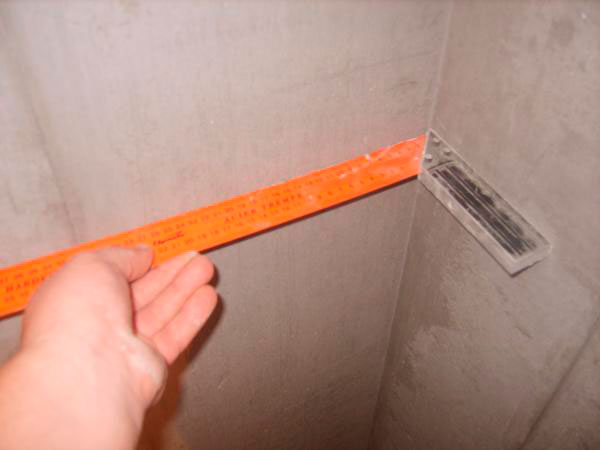
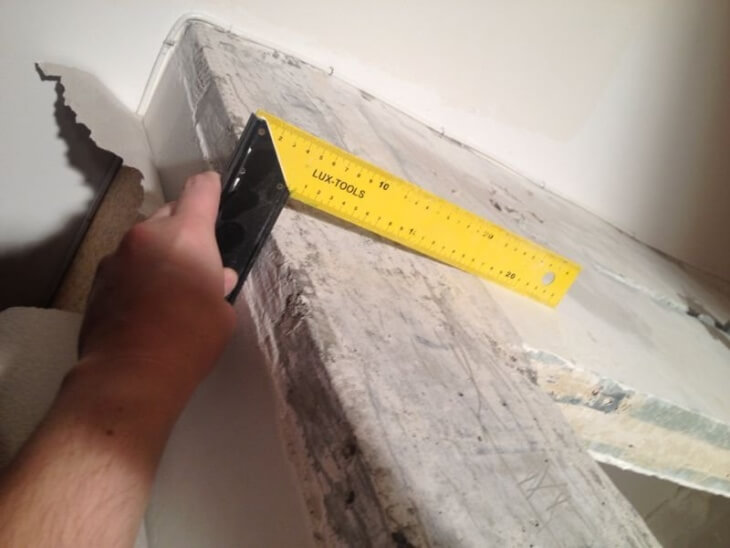
Checking with a plastering square, we achieve such a position of the lighthouse so that the plane to be plastered converges at a right angle to the already finished wall.
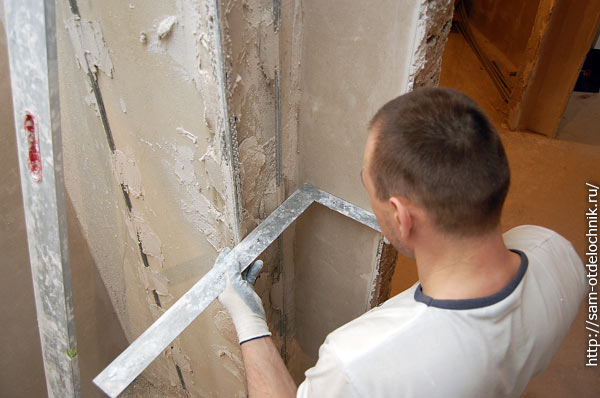
When the length of the square is not enough, we attach it to the short rule.
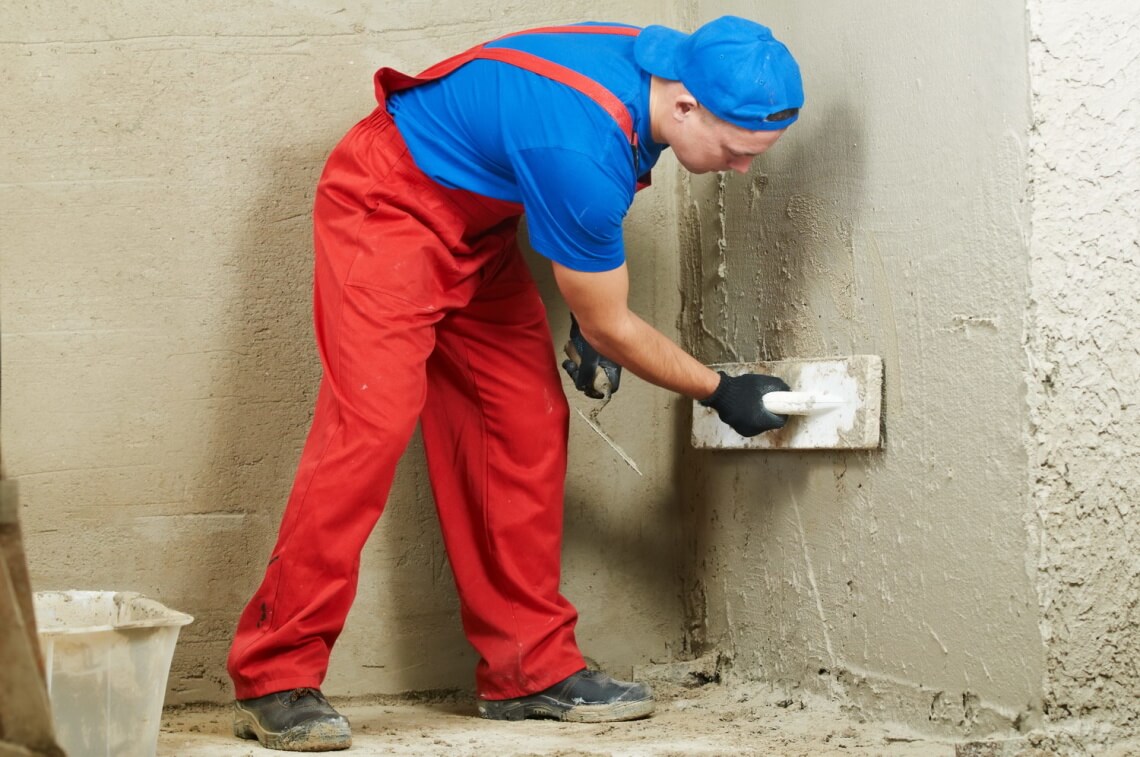
We do not put any beacons in the inner corners. Next is the application of the solution. Gypsum or cement-sand. By machine or by hand.

Pashka throws by hand no worse than a car.
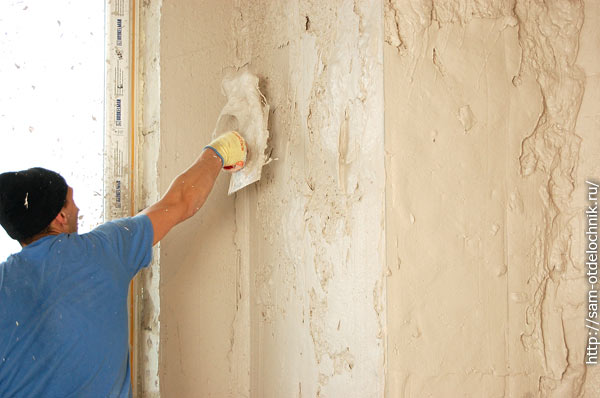
Moreover, with a ladle, and a trowel, and a trowel, and even with two hands. It seems to me that he would also throw with his feet, if there was such an opportunity and the helpers had time to knead the solution :))
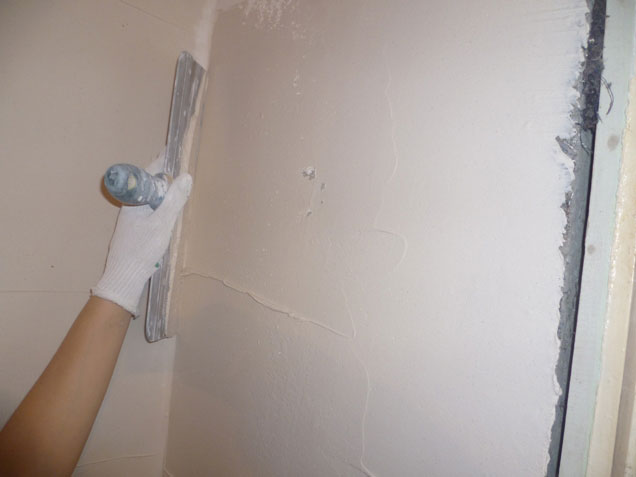
How to plaster interior corners? There is nothing complicated either. The simplest and easiest way is to level one wall first, wait for it to dry and make a second one, without fear of damaging the corner line. For convenience, you can use the rule, in which the edge is sharply cut - then it will not touch the adjacent wall.


But this method wastes a lot of time.
When both converging walls are plastered at the same time, we remove the mortar with a rule, gradually shifting it to the corner line. We do not reach the very corner of 3-5 mm, so as not to touch the neighboring wall with the tool.

We also make a developed angle, the value of which is more than 90 degrees.

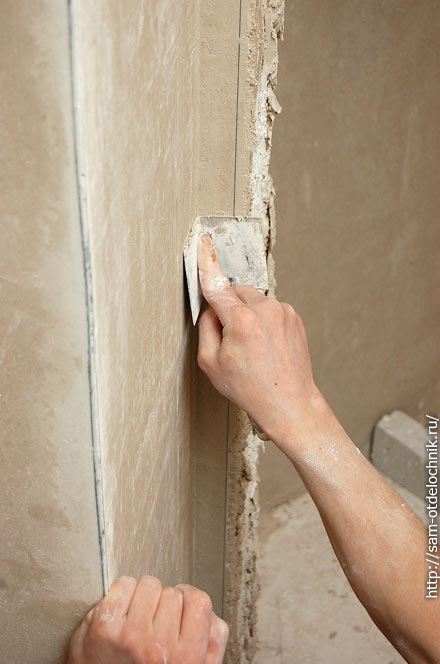
Then, when the mortar hardens a little, but it will still be easy to process, we attach the rule to the wall vertically and cut the remains of the mortar with movements in the corner. Both walls.

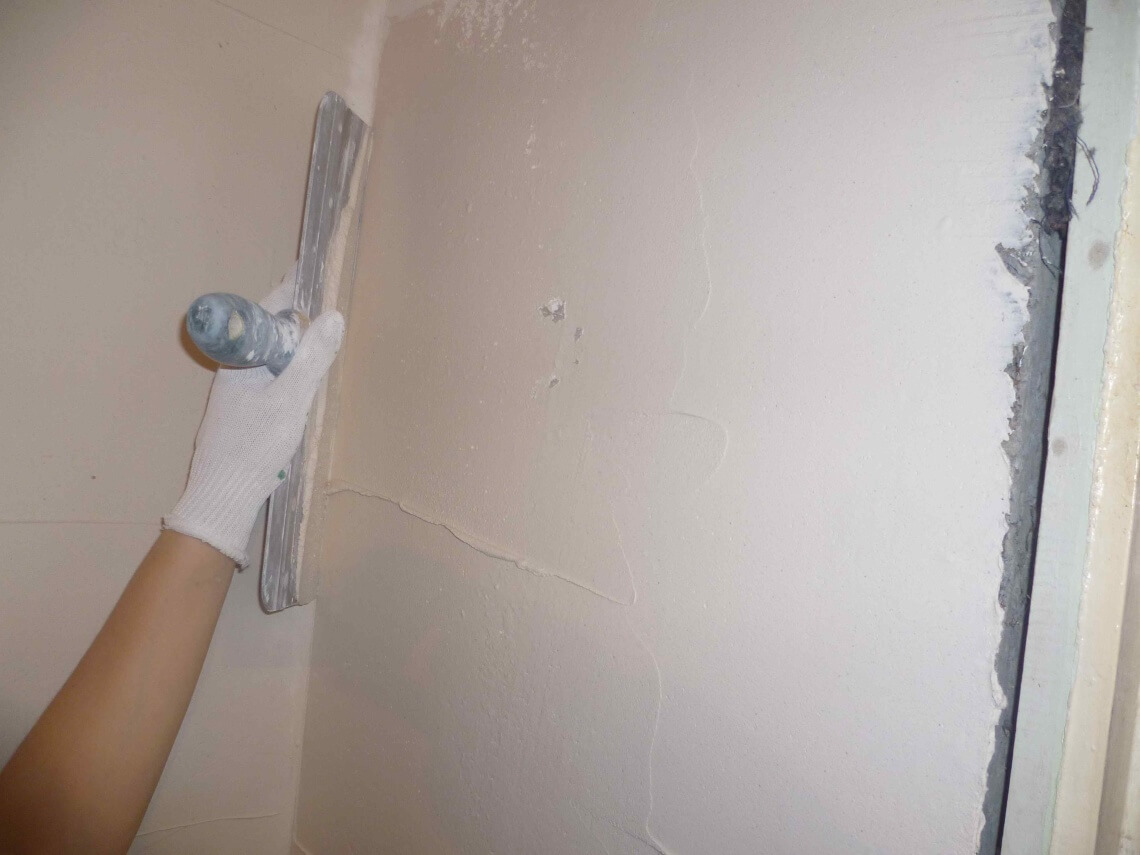
Next, the plaster wall is soaked and smoothed with a spatula. You can attach a rule to one of the sides of the expanded corner, using it as a stop-limiter, and process the other with a spatula. Then vice versa.

The cement-sand mortar is rubbed with a grater, or left with small shells (if) - depending on the type of further finishing. When the plaster is still damp, finish the square corners with a plaster corner leveler or an angle trowel. The line of the corner becomes straight, small irregularities are cut off.

P.S. Once upon a time, I had to plaster the summer kitchen. There was no knowledge, no tools, and there was no one to tell how to plaster the corners. Nothing, did it. I took old door frames and plastered. He changed them - they were erased quickly, but he brought out the walls no worse than the rule.
Creative ideas and good luck!
To receive new blog articles to your e-mail, subscribe.
I would be grateful if you share the article on social networks:- Plastering of internal corners: necessary tools and materials
- Processing of external joints
- Mounting errors
During the repair work, the most difficult and responsible process is, and especially their corners.
At the same time, there are certain differences in how to plaster the corners of the walls.
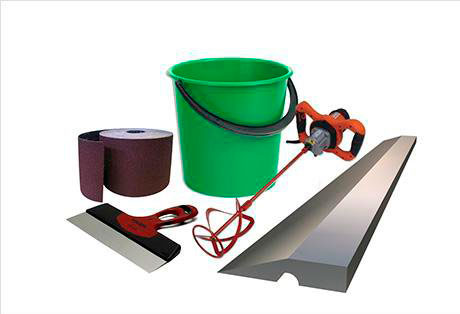
Plastering internal corners: the necessary tools and materials
In order to organize, you need to prepare the following materials and tools:
- Bucket (plastic).
- Drill with stirrer.
- A set of trowels and spatulas.
- Rule.
- Sandpaper (with different grits).
- Specialized grout.
To carry out the internal alignment of corners with plaster, there are 2 options for their finishing. In the first option, the plastering of the corners is carried out on two adjacent surfaces. In the second variant, the plastered surface is joined to the untreated one. But the basic principle of the work will be approximately the same.
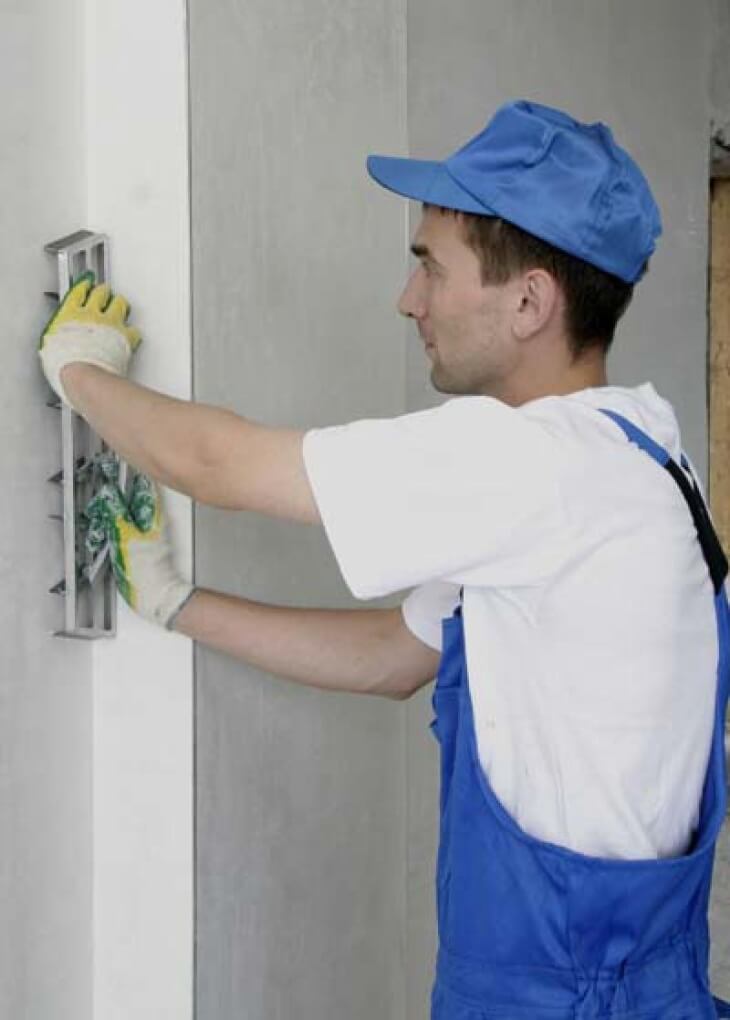
First you need to apply the primer on the wall to be treated, and this must be done by moving towards the untreated plane. After that, the primer must be rubbed using the rule. Then you need to form an angle and scratch the material on its surface with a special grater, on which there will be nails.
Such wall plastering is done using a trowel, which must be applied with its edge at an angle of 30 degrees to the base of the wall and brought to the corner. After it enters the material, you need to start slowly moving it across the surface from top to bottom.
After that, the trowel must be applied with an edge to the hard part of the surface, but flat, on the freshly applied and slightly dried plaster. This way you can create a corner on 2 sides. Next, you need to wait until the plaster dries. Then it will be necessary to apply a water-repellent primer to its surface, which is recommended to be smoothed also towards the untreated plane.
Back to index
Processing of external joints
The outer corners of the walls can also be processed in 2 ways. To perform the first method, you need to use a metal profile. This option of plastering the corners will allow you to process two adjacent surfaces at once. In this case, the corners will be even, smooth and very neat.
When using the second method, you need to use a beacon rail. With its help, the sides of the corners are plastered in turn. In this case, it is also recommended to use metal corners (namely, a metal corner rail), which will help to complete the plaster.
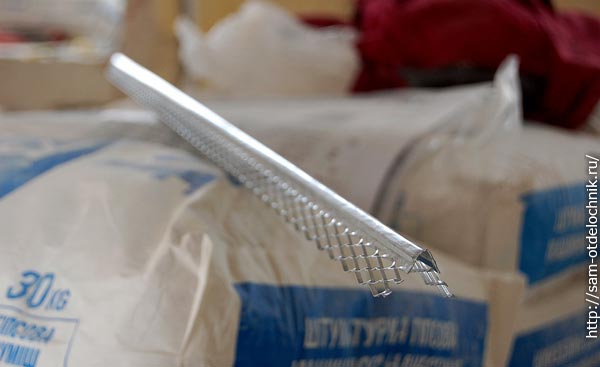
The use of a rail will help to get a fairly strong angle. In order to correctly understand how to plaster wall corners using a corner profile, you need to remember that you first need to install the profile, and then apply a finishing material to its surface.
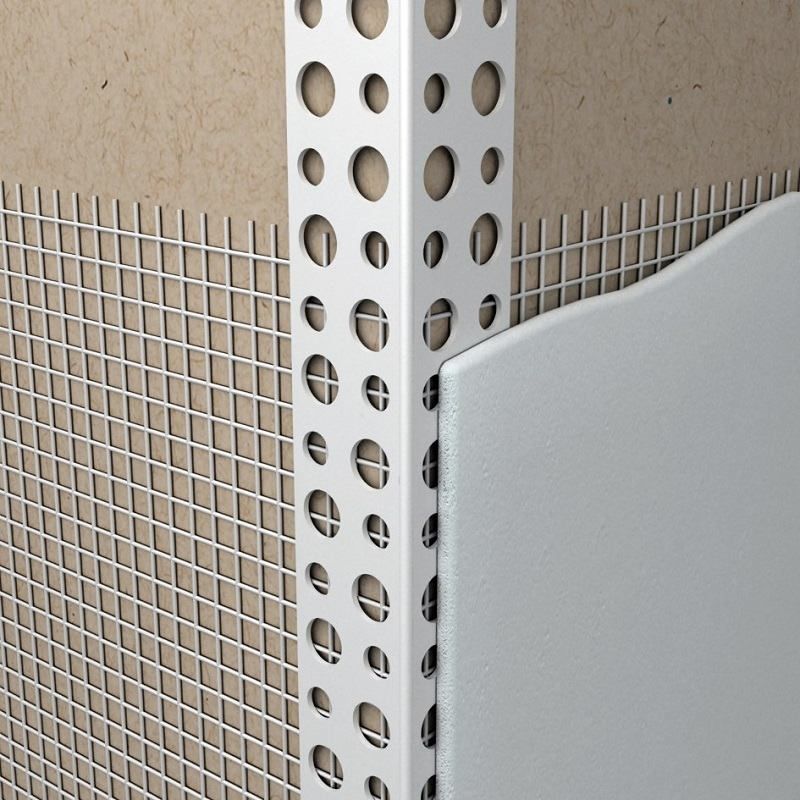
On the central part of such a profile, special shelves are attached, made in the form of a grid. This design allows you to hold the plaster on the surface of the profile during its application. The length of the profile is adjustable: too long can be reduced with metal shears. If the profile needs to be cut along the corner joint, then this can be done with a hacksaw.
During the preparation of the walls for further decoration, they must be brought to a perfectly even state. If with straight sections, as a rule, everything is clear, then the question: corners, so that later there are no difficulties, is quite complicated. Indeed, the transition from one plane to another is one of the most difficult stages of such preparation.
First of all, you need to divide this work into two different sections - the preparation of internal and external corners, since the approach to implementation will be completely different. To work with such places, high accuracy is required, so you should immediately arm yourself with control devices - a rule, a level, and others.
Such preparation is required both in apartments of the secondary housing stock and in new buildings, although in the latter it is the least likely to be done. In old apartments, especially in panel houses, they are often of arbitrary size, so wallpapering them becomes a real problem. In the process of work, you have to cut the sheets or, conversely, glue them in order to compensate for discrepancies in size. Such actions lead to a decrease in the external attractiveness of the finish and an increase in the duration of all work.
Pay attention to the methods of finishing - if we are talking about the use of decorative plaster, then the accuracy of the preparation is not so important, because further work will be carried out with materials similar in application. But for wallpapering, you need to maintain evenness in the horizontal and vertical planes as much as possible, otherwise, during finishing work, inconsistencies and difficulties will definitely appear.
Plaster materials
Before plastering the corners of the walls, you need to work. The ideal option in this case would be starting plaster. Made on a gypsum basis, it allows you to apply thin layers and gradually increase the thickness. In addition, due to the fast setting, the process is quick.
Before applying the plaster, do not forget the primer. We recommend using materials from the same manufacturer, thus you will get the best results.
Tools for the job
In order for all work to be carried out easily, it is required to use clearly marked tools, without replacing them with anything else. This list includes the following items:
- rule - the wider, the better;
- drill;
- spatula wide;
- sandpaper.
Working with inside corners
The greatest difficulty in preparing the walls is. A small space, the need to take into account the curvature of the walls and other subtleties only complicate the process. But there are technologies that allow you to do this quickly and without much difficulty.
First of all, you will need to carefully examine the angle for its curvature. By the way, if the convex parts protrude very strongly, then to save time and materials, they can simply be knocked down with a pick or a hammer. Applying the rule in the horizontal and vertical planes, it is necessary to mark the critical points on the wall with a pencil.
The next step will be the installation of a beacon - a gypsum strip about 5 cm wide, which is installed along the entire height of the corner to be leveled. After application, it is better to strengthen it with additional self-tapping screws. Exactly the same lighthouse will need to be installed on the adjacent wall. After that you can.
When applying as a rule, apply a thin layer in convex areas and a thicker one in concave areas. Please note that between applying layers, it is worth additionally moistening the wall with water from a spray bottle - this will help better setting the layers together. Excess mortar is best removed as follows: after setting the rule on the wall and the lighthouse with different ends, slowly lift it up. All sections of the material that go beyond the leveled plane will be removed by the rule.
The final layers must be applied with a more liquid solution, then they will ideally close the scratches formed on the surface of the walls. After completing all the work, sand the surface with sandpaper and the inner corners can be considered successfully completed.
Working with outside corners
Outer corners are much easier to align. For this purpose, a special metal perforated corner is used, which is easily cut with scissors for metal, so you can always get the product of the right size.
Knock off the excess parts from the corner of the wall, and then treat it with a primer. This is a very important part of the work, because it is the specified processing that will give the greatest guarantee of high-quality adhesion of subsequent materials to the wall. Install the corner on the mortar and align it with the wall. After the mortar has dried, you can apply the desired layers of plaster under the control of the level and rules, and then sand the surface.
Corner alignment processes are quite complex, so if you have never worked with such areas, good decision will invite professionals who know exactly how to plaster corners and have sufficient experience in this area to carry out the processes. If you want to do all the work yourself, we recommend that you practice before starting large-scale work. It is not only about the direct actions for applying putty or plaster, but also about working with the rule and creating the necessary solutions.
Video on how to properly plaster corners
Creating even corners is the key to the success of all further operations, because almost each of them requires perfectly even preparation of the walls. If your walls are very curved, it may make sense to turn to other leveling methods, such as installing drywall panels.
Great competition in production building materials contributes to the emergence quality goods for a moderate cost. In addition, many manufacturers are entering the market with new products and fixtures that the fitters were previously inexperienced with.
Such products include a plaster corner - an indispensable part for the production of interior decoration. By using this item correctly, you can be sure that the corners in the room will become even and reliable.
Plaster corner and its varieties
 Metal corner
 Each owner, when starting repairs in his premises, very often faces the problem of leveling the walls and creating a high-quality cover for finishing. Paying attention to the corners in the room where the renovation will be done, many people do not know how to properly align them.
Modern developers involved in the production of various building products have created and introduced into the "building world" such an invention as a corner for plaster , which is grateful not only to professional finishers, but also to ordinary people who make their own repairs in their apartment.
 plastic corner
 This item is used to form an even inner or outer corner. Despite its simple design, it requires certain skills to install it.
To date, there are 2 types of construction:
- metal profiled corner;
- plastic corner.
Each of these options has its own scope and certain advantages and disadvantages.
Metal corners for plaster
 Aluminum fittings are lightweight and more reliable than the galvanized version
 Plaster corners made of metal are classified according to the shape of the structure and material.
As a material for the production of plaster corners of this type, galvanized steel and aluminum are used.
Despite the fact that aluminum can be attributed to the genus of rather soft metals that require careful handling, corners from it are widely used, since the material is slightly susceptible to corrosion, and products made from it can last for many years. In addition, the aluminum corner has a low weight, which subsequently does not exert additional load on the surface.
A corner made of galvanized steel is more susceptible to atmospheric influences than an aluminum counterpart, but at the same time it has high reliability indicators.
In order for the galvanized steel corner to serve you as long as possible and not start to corrode, it must be cut only with metal shears, and not with an electric grinding tool. Installation of products should be done carefully so as not to damage the zinc layer.
 According to the shape of the structure, all metal corners for plastering work are divided into 3 types:
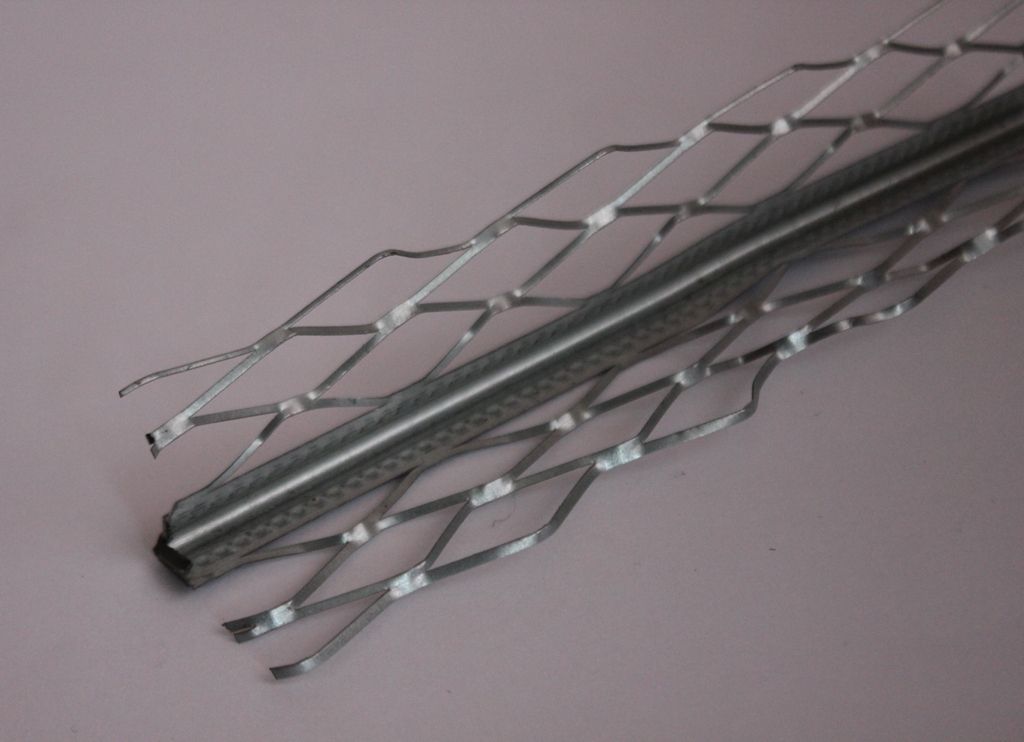
- Regular angle. It has the form of a metal strip, bent at 90 0, up to 0.5 mm thick. Usually, perforations are found on the sides of the product, depending on the manufacturer, which lightens the weight of the product and gives it additional adhesive properties.
- Plaster corner with mesh. Metal corners of this sample are widely used in the production of wet plastering. The design feature of this product is that a metal mesh 2-4 cm wide is attached to the corner with the help of special overlays. Using this design, you can level a variety of surfaces.
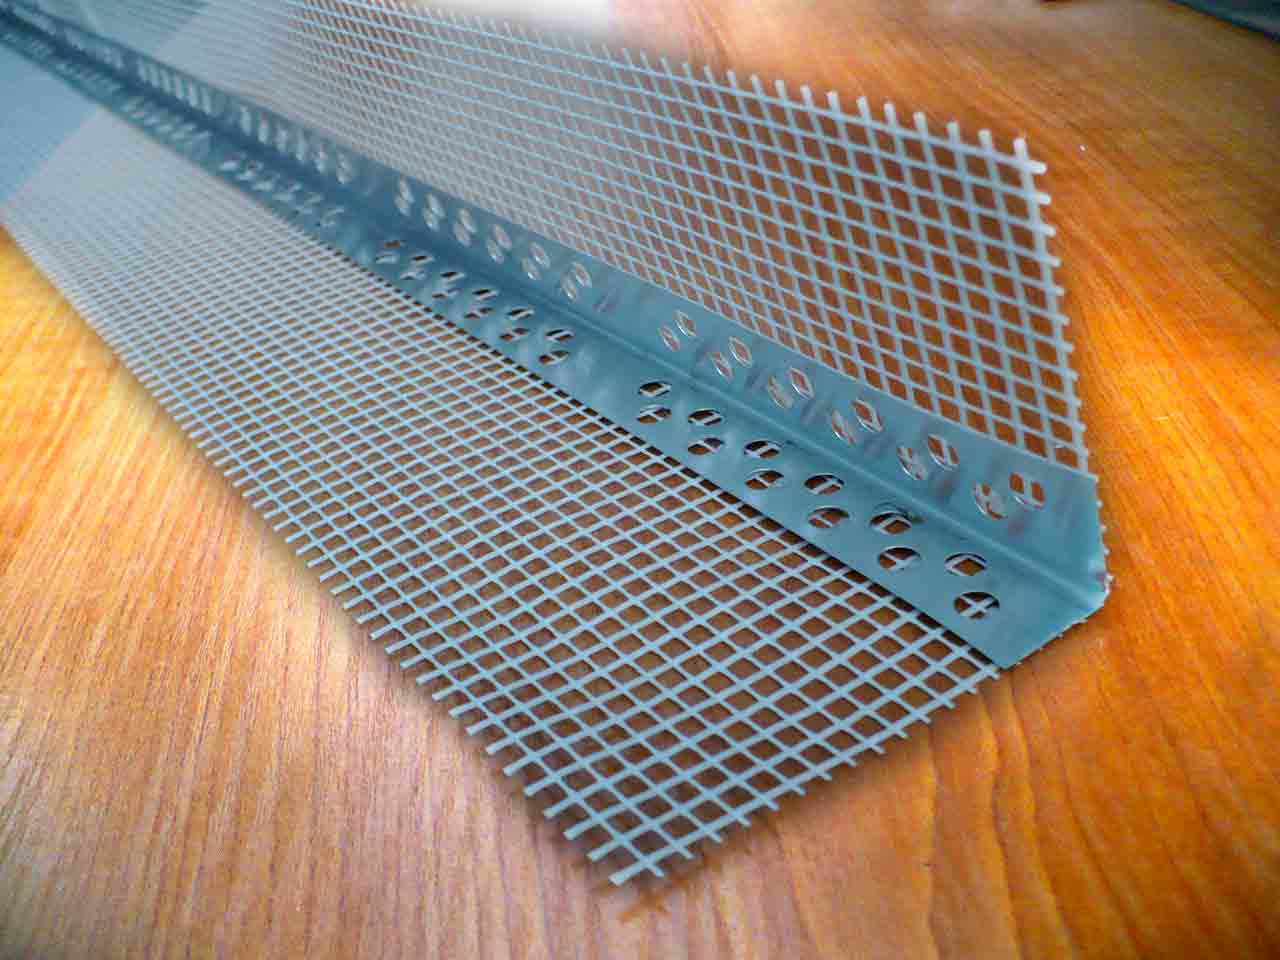
- Combined angle. It is a type of metal structure made up of aluminum or galvanized corner and fiberglass mesh. With its help, clear corner shapes are created on the surface, and the joint is correctly formed using a grid. For information on which option is better to choose, see this video:
Metal corner for plaster can be called ideal option for finishing work, but due to its significant drawback (susceptibility to corrosion), experts recommend using it only for gypsum putty or latex coating.
Plastic plaster corners
 Plastic structures for plastering corners create quite a lot of competition for metal counterparts in the building materials market. There are several types of plastic pads installed in the corners:
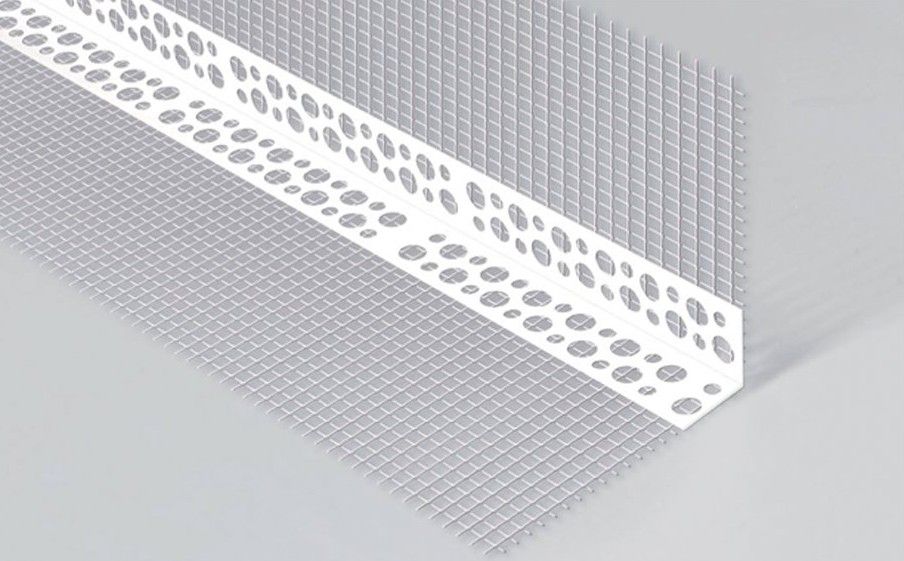
- Standard plastic corner. Similar to metal structures. Its main difference is that it does not corrode. Its main drawback is the thickness of the product, which can exceed 1-1.5 mm, and makes its use impossible when puttingtying the surface, but it is great for plastering work.
- Arched plastic corners. The structures help to create a high-quality arched opening in the room. Due to the segmentally divided 1 edge of the corner, its surface can be bent to different radii, thereby creating an even corner even in a difficult situation.
- Mesh corners. Such products are used in places where a thick layer of plaster will be applied. Mesh extensions create an additional fixing base. Due to this, a high-quality angle is obtained even in the most difficult conditions.
- universal angle. It has a mesh design and with its help you can create non-standard angles (other than 90 0) due to the high-quality plastic used and a specially created fold line.
The main advantage of plastic plaster corners is their anti-corrosion properties, allowing them to be laid in a cement-sand mortar, which is still a popular plaster material.
Fixing the plaster corner
It is not enough to choose a quality product for framing metal or plastic corners, the main task is to install it. There are certain nuances and postulates that every professional finisher will recommend to follow. These should include:
- a solid wall should be at an angle;
- the corner should be primed, as well as the walls;
- the corner is set according to special beacons mounted in level;
- the corner should be installed in such a way that the solution penetrates into all perforations;
- the verticality of the installed product should be controlled using a level;
- in extreme cases, when the layer of finishing material is too thin, it is allowed to use additional mechanical fastening, which can be dowels with plastic sleeves and self-tapping screws;
- plastering work on the corner element is carried out last;
- there are special tools to decorate the corner and remove excess solution from the surface of a plastic or metal product;
- grouting the corner should be done on both sides alternately, while the product itself should not protrude.
If, when comparing the corner lining with the wall surface, you see that the mortar or gypsum composition is not enough to drown the corner, you should use some kind of leveling compound or sealant for these purposes.
 Summing up the material presented, it is worth saying that the plaster corner is an indispensable tool for the owner of an apartment or house, trying for the first time to do the finishing work on his own in his room.
Having made right choice products and having completed its high-quality installation in accordance with the recommendations, you can be sure that the corners in the room will be even.
Many people know how to properly plaster walls, the process is simple and after several workouts, the coating turns out to be perfect, but the corners are already a task of a completely different level. Unfortunately, I often start work, home craftsmen ignore this moment, leaving it in the end, and in vain, since it is the corner of the wall that sets the direction for the entire coating.
And the subsequent finishing, whether it be wallpaper or painting, will reveal all the errors and spoil the whole impression of the new repair.
That is why I decided to consider in detail the question of how to plaster the corners.
Interior
It is believed that this is the most difficult stage in plastering, and therefore I decided to start with it. First, you need to prepare all the necessary tools, some of which may be unfamiliar to a home master without experience:
- A long rule will be needed to level a large area between beacons.
- The medium length rule is necessary for comparing small areas and removing excess plaster mixture.
- Angle spatula. This tool is designed right angle at 90 degrees and is able to level the surface in hard-to-reach places where no other tool is missing.
- Building level 1.5-2 meters long. It is necessary to align the beacons along the entire length. You can get by with a short level, but this will significantly slow down the process and create certain difficulties.
- Angle at 90 degrees. To determine the perpendicularity of beacons.
Advice! Before starting work, the building level must be checked for errors. To do this is quite simple, just attach the tool to the wall, achieve a straight line, and draw a line. After that, the level is turned over and applied to the drawn line on the other side. If the readings remain the same, the level is good and ready for use, but if the readings differ on the same line on the right and left, then the tool is lying and needs to be adjusted or replaced.
Plastering the inner corner

First of all, you need to fix the beacons. They are attached to the wall on a plaster mortar, so it is easier to adjust them in level. The step between the fasteners should be about 20 cm, this will not allow the beacon to “walk” and bend under the pressure of the rule.
The extreme lighthouse is set about 5 centimeters from the corner so that it is exactly perpendicular to the wall from which the corner is created.
After the beacons are fixed, they need to be allowed to dry and securely grab onto the wall surface, after which you can proceed to “throw” the first layer of plaster. The excess mixture is removed by the rule in such a way as not to damage the other wall, so bumps will remain in the corner itself, they are leveled with an angle spatula, and you need to lightly press on the tool so that the corner is slightly lower than the walls themselves. This is necessary for applying the finishing layer and final alignment.
After removing all the irregularities of the first layer, you can start applying the second. The process is completely the same as described above, with the only difference being that now the angled spatula does not need to be pressed in.
Now it remains only to process the walls and the corner with fine sandpaper and you're done.
External
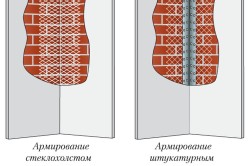
This process is considered less time consuming, since the alignment of the corners with plaster takes place on special corners that act as a beacon, and can also be with a glued reinforcing mesh.
Old-school specialists often consider such innovations to be overkill and make repairs without them. But don't deny all the benefits modern materials, as the corners significantly improve the quality of the plaster and strengthen the corner.
Here are just a few arguments in favor of plastering in the corners:
- The steel beacon strengthens the coating and causes the plaster to crumble.
- An additional reinforcing mesh securely connects the two walls, making the coating monolithic.
- There is no need for careful smoothing of the corners, since the lighthouse is already level and is the zero mark in the plaster of the entire wall.
- Plastering corners is much faster, and the process does not take much effort.
First of all, it is necessary to determine the most convex place on the wall that cannot be eliminated or leveled. It is it that is the starting point in the installation of beacons. To make the wall smooth and without drops, all beacons, including the corner one, must be located on the same level.
This can be determined using a long rule that is applied to the extreme beacons, and everything in between should fit snugly against the tool.
When the beacons are fixed, you can proceed directly to plastering, and the corner itself will simply be walked with sandpaper.
Advice! corners can be of various configurations: with an acute angle or with a rounded one. They should be selected based on the subsequent finishing. It is better to use an acute angle for wallpaper, and a rounded one is suitable for decorative plaster or painting.
As you can see, there is nothing complicated in finishing the corners, the main thing is just to know the technology and pay special attention to setting the beacons according to the level.

- The underlying plaster must always be thoroughly cleaned and primed.
- Cellular concrete poorly comes into contact with gypsum plaster.
- There should not be long breaks between the application of plaster layers, the finishing layer is applied as soon as the first one has begun to dry.
- Before plastering the corners, you need to cut the beacons to size, it is advisable to do this with scissors or a jigsaw, as the grinder burns the galvanized layer and the beacon will begin to rot quickly at the cut point.
- You can start finishing the walls no earlier than two weeks after plastering.
- Before plastering the corners of the walls, they must be carefully primed, and it is best to use a brush here, since the roller will be missing, and subsequently in this place, the layer will begin to fall off.
Using these tips and using quality materials, finishing the corners will no longer seem tricky business. As they say, nothing is impossible, but before starting work, you should still practice.