
How to reduce the temperature of the water in the gas column. Heating systems for country and country houses. Boilers, geysers, water heaters - Repair, service, operation. Mounting and Installation Recommendations
__________________________________________________________________________
Bosch Therm 4000 WR 10-2P geyser adjustments
The Bosch Therm 4000 WR 10-2P geyser with piezo ignition works with a constantly burning wick. Depending on whether the device is used in summer or winter, you can adjust the water temperature using a special slider.
A distinctive feature of such a device with piezo ignition is reliability, quality and affordable price.
The device is mounted on the wall and can work in the apartment on natural gas and in the country on liquefied gas.
To operate on liquefied gas, special nozzles must be purchased separately. The nozzles are easy to install, so the specialist will not have problems when starting the device.
The Bosch WR 10-2P geyser with piezo ignition has an accurate water heating temperature due to a stainless steel burner. The flame in the burner spreads evenly, providing an accurate temperature. But all parameters depend on the temperature of the incoming water.
The heat exchanger is made of high-quality copper, which is maximally protected from high temperatures, burnout and the possibility of oxidation.
Equipped with a modulating burner, which ensures a uniform water temperature during use.
The minimum pressure required to turn on the water heater is 0.1-0.2 atm.
Geysers with piezo ignition Bosch Therm 4000 are designed to work in Russian conditions, for gas pressure up to 5 mbar.
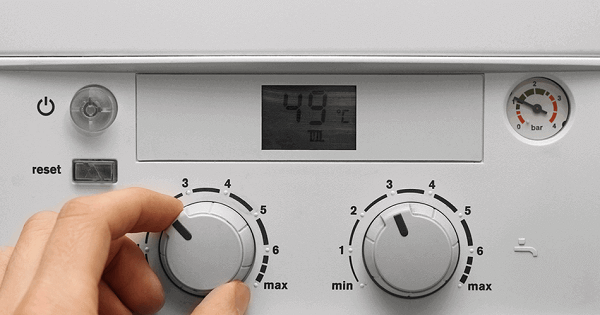
Water flow regulation
Turn the rotary knob counterclockwise. The water flow increases, the outlet water temperature decreases accordingly.
Turn the rotary knob clockwise.
The water flow is reduced, the outlet water temperature is correspondingly increased.
Lowering the leaving water temperature to the required temperature reduces energy consumption as well as the risk of lime deposits on the heat exchanger.
Emptying the geyser Bosch Therm 4000 WR 10-2P if there is a risk of freezing
Close the cold water tap;
Open all taps hot water;
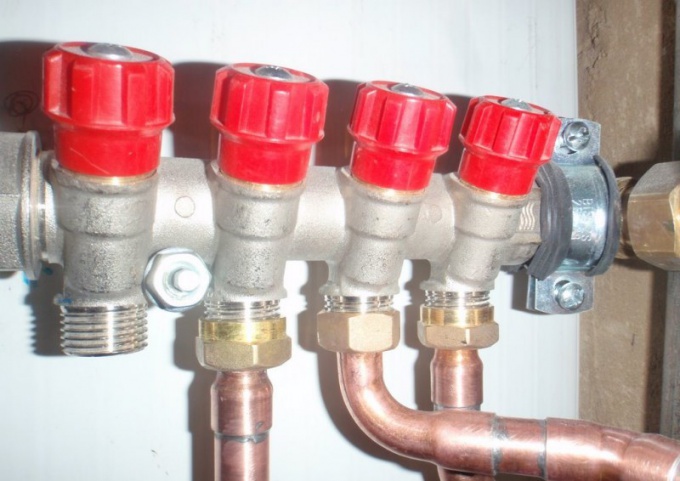
Remove the bracket from the filter housing on the water fitting;
Take out the plug;
Empty the device completely.
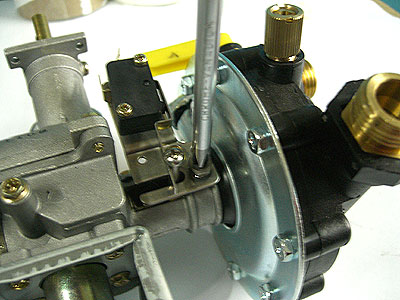
Adjusting the pressure in front of the nozzle
Adjustment screw access:
Remove cover.
Connect pressure gauge
Loosen the locking screw.
Connect a pressure gauge to the measuring pipe (pressure upstream of the nozzle).
Rice. 2. Adjustment screw for maximum gas flow
Pressure in front of the nozzle at maximum heat output:
Remove the seal from the adjusting screw (Fig. 2).
Turn on geyser Bosch 10. Set the power regulator to the extreme right position (maximum power).
Using the adjusting screw (Fig. 2), adjust the pressure in front of the nozzle.
Pressure in front of the nozzle at minimum heat output:
Turn on the device. The power regulator must be in the leftmost position.
Open several hot water taps.
Adjust the pressure with the adjusting screw.
Seal the adjusting screw again.
Checking the correct functioning of the equipment
Check the correct functioning of all safety, control and monitoring devices.
Heat exchanger:
Check heat exchanger.
In case of contamination: dismantle the heat exchanger and remove the temperature limiter; Rinse the heat exchanger under a strong stream of water.
If contamination cannot be removed: soak contaminated parts in hot water and detergent and rinse gently.
If necessary: remove lime scale from the inside of the heat exchanger and the connecting pipes.
Install heat exchanger with new seals.
Install a temperature limiter on the heat exchanger.
Burner geyser Bosch WR 10:
Check burner annually and clean if necessary.
In case of severe contamination (grease, soot): dismantle the burner, dip it in hot water with detergent and rinse carefully.
Water filter:
Replace the water filter at the inlet of the water fitting.
Burner and ignition nozzle:
Remove and clean the pilot burner.
Remove and clean the ignition nozzle.
To ensure that traction control works flawlessly, the following steps must be taken:
Remove flue gas accessory;
Replace it with a pipe with a plugged end (about 50 cm long);
The pipe should be placed vertically;
Turn on the device. Turn the power regulator to the right until it stops (maximum power), set the water flow switch to the extreme right position (small water flow, high temperature). Under these conditions, the instrument should turn off after two minutes;
Remove the pipe with the plugged end and install the flue gas accessory again.
Gas column maintenance Bosch Therm 4000 WR 10-2P
If there is a malfunction in the traction control, proceed as follows:
Loosen the traction control fixing screw;
Disconnect the temperature limiter;
Loosen the solenoid valve connection;
Remove the thermocouple from the burner;
Replace the defective part and install the new kit in reverse order.
__________________________________________________________________________
__________________________________________________________________________
Proterm Panthera Proterm Skat Proterm Bear Proterm Cheetah Evan
Ariston Egis Teplodar Cooper Atem Zhitomir Neva Lux Arderia Nova
Thermona Immergas Electrolux Conord Lemax Galan Mora Aton
_______________________________________________________________________________
Instruction
The first modification is a geyser with piezo ignition. To ignite such a column, with one hand press the button that opens the igniter gas valve, and with the other hand press the piezo ignition button. The pilot burner will be ignited by an electric spark created by the piezoelectric element. After the flame appears, hold down the button for 10-15 seconds. At this time, the thermocouple will heat up, which regulates the flame. To change the power of the water heater, move the slider, and to adjust the water temperature, turn the knob.
The second modification is a column with automatic electric ignition (for example, a column of the Neva brand). It works according to the following principle: when water appears, the electronic circuit of the water heater sends a signal to open the igniter valve, simultaneously creating an electric charge to ignite the igniter. In this case, gas is saved by almost 25%, since there is no constant burning igniter.
To turn on the speaker, simply press the electrical switch. And to control the temperature of the water and the power of the flame, change the position of the rotary knobs on the regulator. Find the optimal position of the regulator and fix it, next time it will turn on with the adjusted settings. Watch the indicator on the speaker panel: if it starts to glow, this indicates that it is necessary to replace the batteries that power the electrical circuit of the speaker.
The third modification is a column with built-in ignition from a hydrogenerator. Such devices are equipped with a multifunctional LCD display, on which you can simultaneously see all the necessary information, including water temperature and error messages. All controls on the speaker are easy to use and are ergonomically designed and clear. Therefore, opt for this modification if you want to get maximum convenience and ease of column management.
The geyser belongs to the group of water heaters designed to prepare hot water for hygienic needs. Water is prepared in flow mode. Having arrived from the water supply, it passes through a heat exchanger and is heated with the participation of a gas burner.
Instruction
The geyser consists of a heat exchanger, automation and a burner, with all components assembled in one housing. Cold tap water is heated by burners located behind the heat exchanger. Exhaust flue gases are removed through the chimney, and oxygen enters due to the natural ventilation of the room. Hot water is delivered through a pipe from the column to the point of use.
Geysers are electronic, manual or with piezo ignition. In terms of their technical capabilities, they differ slightly from each other. The difference lies only in the principle of operation, comfort of use and design.
Columns with manual ignition are almost no longer used, this technique is considered obsolete. The igniter in them had to be set on fire with a match or a lighter. In this case, the burner ignited only after turning a special knob.
In geysers with piezo ignition, the principle of the piezoelectric effect is used, in which mechanical force is converted into an electrical charge. It is enough to press the button on the gas column panel once, so that the piezoelectric element gives a spark. At the same time, the igniter lights up. After that, the column starts to work in automatic mode. When the faucet opens, it lights up by itself and after a few seconds you can use it. hot water.
A column with electronic ignition is considered the most reliable and modern. With its help, you can save gas fuel. In columns with piezo ignition, even when the device is not working, the spark plug burns, which leads to unnecessary gas consumption. In water heaters of the electronic type, this drawback is eliminated. When you close the faucet, any kind of combustion in the column stops.
In geysers with electronic ignition, a spark is produced by a battery, which consists of two AA batteries. There is no need to equip such a device with additional buttons, the user only needs to open the faucet for the column to start working, and hot water flows from the faucet.
If the heater is used to provide hot water to only one point, a gas column with a power of 17-20 kW is enough, it provides a capacity of about 10-11 liters per minute. In the case when hot water is needed at several points, a geyser designed for 20-26 kW is chosen.
As a rule, geysers are equipped automatic systems security, which ensure their reliable operation. A special safety element automatically cuts off the gas supply if there is no flame in the pilot wick.
Sources:
- Construction base, Geyser
- Repair tips, Geysers - reviews and selection criteria
It is difficult to imagine a personal plot without running water: you can’t water the trees in the garden, you can’t grow vegetables in the garden ... In a word, without water like no hands. Similar problems may be faced by those who have water supplied to the site with a small pressure m. Yes, and residents of apartment buildings, this trouble has not bypassed: quite often they are faced with unsatisfactory pressure in the plumbing. But the situation is not hopeless: pressure water can be adjusted.
You will need
- - two tanks;
- - pipes;
- - valve;
- - cranes;
- - wrench;
- - a thin cable;
- - storage capacity;
- - check valve;
- - household pump;
- - reducer.
Instruction
From the valve, branch the pipe: one part should go to the distributing circuit - the first tank, and the second - to the spare tank, which acts as a battery. Install taps on both one and the second pipe, with the help of which it would be possible to block the section of the water supply network at any time. The check valve of this plumbing system will serve as a fuse that regulates the pressure with which water is supplied. The accumulator operates as follows: water under the influence high pressure compresses the air in the tank. When the pressure decreases slightly, the air pushes the water out of the tank.
In order to increase the pressure water in the plumbing high-rise building Start by cleaning your water pipes. Turn off the emergency tap on the pipe supplying water to apartment building, then dismantle the mixer and insert the cable into the water pipe. When cleaning small areas water pipe you need to resume the water supply (this will wash out all exfoliated buildup).
Dangerous and high blood pressure water in the pipe, as it can cause accidents, as well as failure of household appliances such as gas water heaters. In view of this, reduce the pressure in the water supply by installing a pressure reducer on the pipe.
note
Never place the reducer on a pipe supplying hot water: the operating temperature of the reducer is strictly limited.
You can use the services of specialists who will give recommendations on optimizing the water pressure in the pipe in your particular case.
Sources:
- Plumbing on garden plot. Do-it-yourself water pressure regulator
If the drive is noisy, and the engine began to pull poorly due to incomplete filling of the cylinder with the working mixture, then the valves need to be adjusted. Timely work carried out in this direction will avoid gas leakage, causing loss of engine thrust, and maintain valves from overheating and burning.

You will need
- - magnet
- - screwdriver
- - micrometer
Instruction
Carefully remove the cylinder head cover. Turn the engine until the piston of the first cylinder reaches the top dead center position. Make sure that the mark on the pulley matches the pin located on the oil pump pulley.
Pay attention to the valve lifters: those belonging to the first cylinder should have a slight play, and the pushers of the fourth should sit tight. If this does not happen, then turn the engine one more revolution.
Insert a feeler gauge between the cam surface and the tappet and check the valve clearances of the piston of the first cylinder. Different engines have different exhaust and intake valve clearances. Specify the indicators according to the table of measurements and adjustments.
After turning the engine one revolution, measure the valve clearances of the piston of the fourth cylinder at top dead center. You can determine that the adjustment is correct by inserting the end of the probe. Under light pressure, it should bend and go inside.
When adjusting the clearances, replace the adjusting washers on the upper side of the pushers. To do this, turn the crankshaft until the corresponding cam is installed with the tip up and using a special tool, press the pusher inward. Then use a magnet or a small screwdriver to pry out the adjusting washer.
Before pressing the pusher, turn it until the notches on the upper side are facing the candles. Pay attention to the fact that both pushers must be pressed at once with the foot of the device.
Measure the removed washer with a micrometer and record the result. Calculate the thickness of the new washer to ensure proper valve clearance. For the intake valve, subtract 0.25 mm from the result obtained during the valve clearance measurement and add the thickness of the removed washer. To determine the thickness of a new exhaust valve washer, instead of 0.25 mm, subtract 0.30 mm.
Choose a washer closest in thickness to the required clearance. To install it, press the pusher inward again. Measure the valve clearance and adjust it in the remaining valves.
From the right fit driver driving depends on comfort, ease of driving and, as a result, traffic safety on the road. adjust seat driver is required in accordance with certain regulations.
Instruction
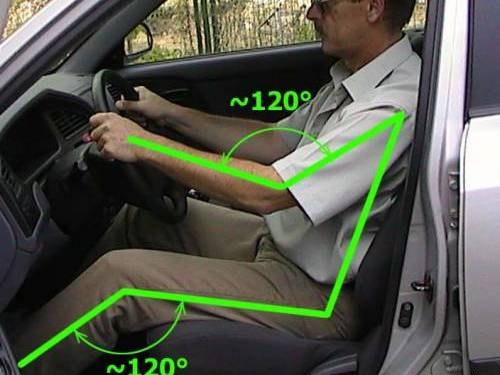
Sit in the driver's seat. Stretch your legs, taking out the pedals with them. Press the left foot on the clutch pedal until it stops. The knee angle should be about 120°.
Press the seat adjustment knob located on the side under the seat cushion on the door side. Pull it towards you and move the seat back and forth. Find the best chair position for you. Release the handle. The seat will be fixed.
Adjust the position of the seatback. It should not have a large slope, as it impairs the protective properties of the seat belt. To adjust, first place your hands on the steering wheel of the vehicle. Lean your back against the back of the chair. Adjust the inclination of the seatback by turning the handle located in the lower part of the backrest on the door side, achieving an angle of about 120° at the elbows.
Adjust the seat head restraint for tilt and height. In this case, the upper part of the headrest cushion should be at the same level with the upper edge of the auricle. The head restraint is adjusted with two hands at the same time: to raise it, pull it up. To lower it, press the release button.
Adjust the seat cushion height if you feel you are too low. Changes are made by turning the knob located on the left side of the seat cushion base. Some vehicles may be equipped with an electrically adjustable driver's seat. Its switches should be located on the left side of the seat cushion base.
Check for correct fit. The spine should fit snugly against the back of the seat. Place your left hand on the steering wheel above its horizontal axis, and your right hand on the gearshift lever on the gearbox. At the same time, you should easily reach all the switches and levers without experiencing inconvenience.
Relax your legs. Raise your feet - with proper adjustment, you should do this without tension. Step on the pedals, check your feelings - is it convenient, comfortable for you to do this. If all the steps for adjusting the seat are done correctly, then when driving a car, you will not feel tired for a long time.
Sources:
- Driving book. Preparation of the driver's workplace
Home theater is a set of equipment designed for watching movies and listening to music. Correctly setting up your home audio system cinema allows you to enjoy high-quality sound even when using mid-range devices.

Instruction
First, properly connect and place the satellites. Make sure you don't mix up the connectors. This is easy enough to determine: run a music track and move the equalizer slider, which is responsible for the distribution of sound between the left and right channels. If your home software cinema allows you to increase or decrease the volume of a specific satellite, perform this action.
If you notice a discrepancy, then reconnect columns to the receiver. Now proceed to adjust the sound quality. Select the bass playback mode for the right and left channels. Usually this option is responsible for the front and rear speakers. If you are using small satellites with one or two channels, select the Small mode. In this case, low frequencies will be reproduced only from the subwoofer and, possibly, from the center satellite.
If included in the home kit cinema contains large floor satellites, select the Large mode. This will allow the receiver to distribute low frequencies between the subwoofer and side speakers. Select the bass reproduction mode of the center satellite. Set to Wide for full sound or Normal to cut/cut bass.
Set the delay time for the central columns. Calculate the distance to the front side satellites and subtract from it the distance to the center columns. Divide the resulting number (in centimeters) by 30. Set the delay (in milliseconds) equal to the resulting result.
Adjust the volume of the subwoofer and satellites. To do this, start a test sound signal. It will be played in turn by each satellite. Adjust the speaker volume so that the sound is about the same.
It doesn't always happen that Door installed correctly. Sometimes minor malfunctions appear, which usually result from poor-quality door installation. And even new, well-installed doors sometimes need to be adjusted. Consider the process of adjusting plastic doors, including balcony doors. Door fittings different manufacturers may differ slightly from each other. But all plastic doors are generally regulated in the same way.

The need to install a column can arise for many reasons. However, each owner of the device is faced with a typical problem: incorrect setting of the geyser at the connection stage leads to incorrect operation. As a result, the expected results are not justified, and further use of the device leads to malfunctions. Appliance manufacturers are trying to get around this problem by providing a system auto tuning. The obvious decision had no effect: not every buyer is ready to overpay for complex technique with an incomprehensible principle of operation. Many people prefer to spend some time learning how to set up a geyser on their own.
Adjusting the gas column does not take much time, but requires a careful approach and attention. A painstaking process can cause a lot of questions in an unprepared person. Before you adjust the household appliance, you need to shut off the flow of water to a minimum, because it is precisely such indicators that are provided for in the instruction manual. Neglect of these requirements leads to the fact that all subsequent settings will not be accepted by the system or will lead to a far from the expected result.
In most cases required flow equates to eight, ten or twelve liters, but there are some deviations, both upward and downward.
It is important to consider that it is possible to adjust the geyser to exact values \u200b\u200bonly when using one mixer with hot water.
After completing the described procedure, turn off the supply valve and proceed to the next step. As for liquid, it is necessary to set minimum gas value. These settings are necessary to bring the water heater to the nominal values \u200b\u200bprescribed for it.
- connection of several wires;
- installation of batteries or consumable batteries used to ignite fuel.
New models can be equipped with sophisticated equipment with screens and sensors. Such a system independently performs all settings and does not require user intervention.
Starting the appliance and adjusting the temperature
Having prepared the equipment properly, you can carry out the first start. First of all, you need to open the hot water faucet, and examine it outlet temperature. The resulting indicators should exceed the input value by twenty-four to twenty-six degrees.
If the liquid heats up for too long, or the heating does not reach the required temperature at all - adjust the throttle, turning it to a satisfactory condition.
In some systems, the handle is replaced by a toggle switch, it also needs to be brought into a certain position to obtain the desired result.
You can achieve the same results with regulation of the volume of water supply. The higher the level, the colder the liquid, and vice versa. This is due to an elementary law of physics - the greater the water flow, the slower it heats up. When relying on this method, it must be taken into account that the temperature of the stagnant water may differ from the expected one, since the liquid will have time to warm up.
Subtleties of settings
When setting up a gas water heater, you need to remember that the liquid cannot reach a comfortable temperature instantly. Do not try to complete all the settings for a few minutes - it will take quite a long time. After each stage, you will have to start all over again, namely, drain the waste water, and let the fresh water warm up or cool down. In general, such manipulations can take up to half an hour, and sometimes longer. It will take much less time for an experienced professional.
When setting up equipment from different companies, for example, the Neva gas column, you may encounter two difficulties:
- fluid pressure;
- weak water pressure that does not cause a reaction of the device;
pressure problems
Pressure fluctuations can be triggered by a variety of conditions. Faced with this, there is no need to panic, the situation is easily solved by replacing a worn valve or purchasing a special pressure regulator. This malfunction can lead to serious damage and accelerate the wear of the equipment.
Replacing the membrane in the gas column
Bad pressure
To fix the problem, just replace leaky membrane. In general, this breakdown does not cause problems, but if the owner needs a lot of hot water, for example, to wash dishes, the column may not be able to handle the heating of a large stream.
Self-tuning of the heater can take a long time, and the result may not always be satisfactory. It is best to entrust this procedure to a professional.
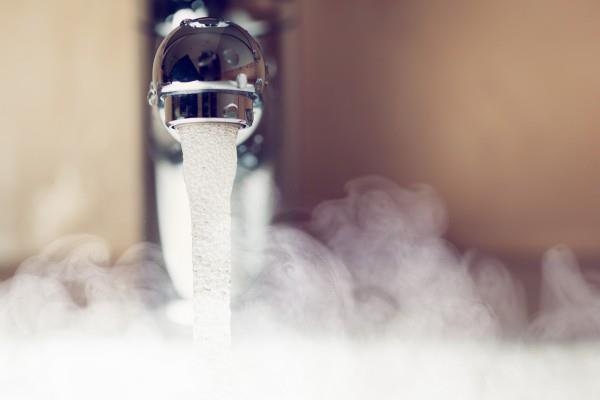
Those who have a gas water heater installed in their apartment will surely confirm that such a water heating system is very convenient. You do not depend on the work of the housing department or on another service company - there is always hot water in the apartment and it will not be turned off during preventive repairs. Another plus is that when installing the column, you yourself choose the required water temperature (20, 40 or 60 ° C), while there is no doubt that it will heat up to the required level.
It happens that with a central hot water supply, the water temperature does not correspond to the norm, that is, it flows warm, and not hot, respectively, its consumption increases. It turns out that heating water with a gas water heater is more profitable. The amount of payment for water for a geyser is less than the one that “runs up” on the meter for a centralized supply of hot water, because the tariff for it significantly exceeds the tariff for cold water.
All these arguments are proof that the choice and installation of a geyser is a practical solution. If you want to replace an outdated “Stalinist” column that has begun to leak, or decide to place such equipment in an apartment for the first time, this article will help you decide which technique is best suited. We will talk about the choice of modern gas water heaters that have become safer and more convenient.
When choosing and buying gas equipment it is very important to take it into account specifications. If, for example, the power of the equipment is less than required, the equipment may not withstand the loads and quickly fail, or many difficulties will arise during its installation. Therefore, we will tell you in order about what you need to pay attention to when choosing a water heater, so that later you will be satisfied with the result of its work.
Is automatic flame adjustment required?
Modern columns are equipped with a traditional or modulating burner. In the first case, the element always operates at the installed power. The temperature of the water may change if, for example, the pressure of the water flow decreases. You will need to manually increase or decrease the power. In columns with a modulating burner, this will not have to be done, because the adjustment takes place automatically. Special sensors control the water pressure, the pressure of the supply gas and, in accordance with these conditions, the power is adjusted. Thanks to this, the water temperature is always the same as the one set by the user. Undoubtedly, if you choose speakers with a modulating burner, such as, it will be much more convenient.
Performance
When choosing and buying a geyser, it is very important to pay attention to its performance. It will depend on this whether the equipment will be able to fully serve you. This value can be 6-11 l/min, 12 or 14 l/min, and it usually depends on the burner power, which is 11-19 kW, 22-24 kW or 28-30 kW, respectively. The more intense the flame, the greater the performance. To service one faucet, a column with a minimum power is enough, but if hot water is needed in the bathroom and in the kitchen and, perhaps, the second restroom in the house, you will need equipment that can heat at least 12 l / min.
Expert tip: It is best to choose a column with a capacity slightly larger than required. Running the column constantly at maximum power can cause rapid wear.
Heat exchanger material
Heat exchanger - essential element the design of the water heater, which is why you need to be careful when buying. It is most often made of copper. This material is durable, does not corrode, and therefore the equipment serves properly for a very long time. The weak side of copper is its intolerance to high temperatures. In this case, safety sensors are needed that prevent the element from overheating.
The heat exchanger can be steel. He is resistant to high temperatures, but the service life is short compared to copper, several years. Therefore, it is not surprising that columns with steel heat exchangers are cheaper and more tempting to choose from.
Control method
Adjustment of work is carried out in two ways: mechanical, as, for example, in the model of equipment, as well as electronic, as in.
In the first case, the water temperature is adjusted using a screw regulator, and in the second - through a keypad. Note that with electronic control, all set parameters are reflected on the LCD display, which is located on the front panel, which is very convenient for monitoring operation. In the event of a breakdown, a special code is displayed on the screen, the decoding of which is most often in the instructions. So, if a problem occurs, the master will fix it very quickly.
Source of power
As a rule, geysers are connected to the central gas pipeline. But, if you want to provide hot water Vacation home, when buying a water heater, you need to pay attention to whether it can be connected to bottled (liquefied) gas. In the catalog of the online store "VseInstrumenty.ru" are presented. This equipment is of domestic production - NEVA (and). High quality workmanship and affordable price are the factors due to which the products have won wide recognition from customers.
Protection system
It usually includes three main elements: 
- ionization flame control electrode, which is responsible for the supply / shutdown of fuel supply when the burner is attenuated;
- draft sensor that blocks operation if there is no normal draft in the chimney;
- a hot water heating sensor that turns off the column if the water temperature reaches the maximum mark, which is dangerous for the heat exchanger to burn out.
These are the main elements of speaker protection, but there may also be additional ones, for example, safety valve through which excess water is removed when the pressure in the system is exceeded, which is necessary to avoid malfunctions; a sensor that prevents the column from turning on if the water pressure in the system is critically low, and others.
Note that many new generation speakers can function properly even with low water pressure in the system. For example, geysers from and work properly even at a pressure of 0.1 or 0.2 bar. Do not hesitate, even if there is a slight pressure in the tap, the burner will work and the water will heat up.
Water heater protection system ensures safe use. Fears about a gas leak that could poison people, or an explosion of a column when the water is turned off prematurely, are a thing of the past.
Now you know what modern gas water heaters differ from the speakers that can still be seen in the Khrushchev apartments. After getting acquainted with the main characteristics, you will have less doubts about choosing a column. If you still have questions, you can contact our managers by phone 8-800-555-83-28. We work to ensure that your purchase of a water heater is really pleasant and useful.