
How to raise the floors in the apartment. Different laminate in different rooms
Floor refurbishment can include a range of work, including leveling and exterior finishing. Sometimes the question arises of raising the level of the floor in the apartment. How to do all the work correctly and not make mistakes, this article will tell.

Usually, during repairs in an apartment or house - especially an old layout, where the ceilings are quite low - they try to make the floors rise slightly during leveling. But in certain situations the level of the floor may still need some increase.
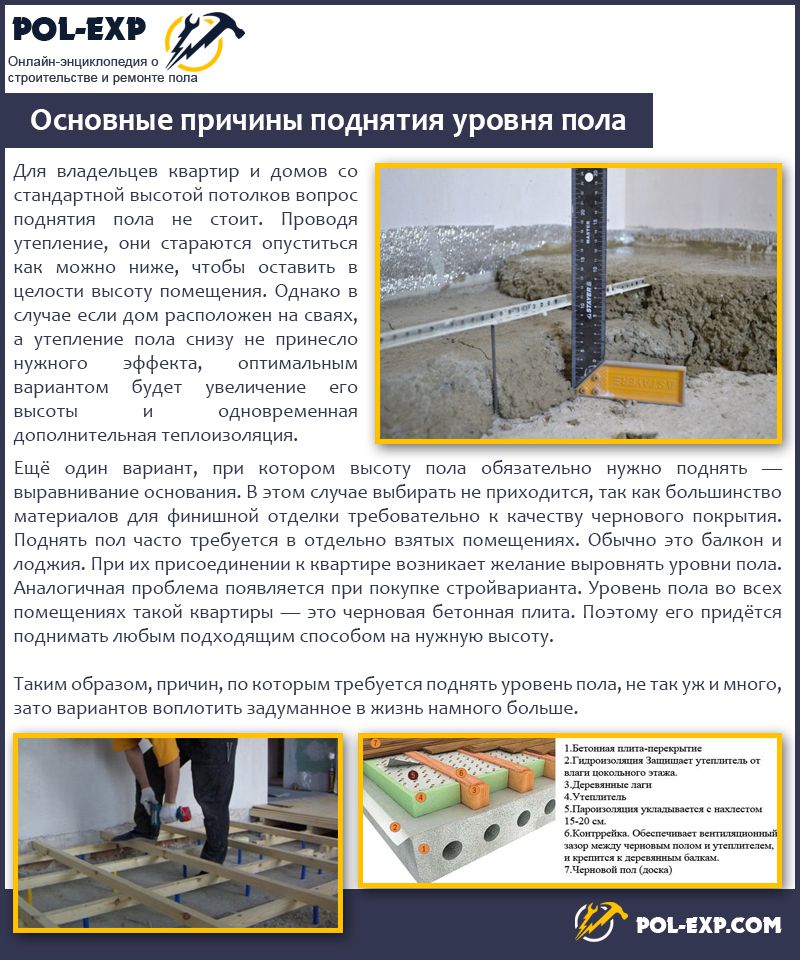
Quite often, the procedure for raising the floor is associated with redevelopment of the premises. For example, the floor can rise to the loggia, in order to then remove part of the wall and increase the space of the room. Also, sometimes it is required to level the floors in the entire apartment and make them on the same level, and here, too, most likely, you will have to raise the base a little in some room.
In neighboring rooms, the floors can have different heights, while they can differ both significantly and only by a few millimeters. It depends on the house itself and the type of room layout.

In a private house, raising the floor level may be necessary to lay an additional layer of thermal insulation if the previously laid one is not enough. To do this, you need to raise the base by a few cm (about 10) in order to lay insulating material into the void.
In general, the procedure for raising the floor requires certain knowledge and considerable financial and labor costs. At the same time, work is not carried out immediately in all rooms, if the front of work is supposed to be in the entire living space. Raising the floor level is carried out in each room separately according to individually made calculations.
Important! Before you decide how the floor will be raised, you should make calculations and find out what kind of load the floors can withstand without damage to themselves and not be damaged.

All calculations are made taking into account the already made choice of finishing coating, since it is on its mass that the decision on how the floor will be raised will largely depend. Moreover, if different types of coverage are laid in different rooms, then calculations are made individually for each of them.
On a note! The load on the floors may not be calculated if the apartment is on the ground floor, and there is no basement under it. If there is a basement, then you will have to calculate the load.

When calculating materials and allowable load, it can be assumed that the floor slab in a concrete house is able to withstand a load of about 400 kg / m 2. And the density of reinforced concrete is on average about 2700 kg / m 3.
Ways to raise the floor
There are 4 main methods for raising the floor. In general, they are all called screeds. Let's look at them in the table below.
Table. Floor raising methods.
| Way | Short description |
|---|---|
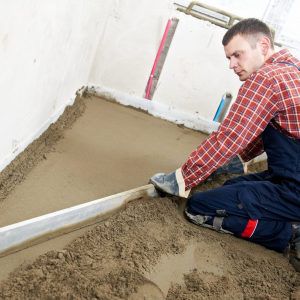
| This is the most popular and familiar method for many. And the most durable even with intensive use. However, many builders do not like to use this method due to the long drying time. The cement-sand screed itself can be laid quickly, but it dries after that for about a month. And other work during this period can not be carried out in any case, otherwise all the work will go down the drain. Correcting the mistakes made will be very difficult. Also cement-sand screed- a rather difficult way to level the floor, and it gives a colossal load on the floors, which requires careful calculation and taking into account the amount of materials and the allowable height of the screed. |
| This is a special type of screed, which is carried out using special self-spreading mortars. It is usually used for additional leveling of the floor and if it is necessary to raise the level slightly. The type of mixture for pouring floors is selected depending on the conditions in which the floor will be used - a wet or dry room, in a heated or unheated room, etc. One of the main advantages of this method to raise the level of the floor is the high drying speed of the filled layer. However, it is important to remember that self-leveling floors are very demanding on the condition of the base - it must be well cleaned of debris and leveled. Yes, and such mixtures are not cheap, but they require a lot of attention during the pouring process. |
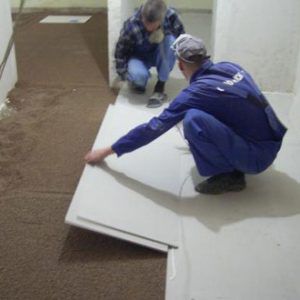
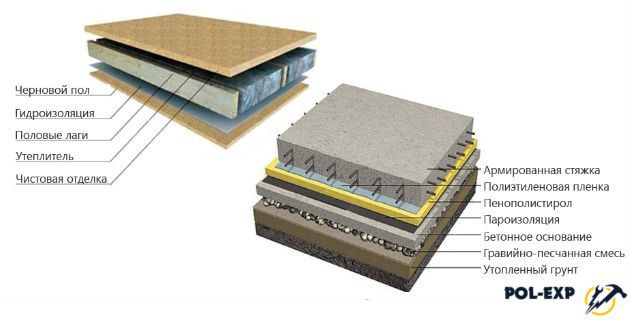
| To raise the level of the floor, you can make floors from gypsum fiber - this is the so-called dry screed. GVL slabs are laid on a leveled expanded clay bed. In this case, installation is fast, a large amount of dirt is not formed in the process, work on the design of the floors can be continued almost immediately after laying the slabs, and this method of raising the floor significantly increases the heat and sound insulation of the base. But GVL floors also have disadvantages - this is hydrophobia, and in the event of a significant increase in the level of the floor, you will have to use a lot of expanded clay bedding, and over time, because of this, the floors can sag. |
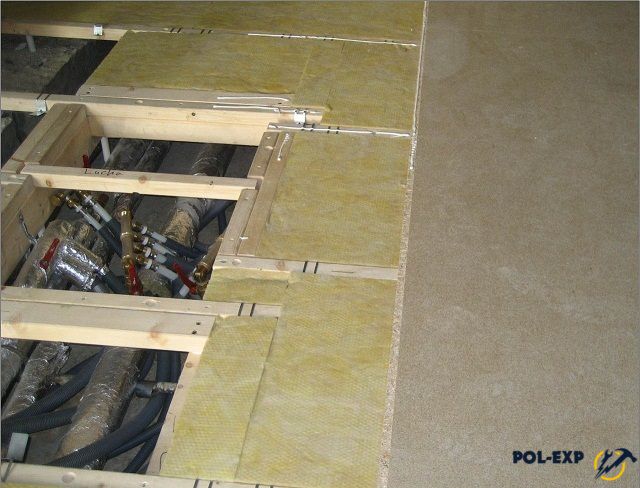
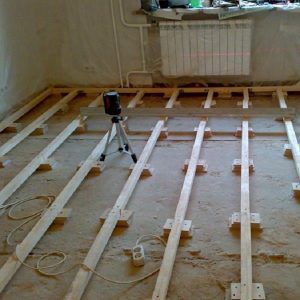
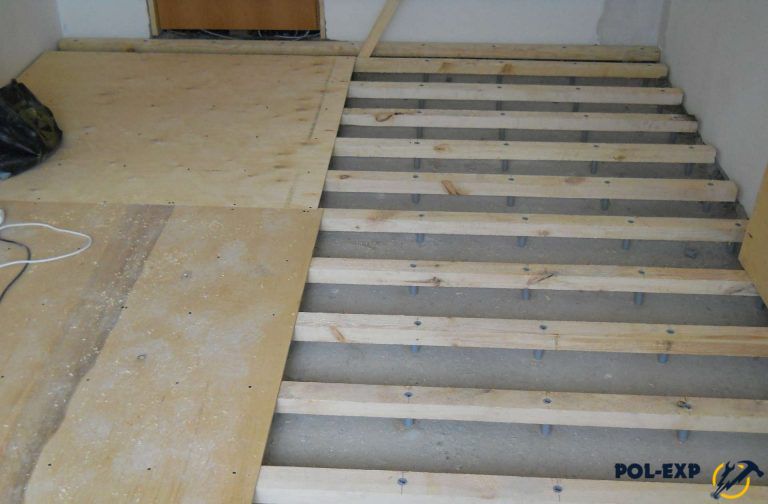
| This method, like the cement-sand screed, is considered one of the most popular and traditional. It has been especially used in recent times both for arranging floors in private houses and apartments. It allows you to raise the floor by a certain amount with particular precision and is ideal for laying laminate and parquet. The work is carried out quite quickly, after their completion, laying the finish coating can be started immediately. The level of the floor by this method can be raised to 15 cm or more, while the floor will not experience significant load. In the voids left between the lags, you can place various communications or make additional floor insulation. But the lag system also has its drawbacks - if the work is done incorrectly, the floors may begin to creak or sag. |

How to raise the floor in a wooden house
AT wooden house floors can be raised in any of the above ways - there is no need to worry about the load on the floors, since they are not here. The best options are wooden logs or cement screed. And it’s worth choosing depending on which method the owner of the house likes more.
Important! When installing the floor in a wooden house, do not forget about high-quality insulation, as well as the mandatory waterproofing of the floors. Otherwise, the floors will quickly become unusable.

If in a private house it is necessary to raise the floors to a considerable height, then you can combine and cement screed, and lags. First done concrete base, on which a wooden structure is then installed.
How to raise the level of the floor in the apartment?
In an apartment, raising the floor is done in different ways, depending on where the work will be done. Kitchen, bedroom, bathroom or loggia - everywhere the floor level will rise in its own way.
The following principles should be followed: if the floors rise to a level of up to 8 cm, then the easiest way to make a screed is by the wet method, that is, using a cement-sand mixture. In some cases, the ceiling can be additionally covered with expanded clay mixture. If the apartment is located above the first floor, then you can do without additional insulation.
On a note! An ordinary screed by itself will give a rise in height in the room up to 5 cm, even without laying insulation or logs.
If it is planned to create a multi-level screed in the rooms, that is, a floor of a certain height will be made in each room, then calculations are made for each of them separately. Here it is optimal to use the method with lags, because it is most convenient for such a design to change the height.
Raising the floor in the bathroom or kitchen
The kitchen and bathroom are rooms where the humidity is quite high. Therefore, to raise the level of floors, it is not recommended to use structures made of wood or drywall. The best option is a cement-sand screed or self-leveling floors.
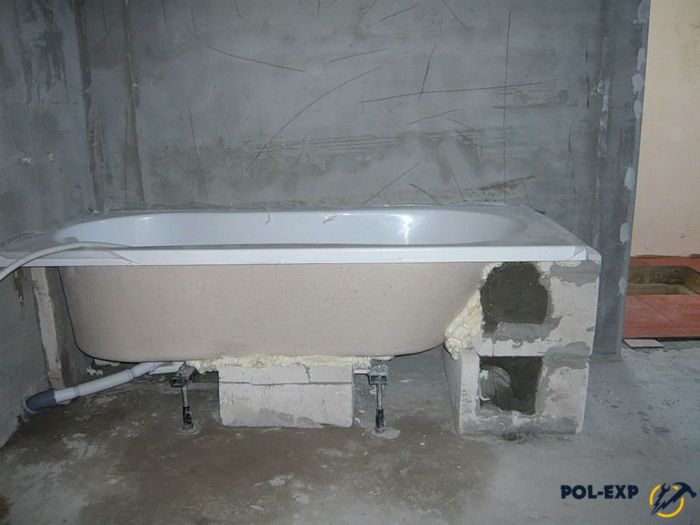
A layer of waterproofing materials is necessarily laid. It can be roofing material, polyethylene film. It is also worth remembering that the level of the floor in the bathroom or toilet should not be exactly the same as in other rooms. The fact is that it is in these rooms that floods usually occur due to the presence of water pipes. And if the floor level here is the same as in other rooms, then when the apartment is flooded, water will also enter other rooms. A small threshold or drop will allow water to remain in the tub.

Important! If pipes are replaced, then all communications change until the screed is poured. Otherwise, a number of additional work will have to be done to create holes in the floor for laying pipes.
Raising the floor on the loggia or balcony
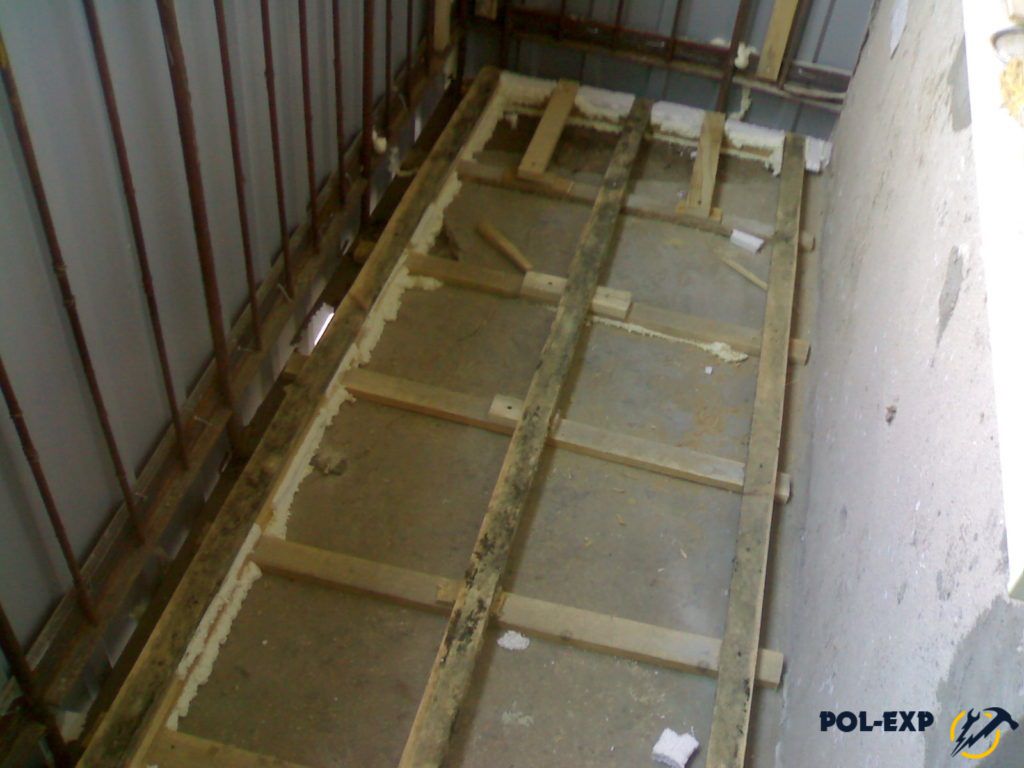
The floor level on a loggia or balcony during construction is often lower than in other rooms. However, it is often raised in order not to stumble over the resulting threshold. Also, raising the floor level on the balcony and loggia is carried out if this part of the housing is planned to be combined with the room in which it is located.
When raising the floor level on the balcony, you should take care of waterproofing. To do this, the base can be treated with bituminous mastic or covered with a film.
Raising the level of the floor in the rooms
In rooms, it is worth choosing the method of raising the floors according to your own preferences, the power of the floors and the properties of the selected finish. Since the area in residential premises is usually larger than in a bathroom or bathroom, then the mass of cement screed here will be significant. Thus, in rooms for raising the floor, it is easier to use a log system made of wood.
In general, the floor level usually rises to a maximum of 10 cm, and according to average indicators - only 2-3 cm. If the floors need to be raised as much as possible, it is also recommended to use the lag system. The voids between them can be filled with insulation or other materials so as not to "move through the air." It is optimal to use mineral wool, foam plastic as a filler.
So, the following aspects influence the decision on choosing a way to raise the level.
- Repair budget. Some materials are more expensive, others are cheaper, and you need to correctly calculate everything. possible options and choose the best one.
- Rationality of the work carried out. It is not always necessary to choose a complex and time-consuming option, sometimes the simplest one is enough - it will be enough to raise the floors without effort and at minimal cost.
- Labor input. It is always worthwhile to adequately assess your time and effort, which will have to be applied to perform certain works.
Floor leveling technology
Let's get acquainted with the technology of raising the floor using a cement-sand screed.
The floors in the room where the work will be carried out are thoroughly cleaned of debris and leveled as much as possible. After that, using the building level, markings are applied to the wall, marking the level of laying the expanded clay mixture. Using a tape measure, the height is measured from the rough base to the marked line. This is necessary to calculate the amount of the mixture.

The area of the room is calculated. The required amount of material is purchased - expanded clay and sand concrete mix M 300, as well as a reinforcing mesh with a section of 6x6 cm.

Sand concrete - dry mix
Floor screed mortar ingredient calculator
The choice of materials for finishing an apartment is perhaps one of the most difficult stages during a renovation. It is necessary to choose decor elements so that they correspond to the desires, possibilities and interior.
In this article, we will try to deal with the laminate, which should harmoniously fit into the interior, emphasizing all the advantages of each room in the apartment. How different laminate looks in different rooms can be seen in the photo.
There are basic principles for choosing a floor covering, which is selected based on the following parameters:
- quality indicators of the material;
- decorative properties.
When choosing, you should pay attention to the following quality indicators:
- material class, which is an indicator of wear resistance;
- method of connecting individual elements of the coating;
- manufacturer;
- moisture resistance.
It must be remembered that to finish the apartment, you need to purchase a laminate of class 32 or 33, which will last more than 8 years, while maintaining its original appearance. Models below class 32 have a shorter service life.

The locking mechanism of the connection will become ideal option for residential premises: nursery, bedroom, hall. But in the kitchen it is advisable to buy a coating with adhesive joints.
![]()
Buying flooring from well-known manufacturers, you can be sure of the quality of the goods and compliance with all specified parameters.
When buying laminated boards for a bathroom or bathroom, you should definitely clarify the degree of moisture resistance of the material.
How to choose a laminate

The different color of the laminate in the rooms, properly selected, will emphasize the purpose of each room and enliven the interior of the apartment as a whole.
- In a sunny room, it is better not to use a wenge, walnut, rosewood coating. On a dark floor with good side lighting, dust and small debris are very noticeable. Constant cleaning of the floor or untidy appearance of the room - such a choice awaits those who do not follow this advice.
- It seems to many that a dark hallway can be made lighter and visually larger if it is finished with wallpaper and a laminate of the same tone. Walls and floors that have merged with each other are ugly. So, if the flooring is light (oak, birch, beech), then the wallpaper should be a few shades darker.
- Use in a small apartment laminate different color visually make it small.
- It is necessary to take into account the color of interior doors. They should be slightly darker than the floor, but combined with it in texture and color. For example, a walnut laminate also suggests walnut doors, but in a darker tone.
- A room with light walls and furniture in the presence of light flooring may seem sterile and uncomfortable.
- Material combination is an important aspect for flooring. Laminate looks great next to carpet or ceramic tiles. But next to the parquet it is better not to lay it.
- Light and dark floors will require frequent cleaning.
- It must be remembered that the laminate flooring lasts for a long time, and if you suddenly have a desire to change the style of the room, then it is unlikely that this can be done without replacing the floor.
- The right skirting board completes the space and unites the individual elements of the interior with each other. Skirting board color options:
- laminate and plinth have the same tone;
- the door and the plinth are made in the same color, contrasting floor;
- furniture and plinth in one color, contrasting floor and doors.
The most advantageous option is the first one.

In general, the basic principle of choosing a laminate is the same as everywhere else - everything in moderation! Based on what mood it is desirable to give to each room, and taking into account the recommendations of experts, feel free to choose a floor covering. Having difficulty with a large range of material? Opt for laminate under a door or furniture, already knowing that the flooring needs to be slightly lighter.
A photo

Hello. I have a 4-room Khrushchev apartment with wooden floors. Can you please tell me if I can gradually raise the floors, first in one room, then in another? Will there be drops?
Answer: Differences can be avoided if you use a simple water level for these purposes and not an expensive laser level.
It is the water level that is used if it is necessary to transfer marks horizontally over considerable distances - within one or more rooms or even apartments.
What is such a flexible level, these are two glass tubes with gradation, which are connected by a transparent hose, or you can use a non-transparent one, only then you need to monitor the amount of water in the hose. Having a transparent tubing, you may not need it, the main thing is to achieve the same water level with one 0 mark available.
So, back to the level with the tubes, before work, you need to remove the technological plugs from the tubes and fill the hose with water, you need to make sure that the water completely fills the hose and there are no air bubbles inside the hose, otherwise the measurements will be inaccurate.
Figure 1. Water level: 1 - plugs; 2 - sighting tubes; 3 - rubber hose
If everything is done correctly, you can get to work. The principle by which the water level works is based on the law of communicating vessels, so in the vertically arranged tubes of our level, the water will be at the same level, no matter how far the tubes are from one another. So, taking for "0" some kind of mark in one room (room), you can get the same marks in each room of interest to us. Here is a way out of your situation, in this way you can absolutely evenly lay out (fill in) the floors in all your rooms (rooms) in any order or immediately in all.
How it works. We choose a mark on the wall (Fig. 2) that is convenient for you, 1-1.5 meters from the level of the subfloor (without boards already), since it is inconvenient to work near the floor itself and take it as the “0” point. It is necessary to work with a flexible water level with an assistant, he attaches the tube with marks (A) to the selected “0” mark, and you attach the second tube (B) to the place on the wall where you need to get the next zero mark (technological plugs were removed from the tubes).
The water level in tube A must be aligned with the "0" mark, and the water level established in tube B will show you the next point "0". On each wall, you can select 3-4 zero points in this way and then use a marking cord to beat off the line with chalk .
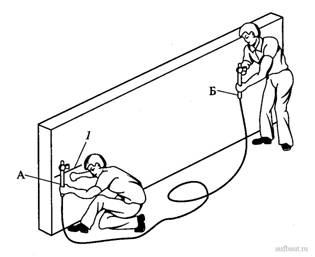
Figure 2. Transferring the mark with a water level: 1 - meter mark; A, B - tubes
Having thus marked the conditional “0” horizontal line with the help of the water level in all rooms where you plan to replace the floors, use a tape measure to set the same marks at the same distance from “0”, but already at the distance you have chosen, you also connect them using a marking cord.

That's all, and then it's a matter of technique, if you fill the floors, set up beacons, if again wooden floors, then set the logs with reference to this level, to the lower zero horizontal line. Video application to help you: