
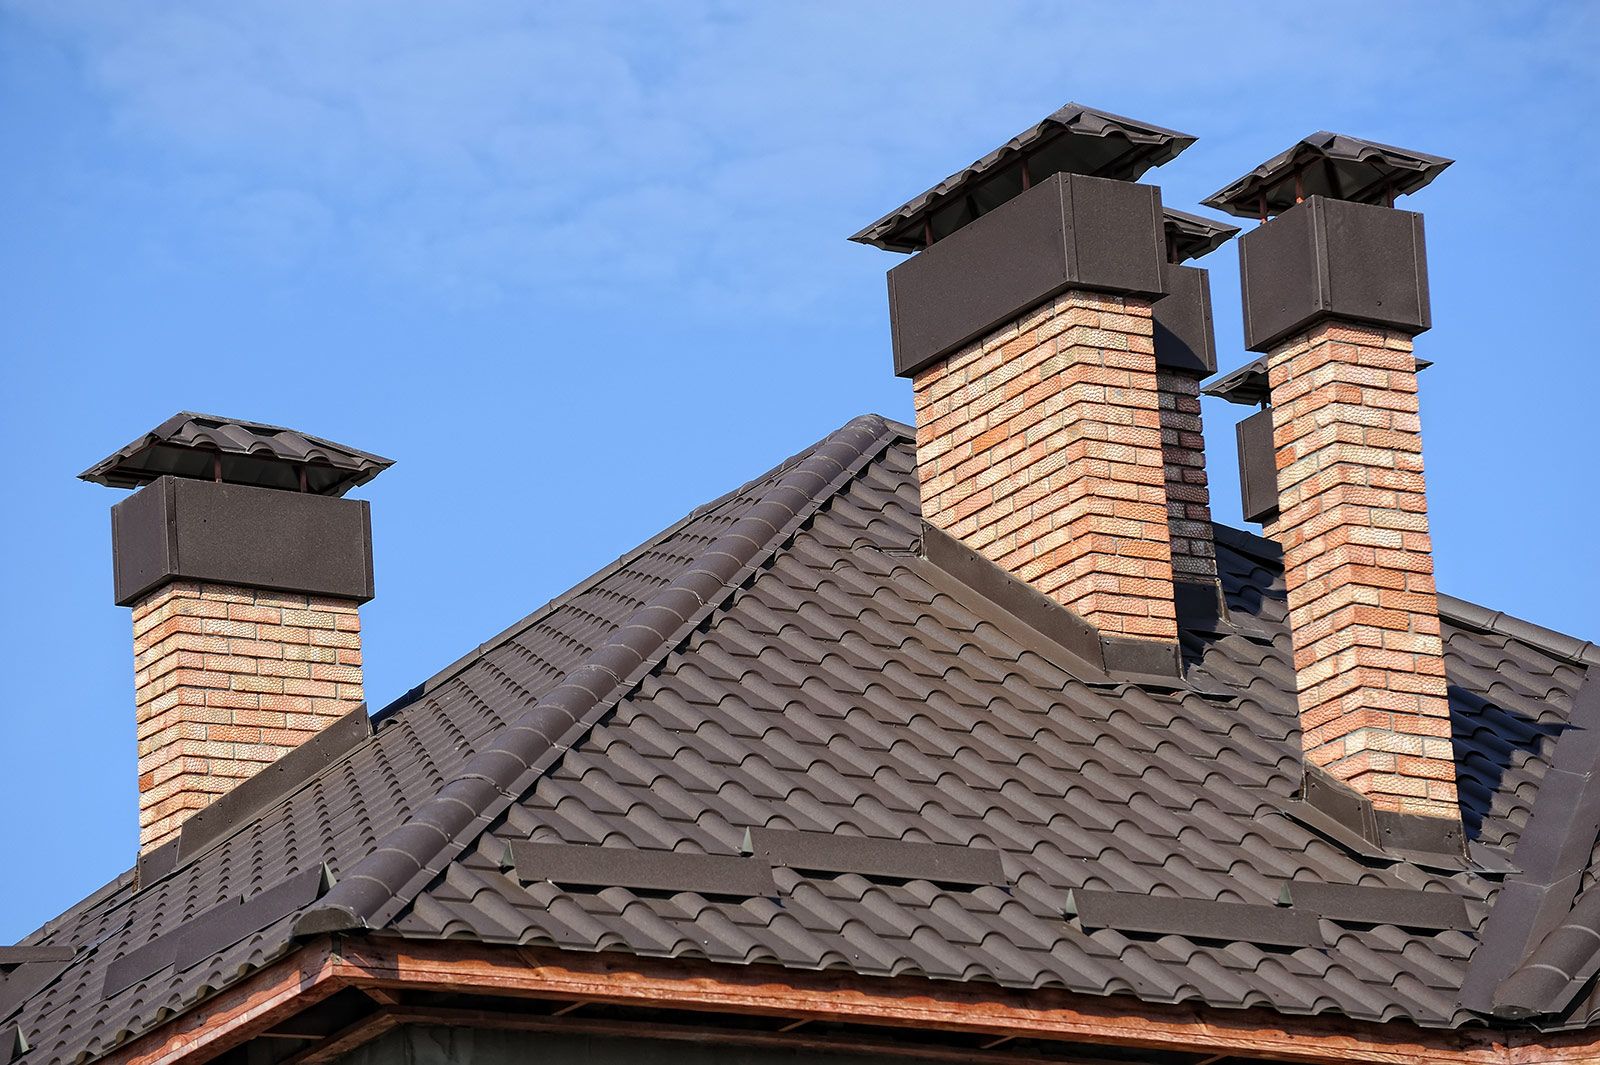
The passage of the pipe in the roof with your own hands. Conclusion of the chimney through the roof of different materials. How to put a pipe on the roof of the garage
Chimneys always go to the roof. If the junction of the soft roof to the chimney is not processed correctly, leaks begin here, and in the worst case, installation errors can lead to fire.
How should the chimney be laid to eliminate the possibility of leaks and fire?
Variants of a chimney in a soft roof
Soft roof can be flat and pitched. The pipe itself is metal, brick, ceramic, square or round.
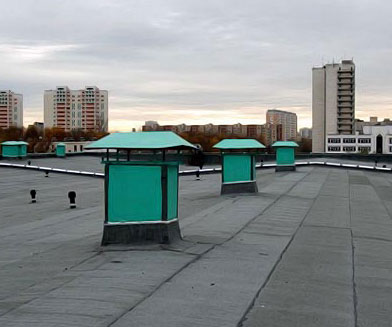
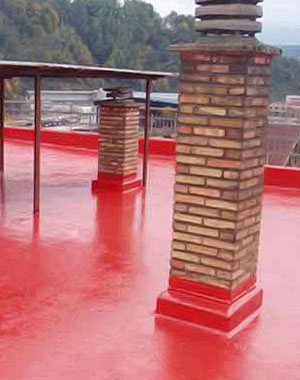
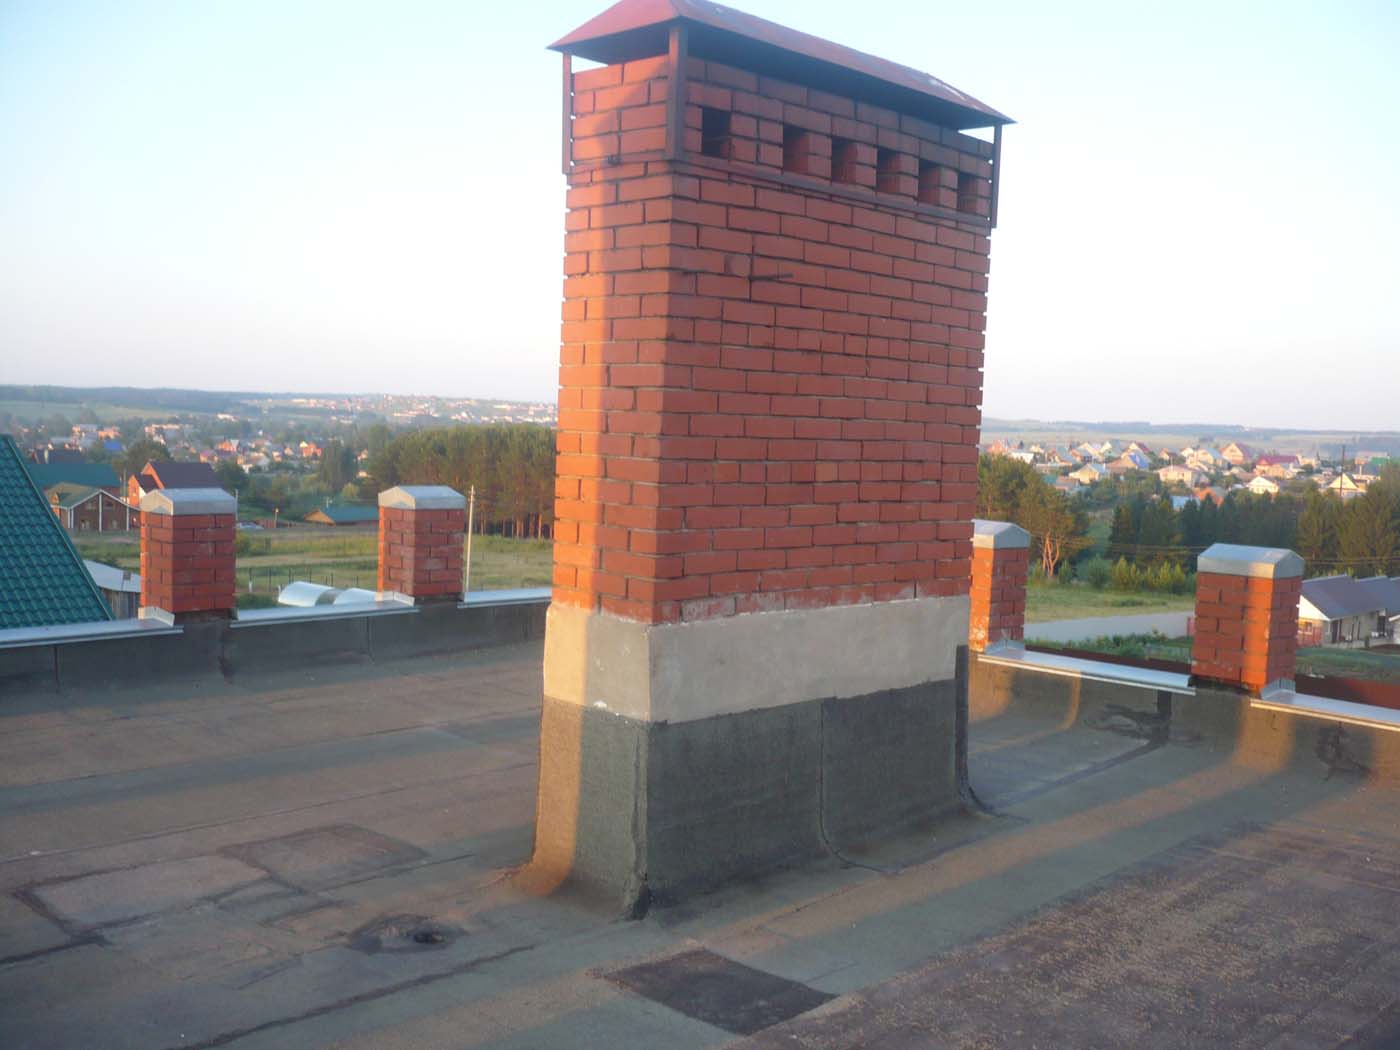
The passage of the chimney through the soft roof of a flat roof
The base is a concrete slab. We derive a rectangular chimney:
- Remove all layers of the cake to concrete in a rectangular area with dimensions equal to the cross section of the pipe + a margin of 15 cm.
- Install formwork around the perimeter.
- Make a 15 cm high concrete rim. Wait for setting.
- Get the roofing on the walls.
- Install a metal strip on the connection of the roofing material with the side, strengthen with dowels through the coating.
- Install an ebb with a dropper on the side.
If the pipe is brick, do not make a side:
1. Bring the material to the walls.
2. Put a metal apron on top.
3. They make a strobe one and a half centimeters deep in the wall (in a brick, not in a seam!), Lead the edge of the apron into it.
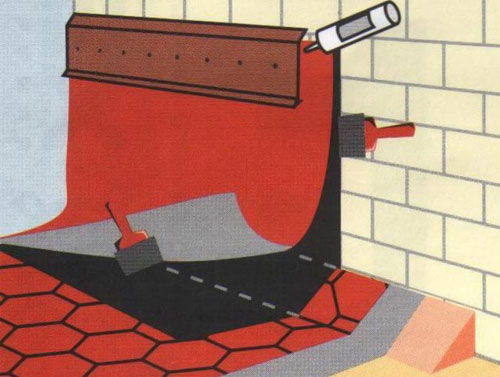
4. Fill with sealant.
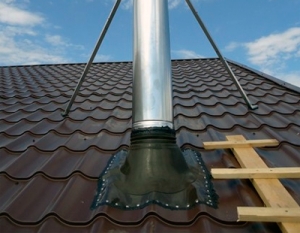
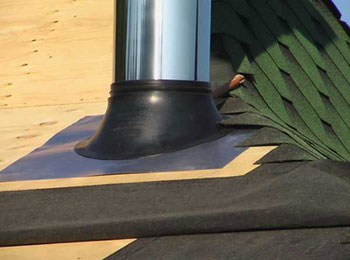
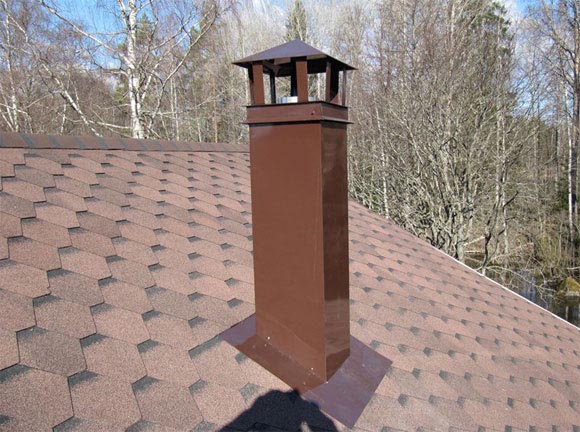
Connection to the chimney of a soft roof on a pitched roof
In this case, you must first install the flange, which will take on the load of the crate, because. in this area it is carved. For the manufacture of the flange, you can use a three-millimeter sheet of steel, to which stiffeners should be welded.
1. Release a strip of about four centimeters around the pipe.
2. Lay a basalt wool pad along the walls.
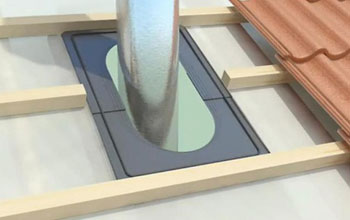
3. For sealing round pipes the material kit often includes a metal round flange with a rubber / silicone corrugation. If not, can be purchased separately. The flange is put on the pipe, coated with sealant and fixed with self-tapping screws to the crate.
note
There are different modifications of round flanges. Some need to be attached to the pipe with clamps. In other cases, the element is attached to the pipe and roof and fastened with screws. Sometimes an additional apron is installed: the upper element is placed with an overlap on the lower one without fixing to each other.The flange is selected according to the diameter of the chimney and the slope of the slope. There are adjustable models.
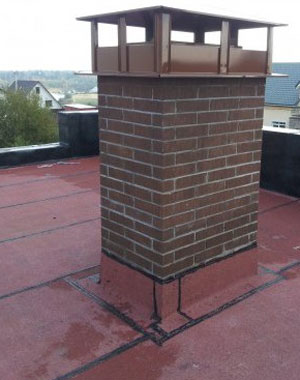
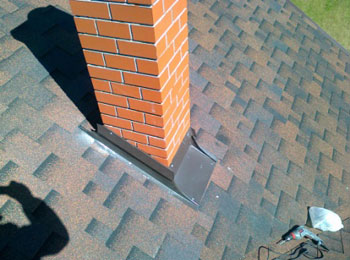
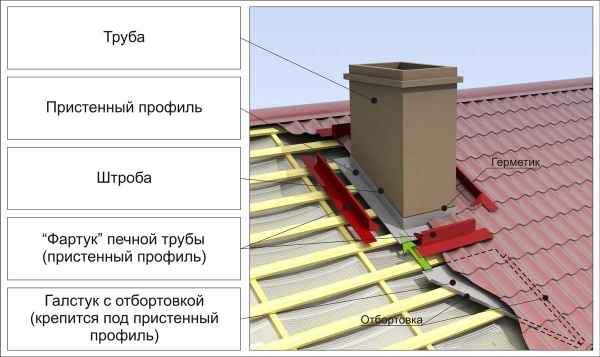
If the pipe is rectangular, a four-piece metal apron is used.
1. The upper bar is brought under the coating and fixed to the pipe.
2. The rest are placed on top of the coating.
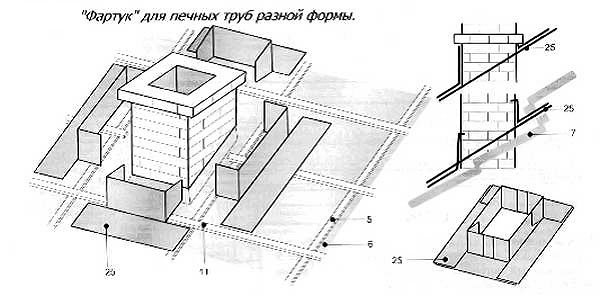
3. A tie is brought under the front bar - wide a metal sheet with sides.
4. Strobes are made on brick pipes, into which the upper cut of the apron is inserted. On the rest, the apron is placed on rubber seals.
5. The seams are filled with sealant.
Our work
How to cut a roof from a soft roof under a chimney
The passage through the roof structure also has its own nuances.
note
On pitched roofs, it is recommended to install the pipe closer to the ridge. The higher it is set, the better the traction. They don’t put it directly on the skate, because. removing part of the ridge beam will weaken the structure.The excess of the chimney over the ridge is half a meter. Do not put pipes close to valleys and skylights.
Procedure (for a round metal pipe):
1. Measure from the rafter a distance equal to the width of the chimney + half a meter, and install an additional rafter leg there.
2. Using a plumb line, project the rafter onto the attic floor. A plumb line is attached at the junction of the rafters with the ridge.
3. Measure from this point one and a half meters towards the slope. Project a new mark onto the rafter. This is where the axis of the chimney will pass.
4. Measure on the ceiling from the axis a distance equal to the radius of the chimney + 25 cm. Also project this point upward.
5. At the last mark, install a timber of the same section perpendicular to the rafter legs as that of the rafters.
6. In the same way, install another beam down the slope to get a rectangular frame - a chimney box.
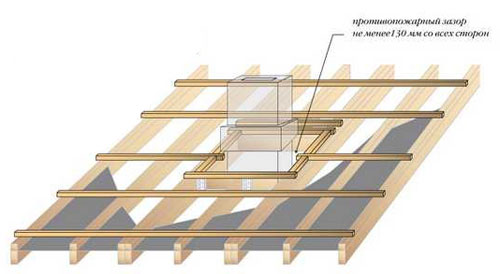
7. Drill four through holes in the corners of the frame. Using these holes from the side of the roof, outline the outline of the rectangle to be cut.
8. At the designated area, the roofing pie is dismantled: the insulation and the crate are removed, the roofing is turned outward, the vapor barrier is inward and attached to the box with a stapler.
9. Put the pipe, fix it to the box with clamps with legs.
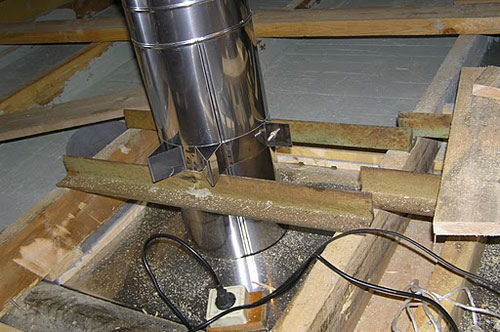
10. From the side of the attic, the box is covered with a sheet of metal or asbestos.
11. From the side of the roof, a non-combustible heat insulator is placed between the walls of the box and the chimney (expanded clay can be filled).
It is quite difficult to properly pass the pipe through the roof. Please contact us at STM-Stroy.
We employ professionals who know the subtleties of all the features of the installation of roofs and roof structures. We will perform for you the installation of the pipe and the adjoining of the soft roof to the chimney in quick lines, efficiently and inexpensively.
Metal roofing - reliable and durable protection houses from precipitation, wind and winter cold. The material is easy to use, has a fairly large selection of options - by manufacturer, color and type of metal. It is simple and quite accessible for independent implementation, but it requires taking into account some features of the material and preliminary familiarization with the rules for its installation and use.
In order to resolve this issue, the greatest attention must be paid the quality of the sealing of the pipe from the ridge side. It is recommended to equip the furnace passage as close as possible to the ridge, this will eliminate the possibility of accumulation of large masses of snow.
NOTE!
All elements of the pipe at the point of passage through the roof must be solid, without joints. All connections are made either before or after the pass.
To ensure fire safety, it is necessary to manufacture (or purchase if the pipe on the roof of the metal tile has a standard shape) special metal box, providing the necessary clearance and cut-off of the hot sections of the pipe from the material of the roofing pie and the truss system. The space between the box and the roof is filled with non-combustible material, glass wool or mineral wool. This will ensure the insulation of the passage section and will avoid the appearance of pockets of condensation.
metal roof chimney
So, how to bypass the pipe with a metal tile? We will talk about this further.
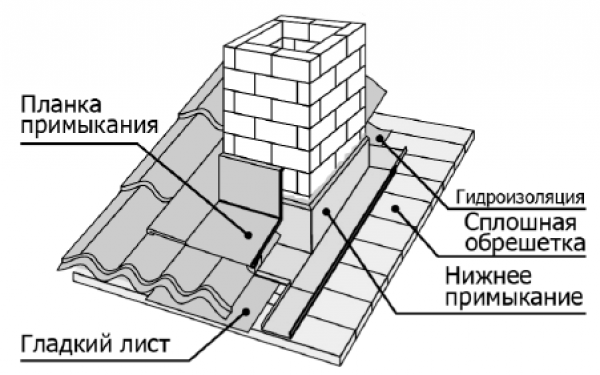
The passage of a square pipe through a metal tile
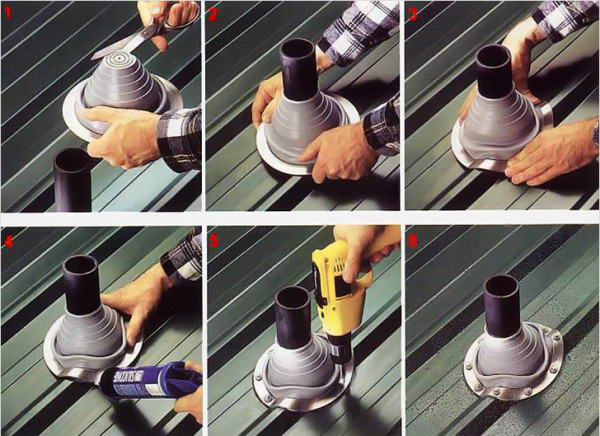
- The passage of the chimney through the roof of the metal tile begins with the installation of an internal apron. To do this, it is necessary to mark on the pipe the points of contact of the junction strips (elements of the inner apron), with the help of a grinder, pass a groove into which the upper edge of the strips will be inserted.
- Carry out the installation of junction strips. They are mounted on roofing screws with a step of no more than 25 cm.. Starting from the bottom side of the pipe, the strips are overlapped with an overlap of at least 15 cm. Joints and gaps (especially the girdle groove, where the edge of the abutment strips is inserted) are filled with sealant.
- A sheet of metal is installed under the bottom bar - bottom tie, providing water flow into a gutter or valley.
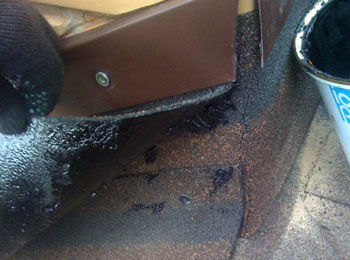
- An additional waterproofing shell of the inner part of the unit is equipped. You can do without it if all the work is done quite reliably, but in this case, additional insurance against leaks will not be superfluous. Its upper edge must overlap the cut of the adjoining strips by at least 5 cm.
- After that they start for the installation of metal roofing.
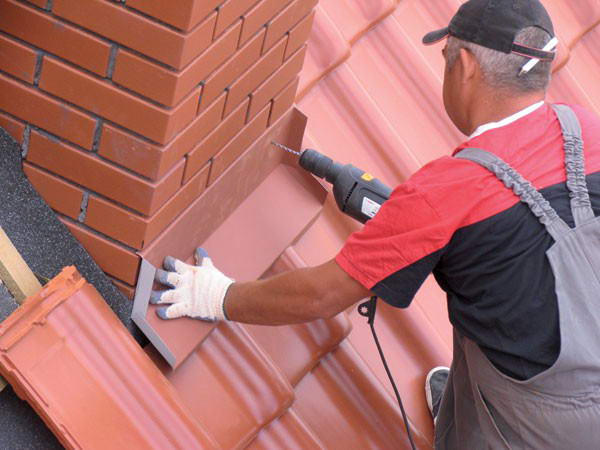
- On top of the finished roof, the exit point of the chimney through the metal tile must be surrounded by an upper apron. This will be the first layer of protection against rain or melt water. Fastening is made without grooving, therefore the joint of the pipe and the apron must be sealed.
junction with a metal tile pipe
CAREFULLY!
Install the apron carefully, avoid deformation of the metal and cracking (peeling) of the polymer layer. This will help to avoid corrosion of the elements and ensure maximum service life.
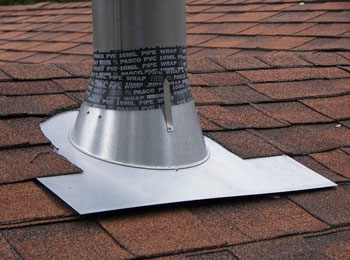
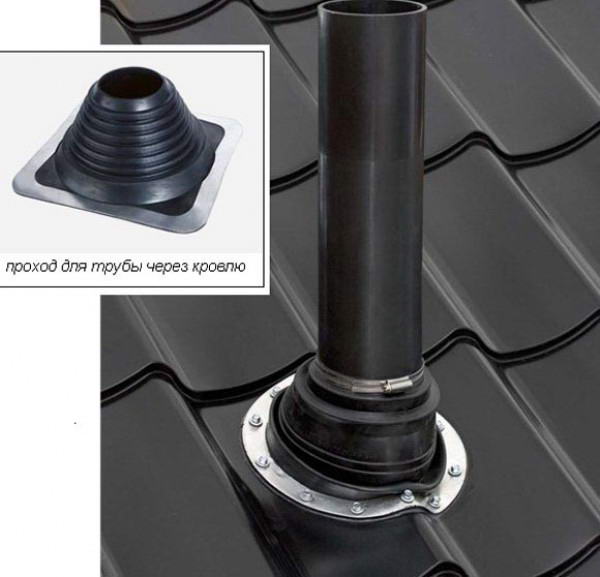
round chimney passage
If a round pipe is used, the best output option would be the use of roof penetrations of circular cross section.
They are made of rubber or thermosilicone, which ensures the elasticity of the material and the possibility of tight connection with any roof relief.
Mounted on top of an existing roof tightly stretched over the pipe and attached to the metal tile.
Thus, an elastic "cap" is obtained, tightly fitting the pipe and smoothly passing to the plane of the roof.
For reliability, the joints must be poured with sealant. Such a system reliably provides protection from rain, is not afraid of temperature changes and deformations.
The inside of the passage is filled with non-combustible insulation and covered with a sheet of metal.
round pipe installation
All places where the pipe adjoins the metal roofing must be insulated with silicone sealant. This applies to both the lower and upper aprons. Do not neglect the installation of an insulator layer between the aprons. After installing the top apron, it is necessary to carefully insulate all existing joints and connections of the elements.
Useful video
And now we invite you to watch a video on self-installation of the chimney:
Conclusion
In general, passage equipment chimney requires accuracy and a complete understanding of the essence of the operations performed. Failure to comply with the rules entails the formation of leaks and the destruction of the roofing pie, threatens with a fire. Compliance with the rules is the key to a long and reliable service of the roof.
The passage of the pipe through the roof is the most complex structural element with several problems associated with its construction. In this article, we will talk about the implementation of work on correct device passage, as well as how to pass the pipe through the roof while maintaining all the protective properties of the roof pie.
The node of the passage of the pipe through the roof is the object of controversy of various specialists. Thus, professionals in the field of work on the equipment of fireplaces and boiler rooms believe that the passage of the pipe through the roof should be located at the ridge. This allows you to protect the main part of the pipe from the effects of cold, which reduces the likelihood of condensation inside the pipe. Roofers, in turn, say that the passage assembly must be equipped directly through the ridge, as this makes it possible to simplify the work associated with the installation of the passage element. This method, among other things, eliminates the formation of snow deposits above the chimney. But everything is further complicated by the fact that the outlet of the pipe through the roof can also be arranged on slopes at a certain distance from the ridge.
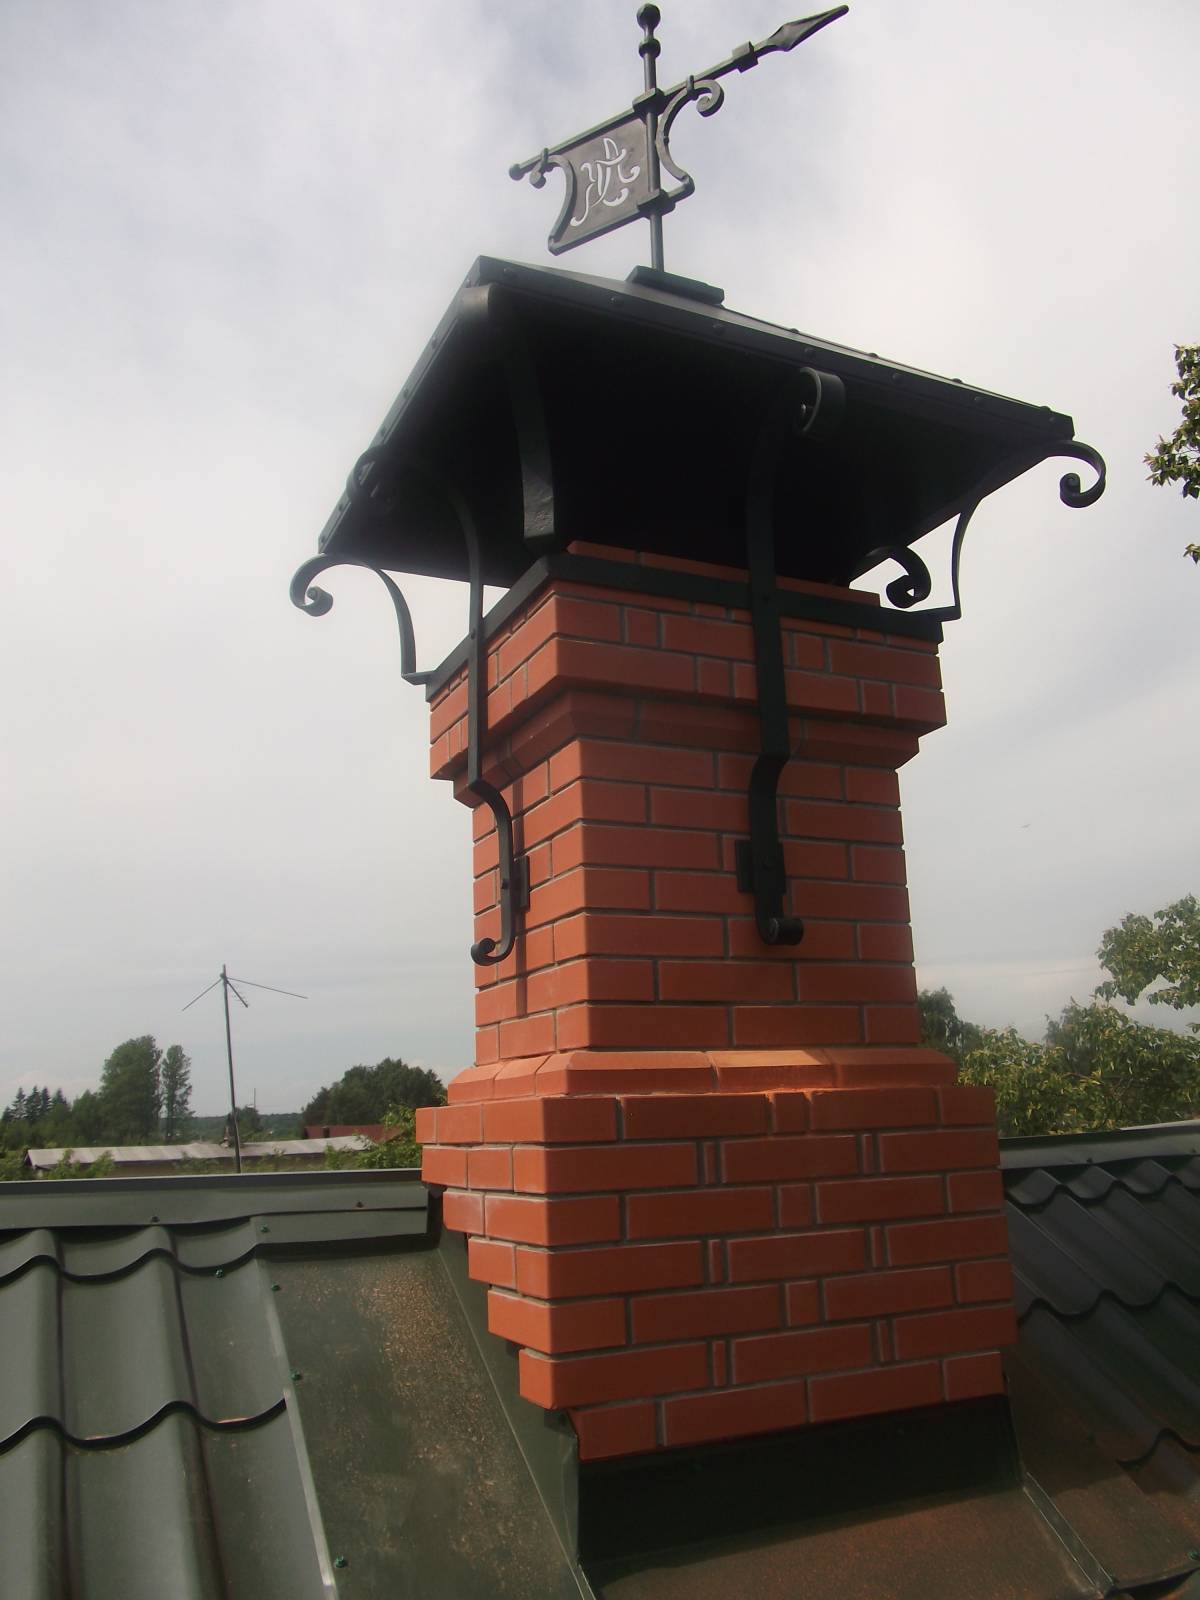
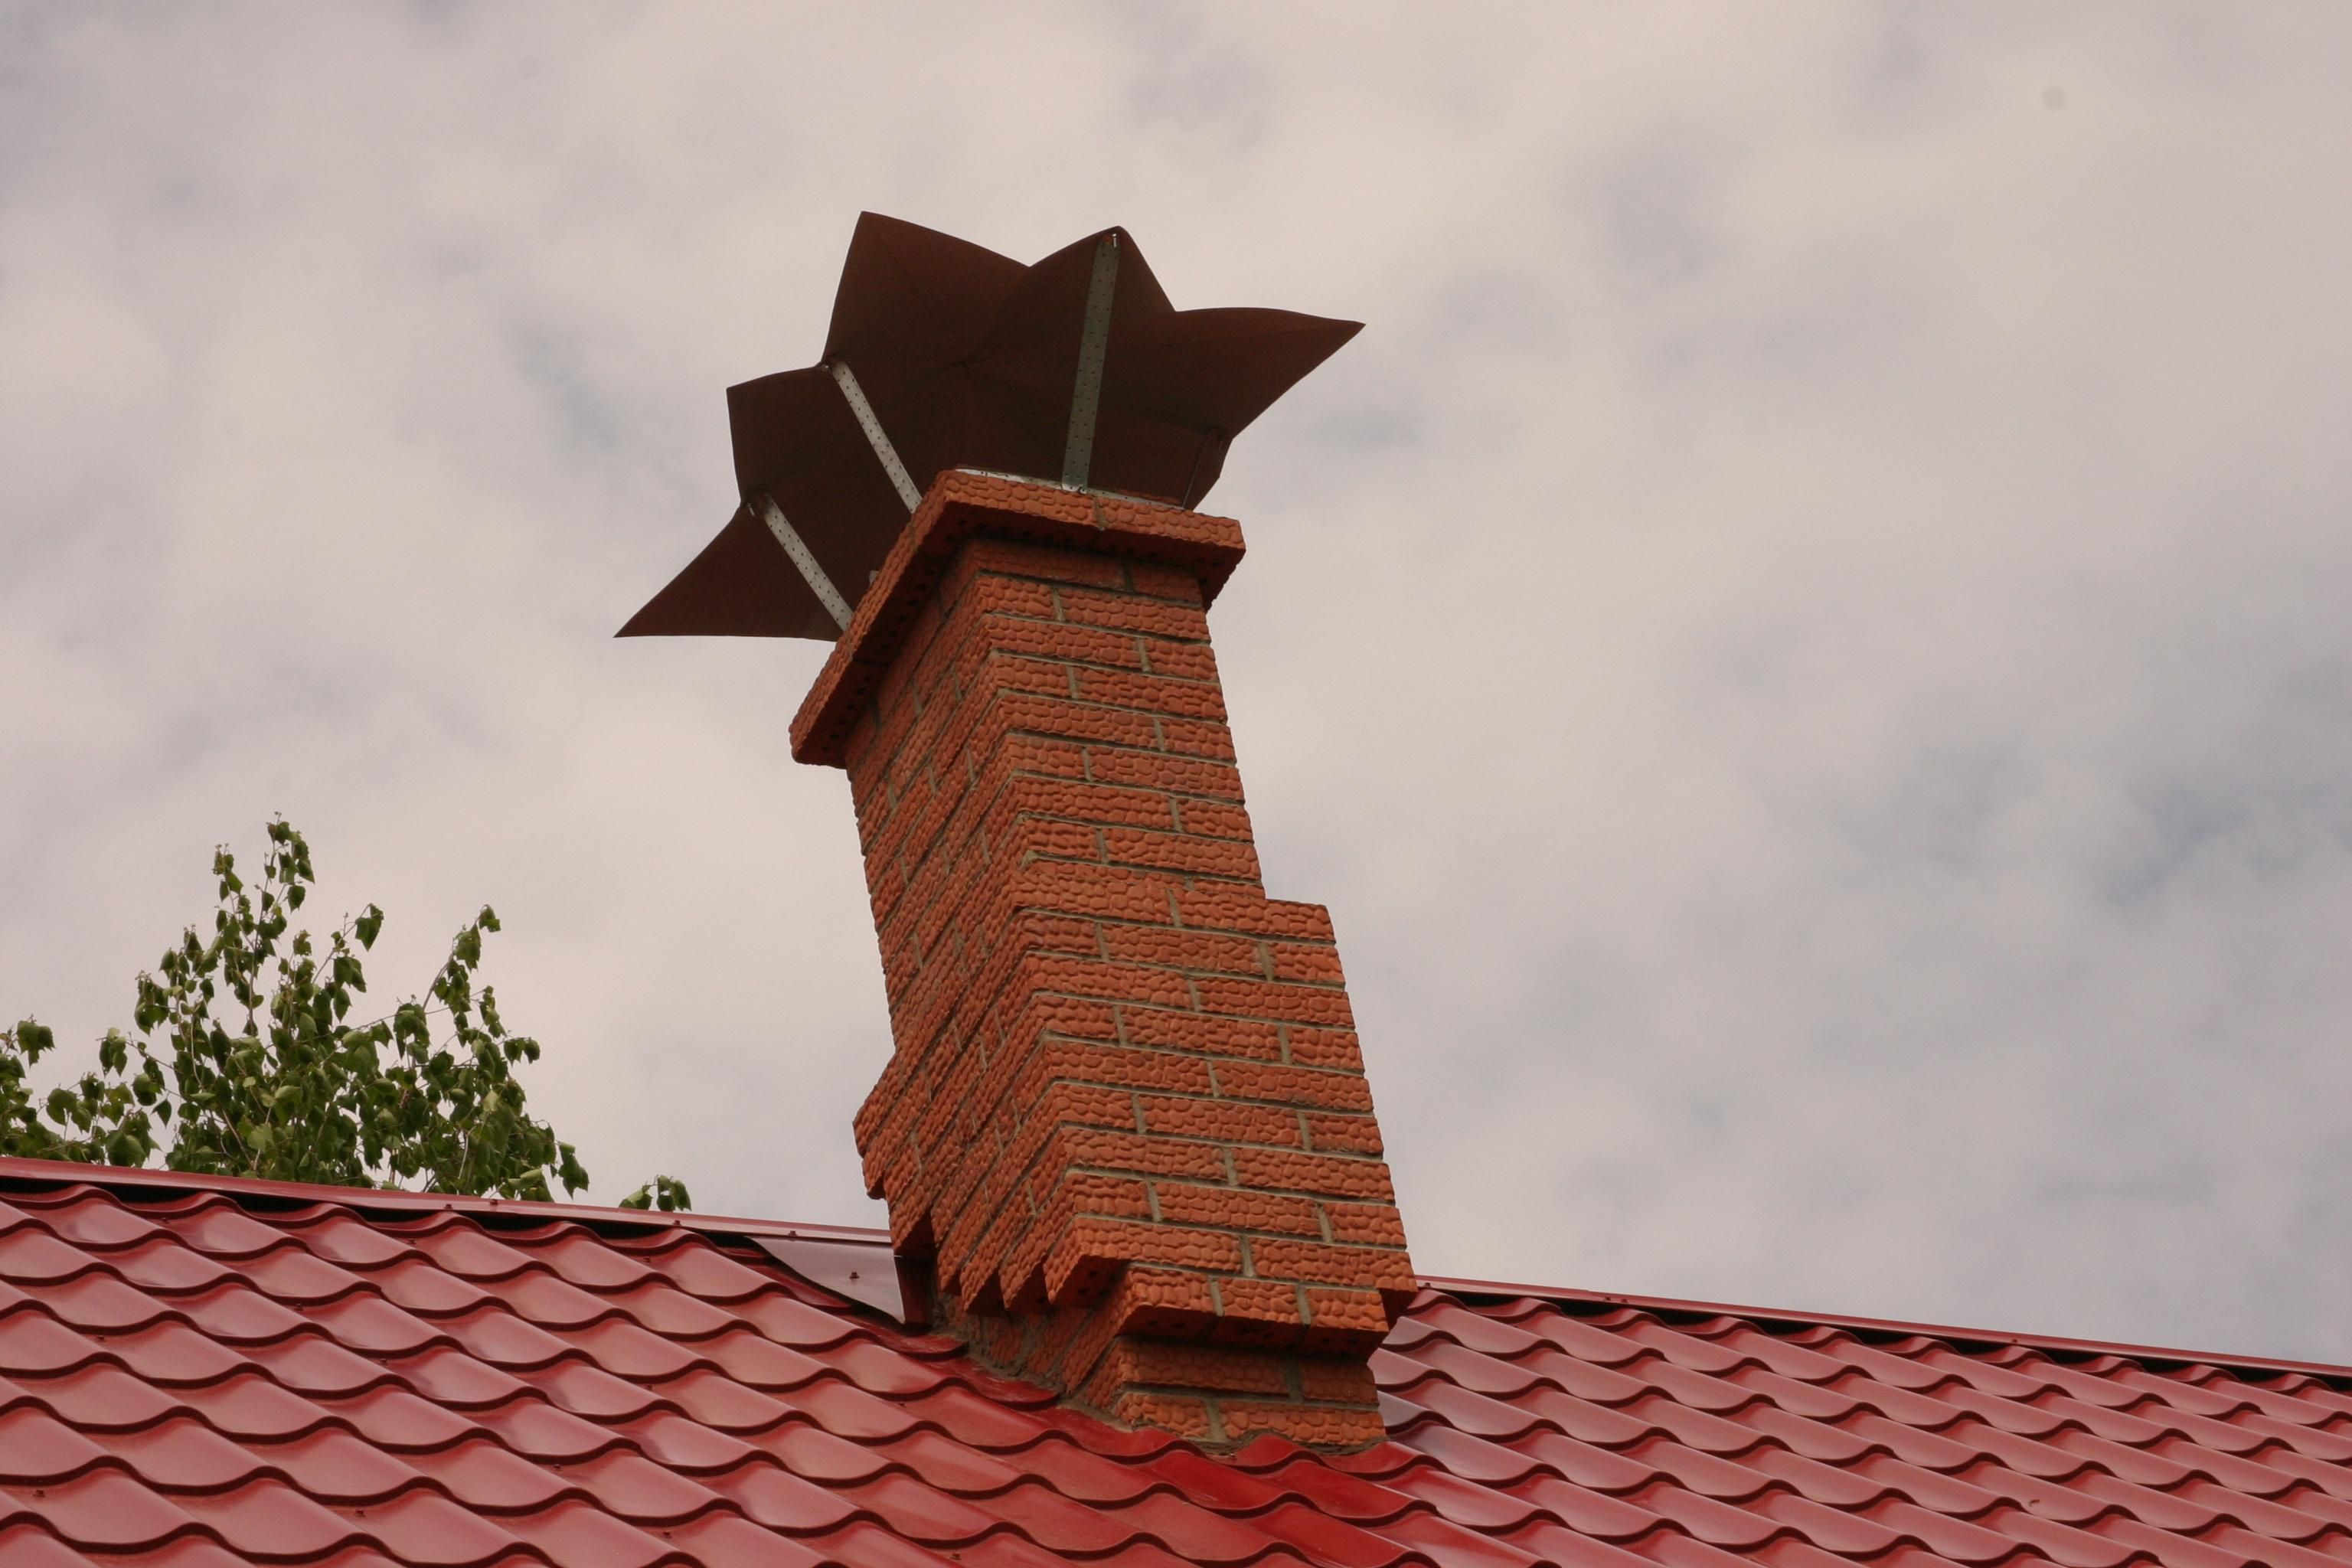
In order to protect the internal surfaces of the chimney from moisture getting there, its outlet is covered with a special umbrella. But if the chimney is connected to boiler equipment, then it is better not to install such a protective element, since due to the low temperature of the combustion products, they can accumulate under, which will create additional pressure in the pipe itself and ultimately reduce draft.
The most problematic place of this node is the passage of the pipe through the roof, since in this place it is necessary to take special measures to protect the roof and isolate it from high temperatures. In order to protect the "pie" of the roof from the chimney, use a separate box. At the same time, it is very important to adhere to the requirements of SNiP regarding the location of beams and rafters, and the interior of the box must be filled with non-combustible material. Well proven for these purposes, such material as stone wool.
The passage element can have a different shape depending on the section of the chimney itself and the roofing material used:
- oval;
- round;
- square;
- rectangular.
Removing the pipe through the roof
When equipping the passage of a pipe through the roof, care must be taken to ensure that two conditions are met:
- passages through the roofing pie must be fireproof;
- the under-roof space should be protected from moisture penetration as much as possible.

The conclusion of the chimney through the ridge allows you to carry out all the work quite simply. Due to the fact that the formation of snow pockets is impossible on the ridge, it is possible to achieve better protection against leaks. But at the same time, this installation method implies that the ridge beam will not have load-bearing functions in the design of the truss system. And this requires additional strengthening of the rafters themselves. In the presence of an attic, the installation of additional truss supports may be undesirable or simply impossible.
That is why developers prefer to install a chimney passage on a slope, directly at the ridge. In this place, a snow pocket also does not form, and besides, the truss system does not need additional reinforcement. But besides this, the location of the heating equipment also affects the choice of the place for the passage of the roof chimney. It should be remembered that the horizontal sections of the chimney should not have a length of more than 1 meter. In some cases, it is the location of the boiler that becomes the reason for choosing the method of passing the chimney through the ridge.
Professionals recommend avoiding the equipment of a passage element in the valley (the place where two slopes converge with an internal angle), since it is especially difficult to install at this point. As a result of rains and snowfalls, the junction may not be able to cope with moisture and as a result, the roof will leak.

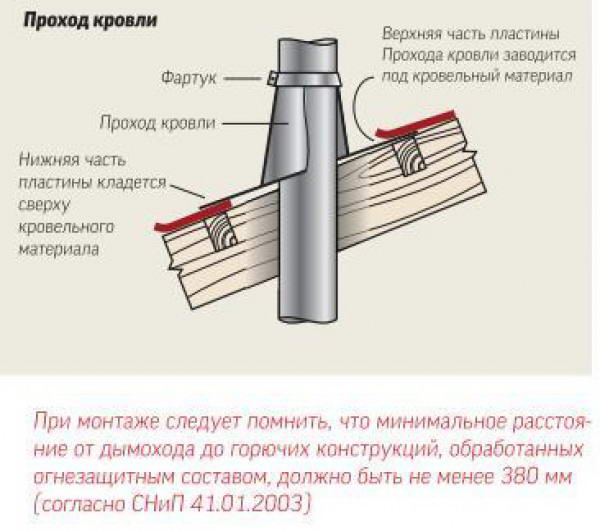
It is important to keep the distance between the rafters and the roof in the range of 25-30 cm. If the roof is made of combustible materials ( different kinds roofing material, soft roof), then a gap of 13-25 cm must be observed between the material and the wall of the chimney. If the material is resistant to high temperatures, then this gap can be left minimal, and removed only from the crate.
If the roof is a “pie” consisting of hydro, steam and thermal insulation, then during the installation of the passage element, some difficulties may arise associated with a violation of the integrity of this layer. As a result of an error, the protective properties of the roof can be significantly reduced. In this case, the chimney can be installed in a separate box, which will isolate the roofing materials from the hot walls. The distance between the inner wall of the box and the chimney should be about 15 cm, while the free space is filled with non-combustible heat-insulating material. It is recommended to use mineral or basalt wool, as it is resistant to moisture.
Hydro and vapor barrier is brought to the box according to the standard method: the “pie” is cut in the shape of an envelope. The sheet of films is brought to the rafters and cross beams, where they are fixed with nails or staples. Then the waterproofing layer is pressed on top with bars, and the vapor barrier is pressed with a base frame for finishing materials of the attic or attic. After that, the joints of the films and the box are treated with a sealant and glued with a special tape.
How to bring a pipe through the roof
To organize a hermetic junction of the roof to the chimney, an internal apron is created at this point. To create it, use the lower junction bars. The strips are applied to the walls of the chimney, where its upper part is marked. On this line, a grinder makes a strobe. Then dust is carefully removed from the formed border. This is done so that small particles of sand and cement do not get on the surface of the waterproofing or roofing. In some cases, fine grains of sand will turn into an abrasive over time, which can seriously damage the roofing material.
The lower apron begins to be installed from the bottom wall, while only one part of the apron is inserted into the strobe. Similarly, this element is attached around the entire perimeter of the chimney. Separate elements must be overlapped with an overlap of 15 cm. The joints are sealed.
For chimneys with a circular cross section, you can purchase special passage elements in hardware stores, consisting of a steel sheet and an apron cap. Their use allows you to significantly speed up the work on the equipment for the passage of the chimney pipe through the roof. A purchased or manufactured apron should be securely fixed to the roof. At the same time, it is not rigidly fixed with the chimney, since the expansion of the material or the shrinkage of the truss system can cause damage to the chimney with an apron (be sure to read: "").
The passage of the chimney pipe through the roof, detailed video instruction:
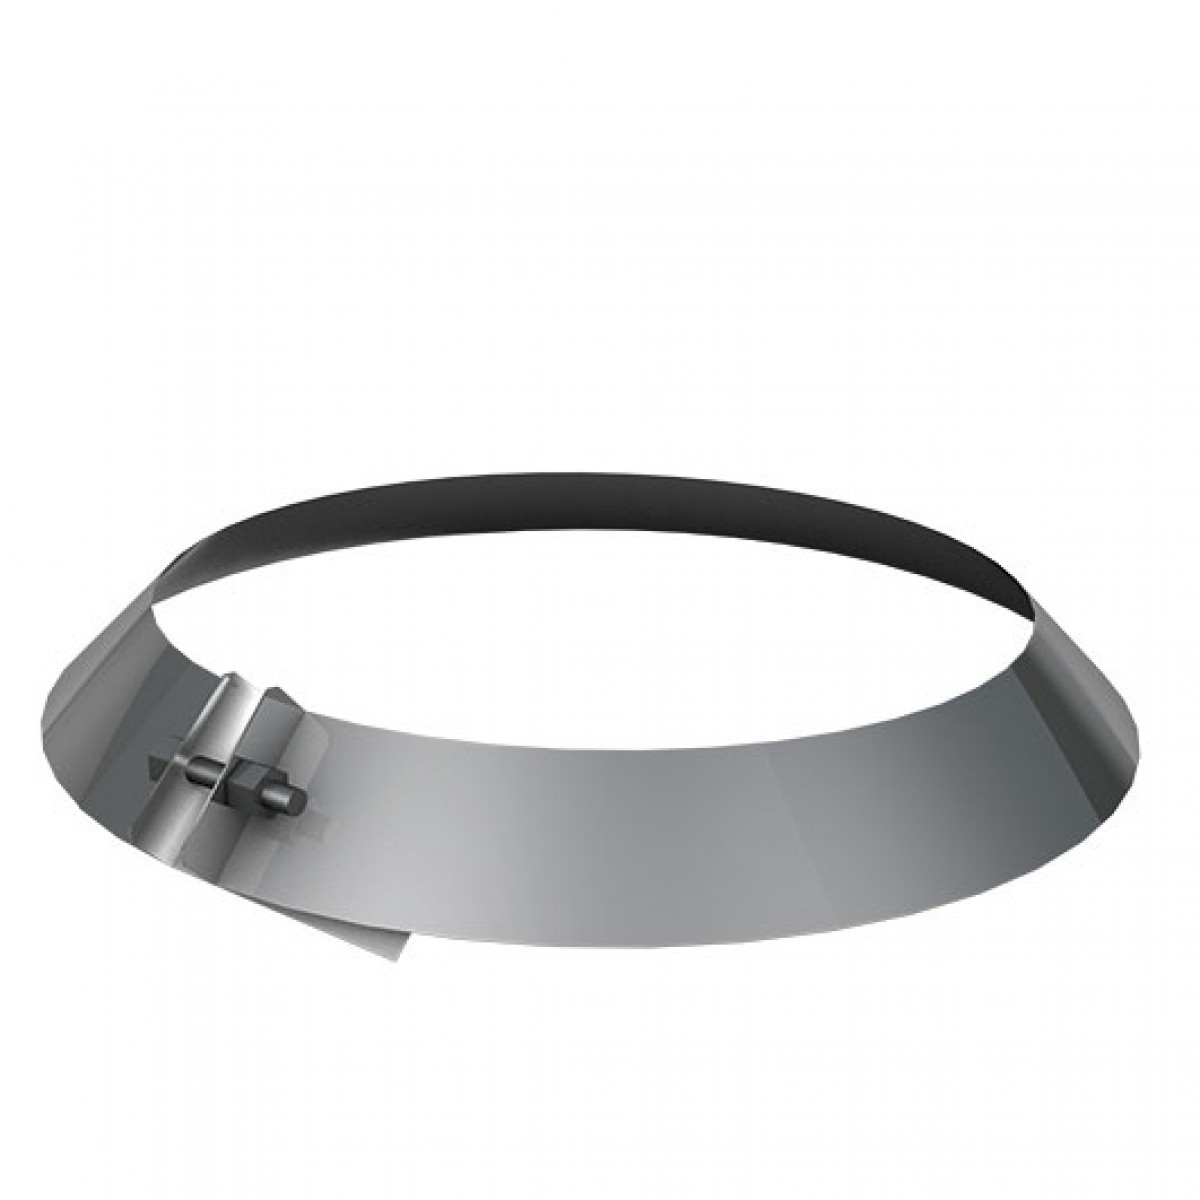
At the junction of the pipe and the apron, a skirt is installed - a steel clamp, which is fixed using a heat-resistant gasket. This approach allows you to significantly improve the waterproofing of the roof in this place. Upon completion of the installation of the apron, it is necessary to apply sealant to all junctions of the element and the chimney. This contributes to obtaining a reliable connection that does not leak.
Construction is a job for creative people, because through your ideas and material security you can create a chic palace in which you will be the king.
An ordinary house, like a palace, requires special attention already at the design stage, because if you make a mistake there, it may happen that the whole project will have to be changed to a more modest one.
But it also happens that your house is no longer enough for you and you have to complete the construction of additional residential meters.
And for increasing the area, the costs of their heating are also dragging on. What to do when the usefulness of your stove is no longer satisfied and you need to increase its volume, and the chimney outlet is not done as it should? Let's figure it out together.
Water is the main roofing enemy
Residents of private houses are often tormented by one question: how to get the chimney through the roof?
In the initial stages, it is worth speculating and finding out what problems can arise if the chimney passes through the roof. Moisture is often the most important issue. When it enters the chimney joints, the entire wooden system will get wet, which will entail its decay and, as a result, failure. Therefore, the correct and high-quality installation of the chimney through the roof should pay attention to sealing.
Poor sealing will inevitably lead you to the following:
- Dampness on the chimney masonry will be the main reason for its rapid destruction. Leaking into the seams, water erodes the solution, which will not only cause destruction, but also the occurrence of smoke in the attic space, and can cause a fire
- All the same moisture entering the pipe very often leads to the appearance of fungus. Everything would be fine, but this fungus forms some protrusions, and the smoke will not be completely drawn out of the chimney. Therefore, you will need a complete or partial re-laying of the chimney
- Water in the roof space can accumulate and get into the thermal insulation layer, thereby reducing its useful qualities by at least half
- The heat loss of the entire building will increase significantly
- The circulation of the air mass is disturbed, which leads to its stagnation and the appearance of condensate can no longer be avoided
- In the cold season, water that has fallen under the roofing material often changes its state of aggregation from a solid to a liquid state, thereby affecting the seams, it only makes them bigger
- A truss system made of wood will not be able to tolerate condensate for a long time, even if it is carefully worked out with antiseptics
Placement of the chimney on the slope
Now that you know how dangerous moisture is, let's look directly at the installation of the chimney through the roof.
In what cases it is necessary to lead the chimney through the roof?
- When building a new home or building
- During roof repairs
- When building a furnace or increasing its volume
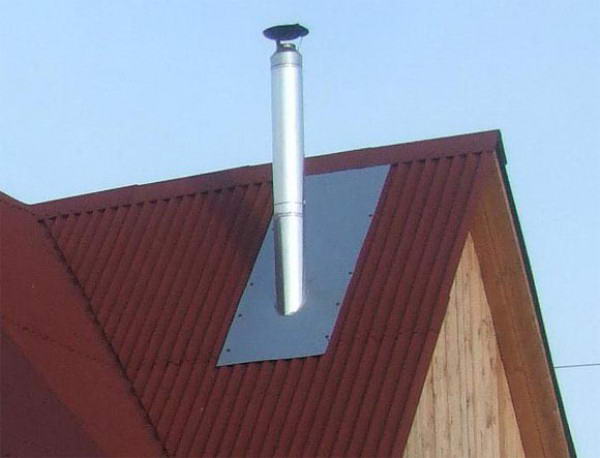
I am a fairly experienced construction specialist, but I don’t have a stove-maker, so if I have questions about chimneys and everything connected with it, I turn to my colleague. He, like an experienced stove-maker, advises placing the outlet of the pipe as close as possible to the ridge. The pipe should be at a height of +0.5 meters to the highest roof element, i.e. if the ridge is at around 4.3 meters, then the pipe should be at a height of 4.8 m. This is done so that in the winter season the snow cover could not fill up the pipe.
IMPORTANT: The passage through the roof for the chimney must not be located in the ridge itself. Otherwise, you will not only violate the integrity of the entire truss system, but also create an unaesthetic appearance of the entire roof. Place it somewhere on the slope, as close to the skate as possible. It is worth noting that if the pipe is located somewhere in the center or at the bottom of the slope, you do not need to make it higher than the ridge. If it is in the middle, then the height of the ridge will be enough, and if closer to the overhang, then 1/3 of the height of the roof.
Chimney pipes differ in their structure and the material from which they are built. Today they use:
- brick
- metal
- Ceramic
- Asbestos-cement
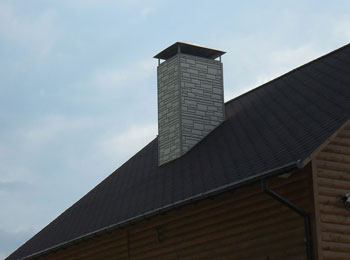
Giving the appearance of brick pipes that lead to the roof has its own installation technique. The head of the pipe is plastered with a completely different method, and a ceramic or metal chimney will have a couple of seam sealing techniques between the roof and it.
Roofing material plays a very important role in sealing chimney joints.
In modern construction, whatever the roofing material, you can always find a suitable waterproofing. Therefore, do not be shy and ask roofing manufacturers all questions related to heating.
IMPORTANT: In the attic where the pipe is located, fire safety regulations must be fully observed. The chimney outlet through the roof must not come into contact with any wooden or flammable elements. The gap between the pipe and other structures is filled with refractory material, as a rule, asbestos is used.
Auxiliary but necessary elements
The output of a round chimney through the roof is the most common practice among developers. And it is worthwhile to understand that the elements of the chimney cannot be just a pipe. So what other details will be useful to you?
- metal apron
- Penetration (elastic)
- Silicone seals

A metal apron has a protective effect, and you probably noticed it in your neighbors or just residents of private houses. It allows you to protect the attic from moisture leaking into the gap between the pipe and the roofing.
In construction, a waterproofing element is called a penetration, and in roofing it is selected taking into account the slope of the slope. These items are freely available at any hardware store. They can be of different diameters and shapes, so when choosing a penetration, it is better to consult a specialist.
As for elastic penetration, its use is more suitable for roofs with medium and large slopes. But at the same time, it is worth paying attention to the material of the roof. To ensure maximum sealing, it is worth considering all the nuances, so as not to spend money on repairs later.
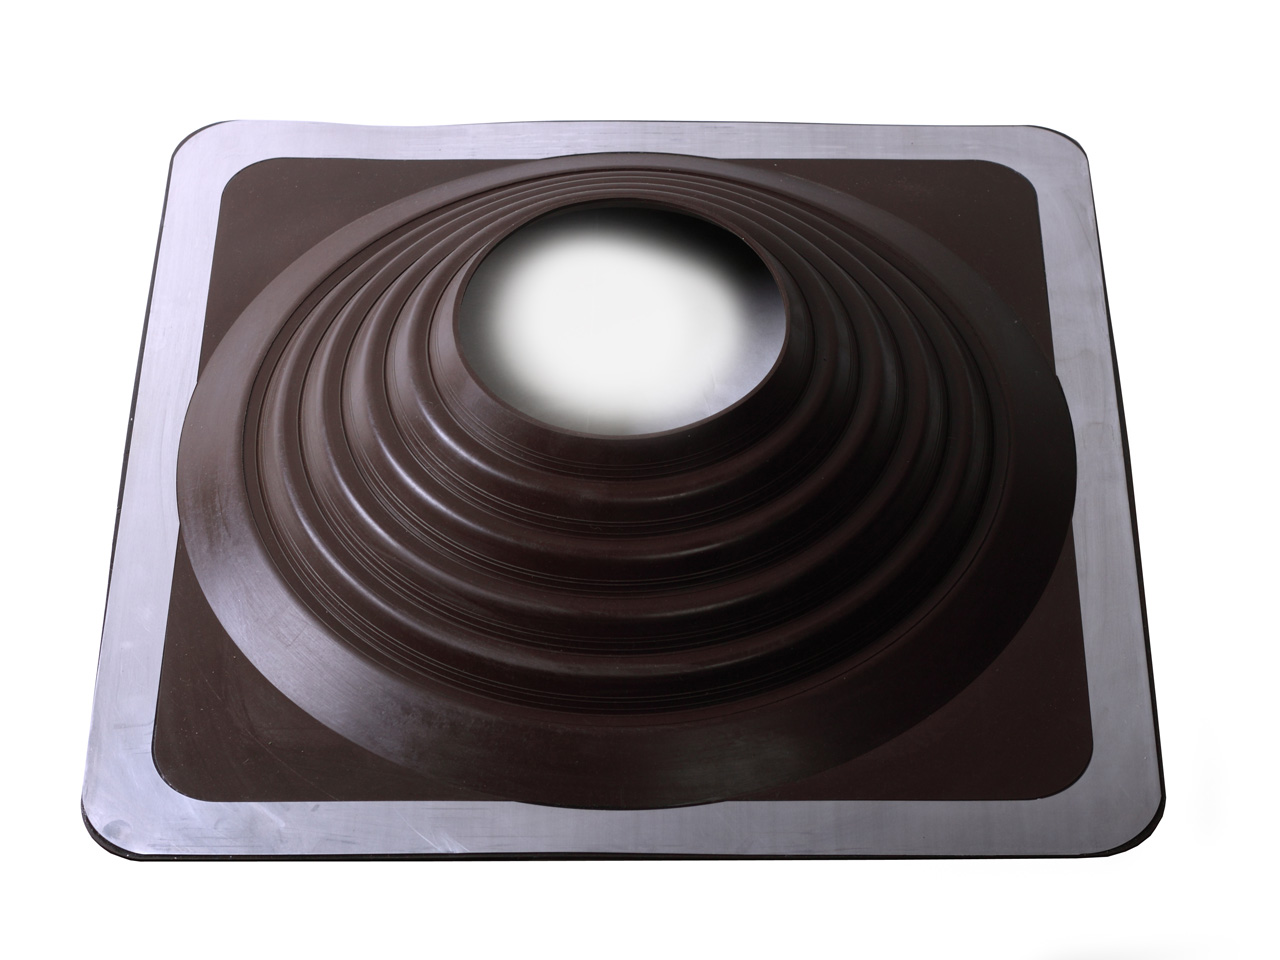
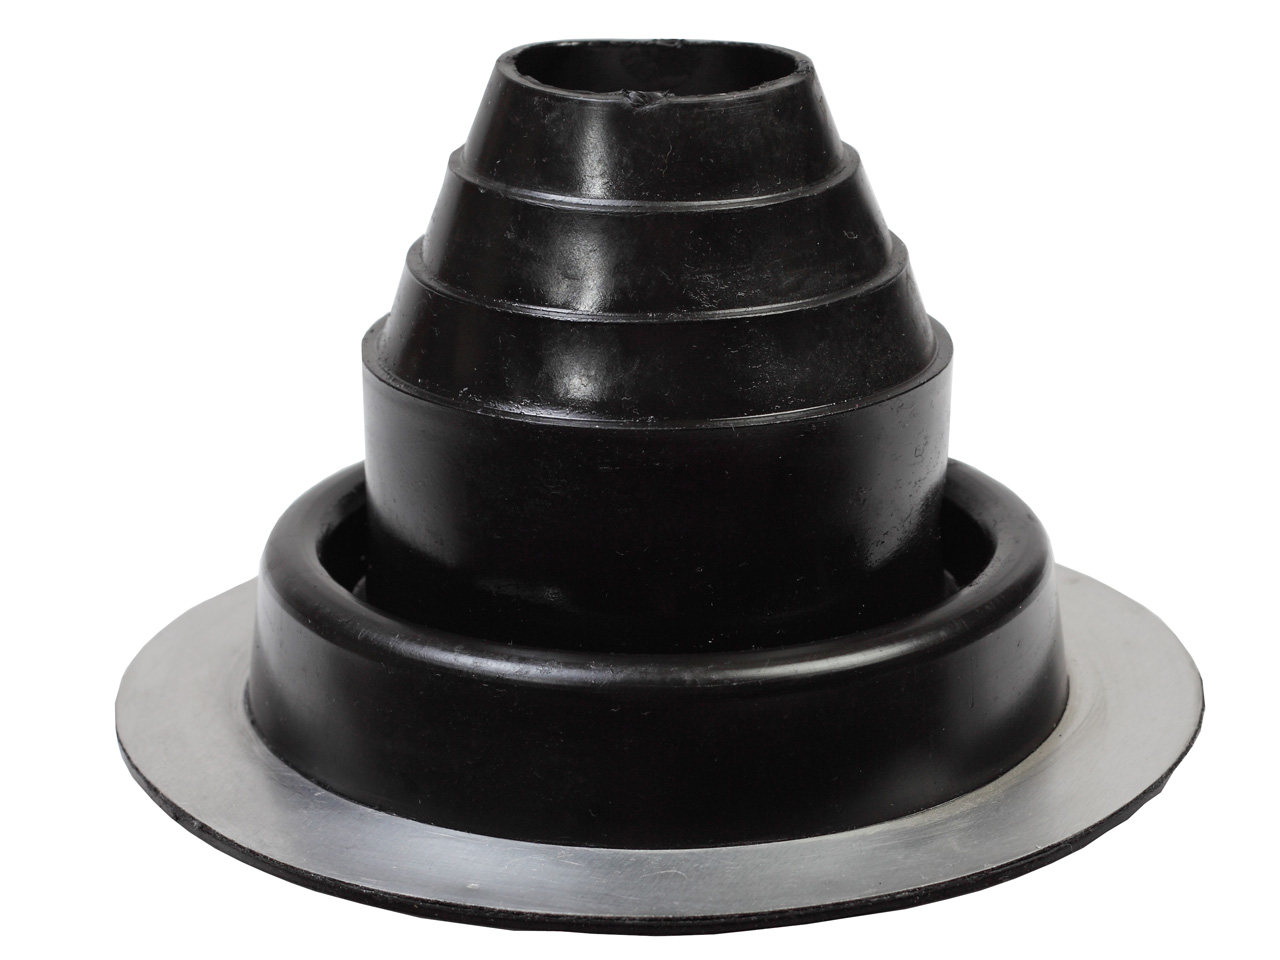
The structure of the penetration is like a stepped pyramid. She, in turn, is located on a soft flange in the form of a square or circle. This element, as a rule, consists entirely of silicone or other types of rubber, but there are penetrations, parts of which are made of aluminum. Thanks to elastic silicone, they easily perform their functions on any type of roof, regardless of precipitation. That is why they are the most purchased.
Any element of construction has positive and negative qualities. Here is some of them.
Positive properties of penetration:
- High resistance to aggressive chemical environment and ultraviolet
- Withstands a wide temperature range. From -50 o to +130 o
- flexible material
- Variety of color palette
- Aesthetic appearance
- Wide range of applications due to elasticity
Aesthetics will give your roof a beautiful finished look, and a wide choice of colors allows a creative person to roam and create a truly unique roof.
Despite the fact that tips on the selection of penetration are indicated on the documents attached to them, it is worth considering some of the nuances.
- On flat and slightly sloping roofs, it is advisable to use straight penetration
- If the roof has a slope of more than 25 °, then they will use corner penetration. This is due to the fact that their flange is fixed at a certain angle and, as a rule, is 20 o. This results in the best sealing possible.
- The universal type penetration is able to fit any diameter. It's all about its pyramid structure. On each of her steps she has different diameter, thus eliminating the need for initial measurements. It remains only to cut off the excess, and the sealing is completed
Technological process of penetration installation
When you do your job for quite a long period, you simply don’t have any difficulties, and questions like how to install a chimney pipe through the roof can no longer confuse. The whole process of installing a chimney is a fairly simple process if you know your business. It is much more important to take into account all the details, so I want to talk in more detail about the penetration device.
Consider the entire installation process on the most common penetration - universal.
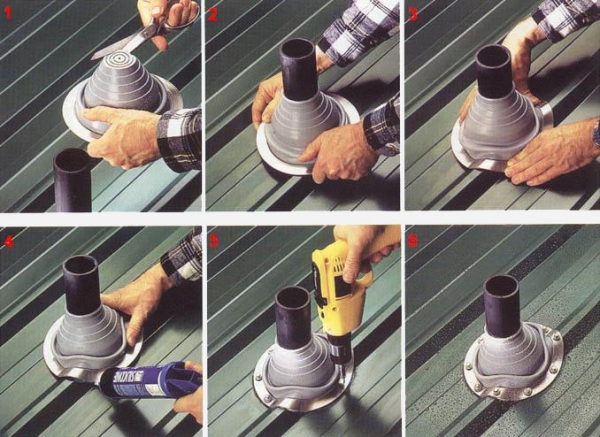
- After selecting the required diameter, excess pieces are cut off
- Putting the penetration on the pipe, press it against the roofing. If it has ribbing and is not flat, it is worth giving the waterproofing exactly the same look, i.e. so that the silicone material completely repeats the shape of the roof
- It's time for the sealer. We coat the flange with it around the edges and press hard on it so that the whole process goes through with the highest quality
- The final step will be to fasten the flange to the roofing material using self-tapping screws or rivets
Do not think that only silicone penetrations are used, metal ones are also known in construction. And now I will say a few words about them.
Of course silicone good stuff and its main quality is natural elasticity, which allows it to be applied to completely different roofs, but metal is also not bad when it comes to soft roofing.
There are several options for penetrations made of metal.
- The metal penetration is fastened by soldering into the pipe, and the outside of the head is fastened by welding
- The penetration allows the pipe to penetrate through, and from above the metal part in the form, as a rule, of a cone does not allow atmospheric precipitation to enter the chimney
Fastening is carried out with self-tapping screws, after processing with a special sealant.
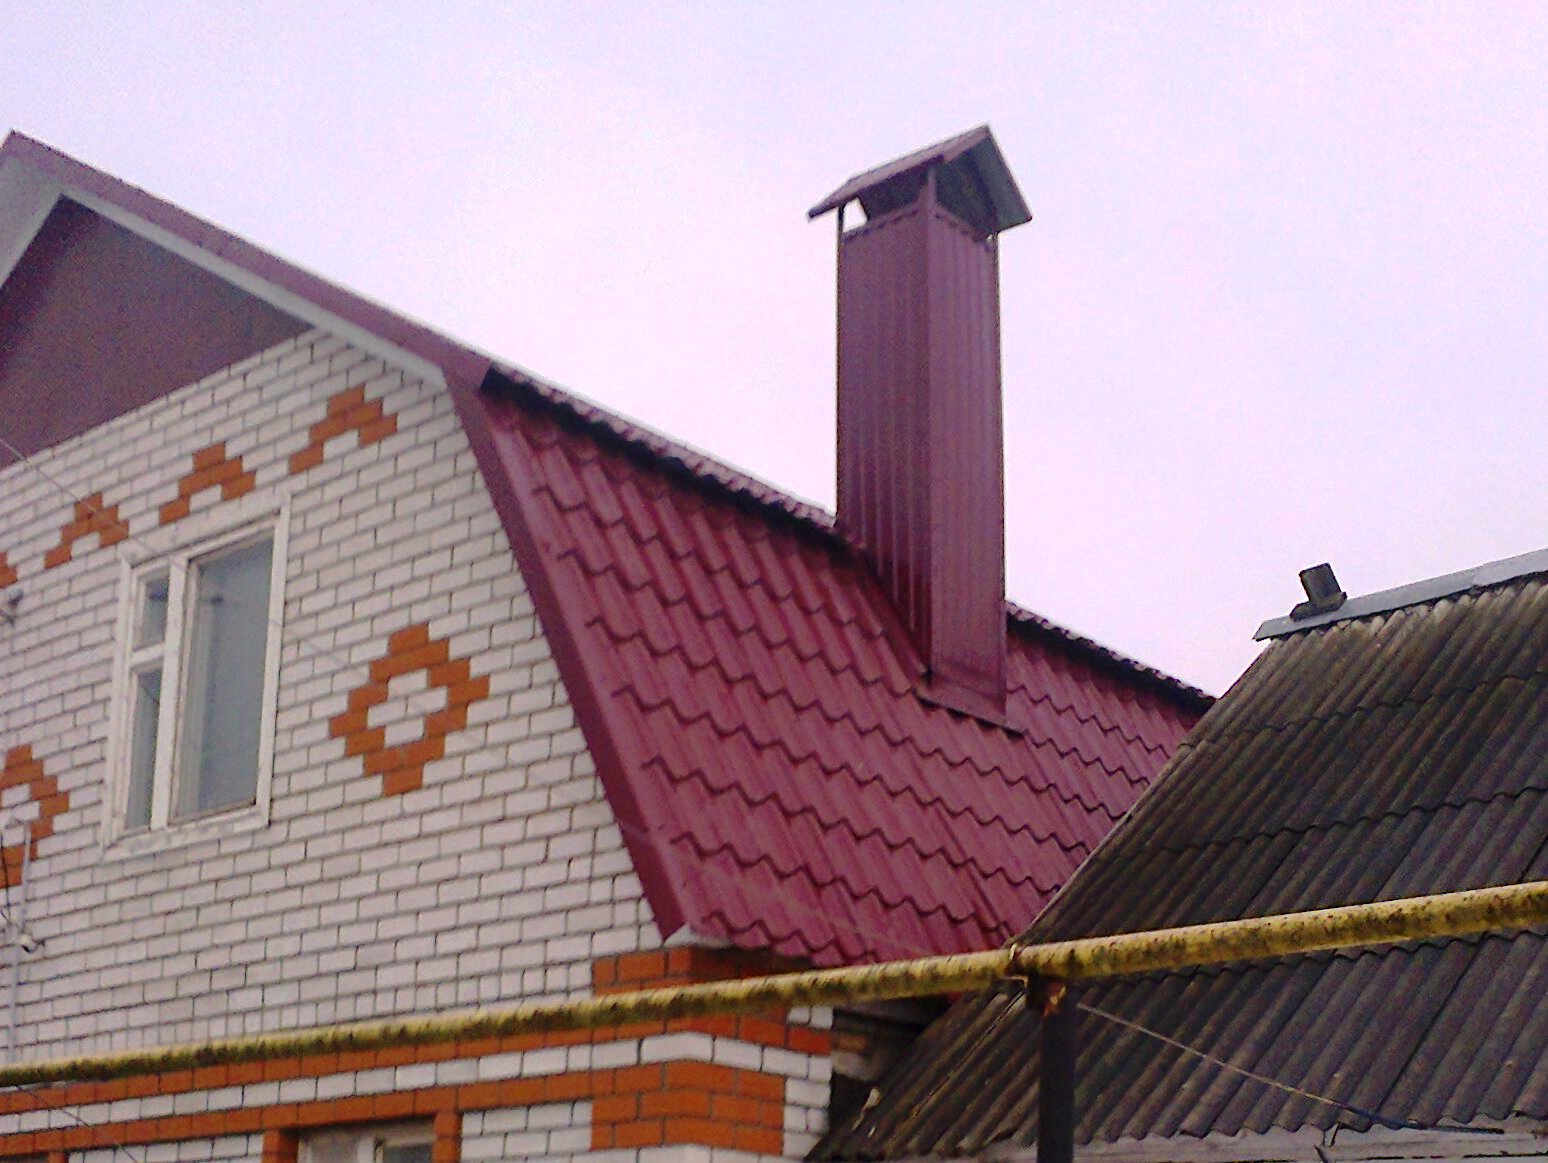
Pipes with four corners
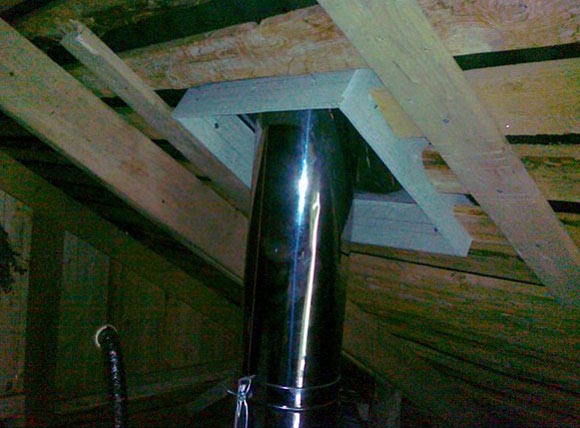
This type of pipes, as you probably guessed, can be attributed to rectangular and square. They, like round ones, have a similar output technique, i.e. passing through the attic space, they are brought out. But at the junction of such a pipe with a roof slope, a sheet of metal with a suitable hole is laid. The head of the chimney will be displayed in it. The described technique is most suitable in the presence of frequent crates. This can be found when installing a soft roof.
If slate is a roofing material, and the crate has a rather large step, then you should try to make the chimney pass between the rafter legs, thereby maintaining the integrity of the rafter system, which will increase the operational period of the entire building. But in the absence of such an opportunity, additional elements have to be arranged. They must perform not only the role of a support, but also hold the refractory insulation of the chimney.
Once all the work is completed and you managed to get the chimney through the roof, the seams are sealed with materials that cannot ignite. And the top of such a pipe is equipped with a universal metal casing penetration.
In the case when the sealant must be applied over the roofing material, then it should be used together with a special tape. It is based on aluminum and lead, which allows using a sealant to create a very confident waterproofing.
IMPORTANT: Metal penetrations are not used on roofs where there are bends and bumps. They are only suitable for smooth types of surfaces.
Chimney through tiles
How to install a chimney through a tile roof so that it is not visible? This question is often asked by developers. But we all know that any chimney must be at some distance above the slope in order to prevent snow or other precipitation from entering it.

But the fact is that now there is a lot of material in which you can easily get confused and do not think that people who ask such questions are stupid. It's all about their carelessness.
They just saw at the neighbors or acquaintances, or maybe just in the photo on the Internet a tile in which there was a special element. He completely copied the pattern of the tiles, and had a hole for the pipe.
Such roofing elements for tiles are made of plastic, therefore, they should not be used as a chimney in any case. They are arranged only as ventilation holes.
In construction, safety is paramount
Whatever the work and its ultimate goals, it is always worth approaching it wisely. Thinking through possible accidents and other important points will help to avoid them in the future, so treat the device of chimneys with the utmost responsibility.
IMPORTANT: All roofs designed to protect a residential building from precipitation, as a rule, consist of a large number of layers. It should be understood that not all of them have high fire resistance. Therefore, take care of fire safety.
All wooden elements near the chimney pipes must be protected from them. For this, a special box filled with refractory materials is created.
Such boxes are very often arranged on roofs where the roofing material is: slate, tiles, soft roofing, etc. in general, where there is relief and pattern. They are erected to the level of the crate with a thickness that is able to qualitatively protect wooden products. Inside the box, it is also worth separating fire-resistant materials by 5-10 cm, but this completely depends on the quality of the filler. If the specialist is sure that ignition will not occur on contact, then this can not be done.
And as a conclusion, I want to give you a few small tips.
- Be careful and buy only proven materials, because even a simple poor-quality penetration can cause future roof repairs.
- When passing the pipe through the slope itself, take care of the smallest details. Don't skimp on sealants
- Inspect the roof and its elements every spring
- Materials must be suitable for their intended purpose. For example, do not use ventilation plastic pipes as a chimney. This is not only impractical, but also dangerous for the property and the lives of your relatives.
Remember, in construction, the word "maybe" should not be used for any type of work. Always think through your steps and follow the design of the building exclusively. If in doubt, contact the experts. They will help you, plan and tell you how, what and why.
Heating appliances are a necessary attribute of any residential building, providing a comfortable temperature for living in cold period, which in most regions of Russia lasts 9 months. However, additional comfort comes with a certain degree of fire risk. Therefore, special attention is paid to the chimney, through which smoke and combustion products are removed from the heat generators and removed to the outside of the room. This article will tell you how to bring the chimney through the roof in compliance with all safety requirements.
As a rule, in the work of a stove-maker or installer gas equipment chimney installation services are not included; the homeowner must provide the passage of the chimney through the roof on his own. The imaginary simplicity of the task makes home craftsmen refuse the services of professional roofers. However, poor-quality output of the pipe to the roof threatens with serious consequences:
- Through the leaky passage of the pipe, moisture seeps into the masonry, gradually destroying it.
- High humidity inside stimulates the spread of molds and fungus. Spores of some types of fungus are dangerous for the human condition, so it is not safe to use an infected tube. In advanced cases, both the chimney and the stove masonry are subject to replacement.
- The penetration of water into the passage of the chimney pipe through the roof reduces the thermal insulation properties of the insulation by half. Moreover, after the thermal insulation layer has dried, its characteristics will never return to the previous level.
- Even the truss system suffers from poor-quality removal of the pipe through the roof, since moisture penetrating into it through a leaky passage leads to decay and destruction.
- Slots near the pipe passage disrupt the normal air circulation inside the attic, leading to increased energy losses and heating costs.
By the way, not only stove chimneys are brought to the roof, pipes from gas boilers and ventilation outlets are also placed there, for the installation of which they use the same methods.
The choice of the location of the chimney outlet and its height
The first condition for a high-quality outlet of the pipe through the roof is the correct placement of the chimney on the roof. This factor affects the functioning of the entire heating system, therefore, in order to avoid errors, installation is carried out in accordance with construction and fire safety requirements:
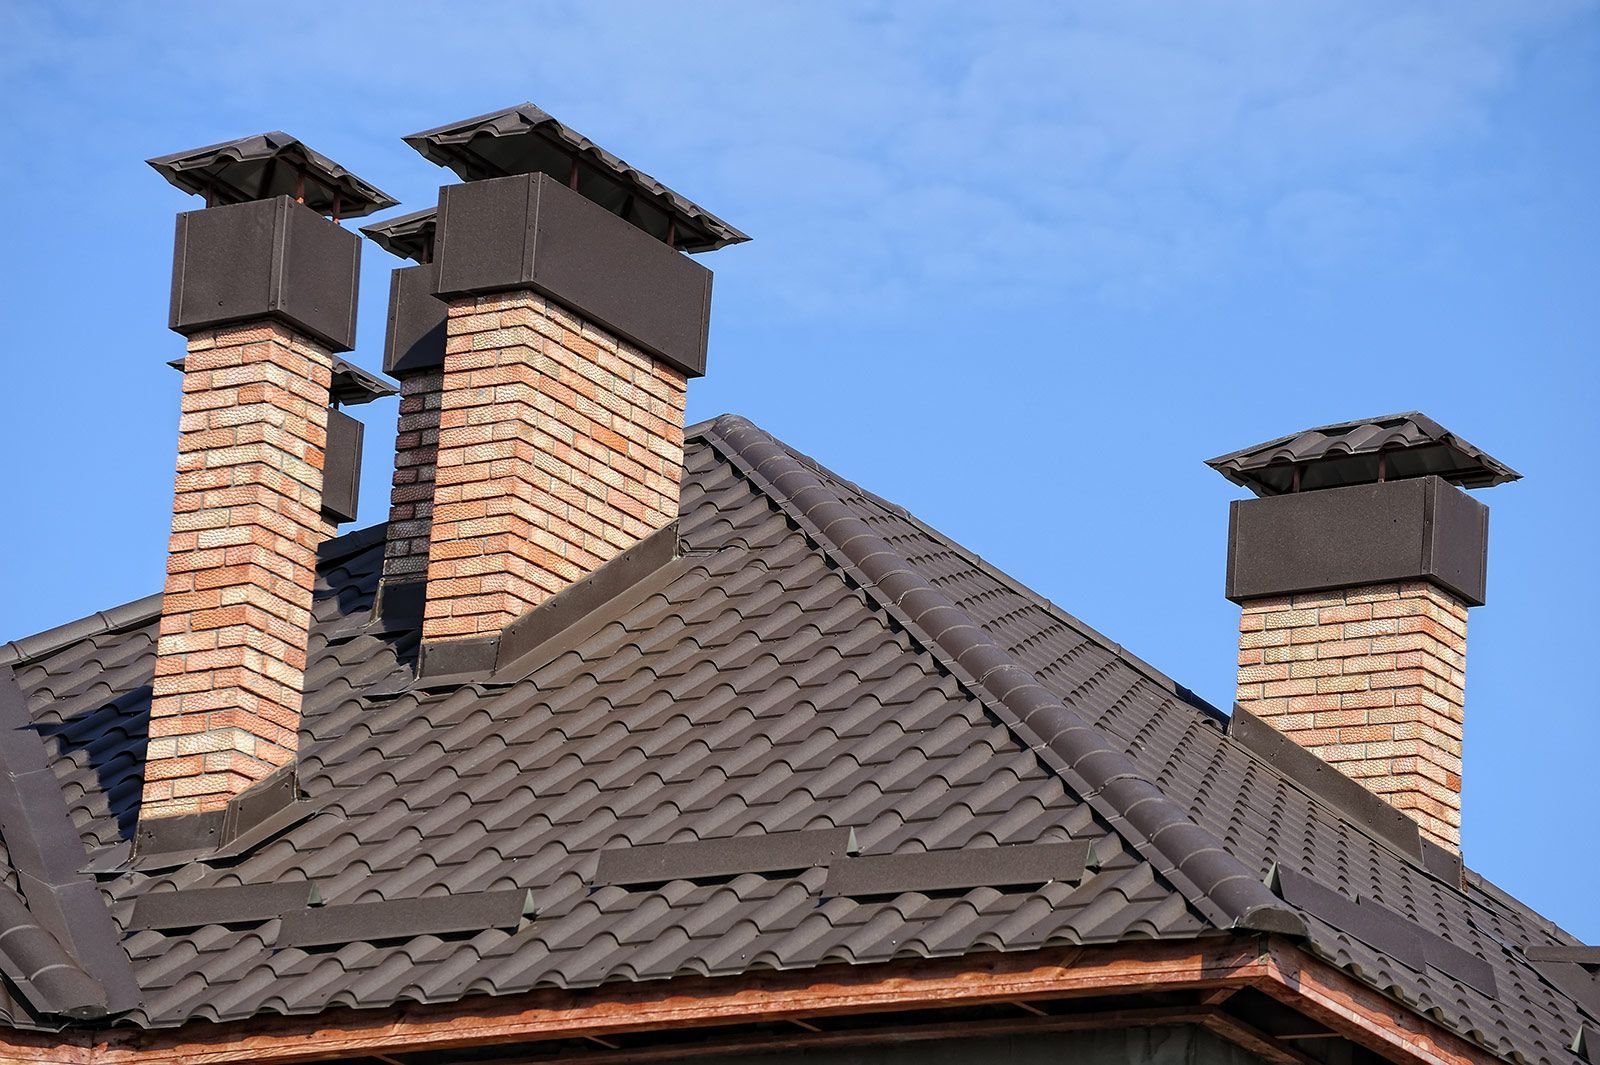
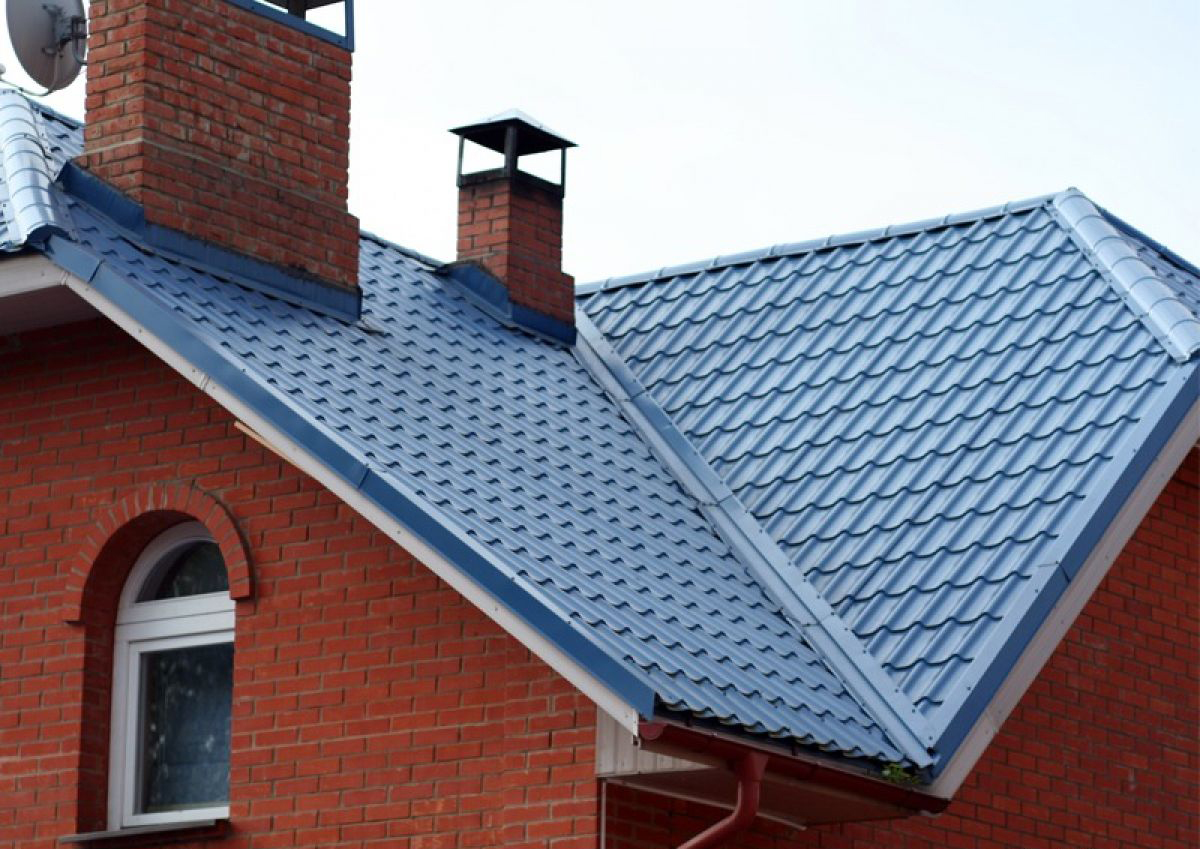
- Chimney pipes are located in the immediate vicinity of the high place roofs, at a distance of 1-1.5 m.
- The recommended height of the chimney relative to the roof ridge to ensure normal stove draft is 0.5-1.5 m.
- The greater the height of the chimney, the greater the draft force in the furnace or gas boiler she provides.
- The lower the chimney is located on the slope, the longer it must be in order for the recommended height of the chimney above the roof to meet the recommendations.
- Parameters such as the height of the chimney, the diameter of the section are selected according to the recommendations of the manufacturer of the thermogenerating device or on the basis of a calculation.
- The chimney consists mainly of vertical sections of pipes, the length of horizontal segments should not exceed 1 m.
- The outlet is placed between the elements of the truss system so as not to violate its integrity.
The main difficulty in passing the pipe through the roof is that during the passage of smoke, the temperature of the walls rises, which poses a risk of ignition of combustible materials of the truss system.
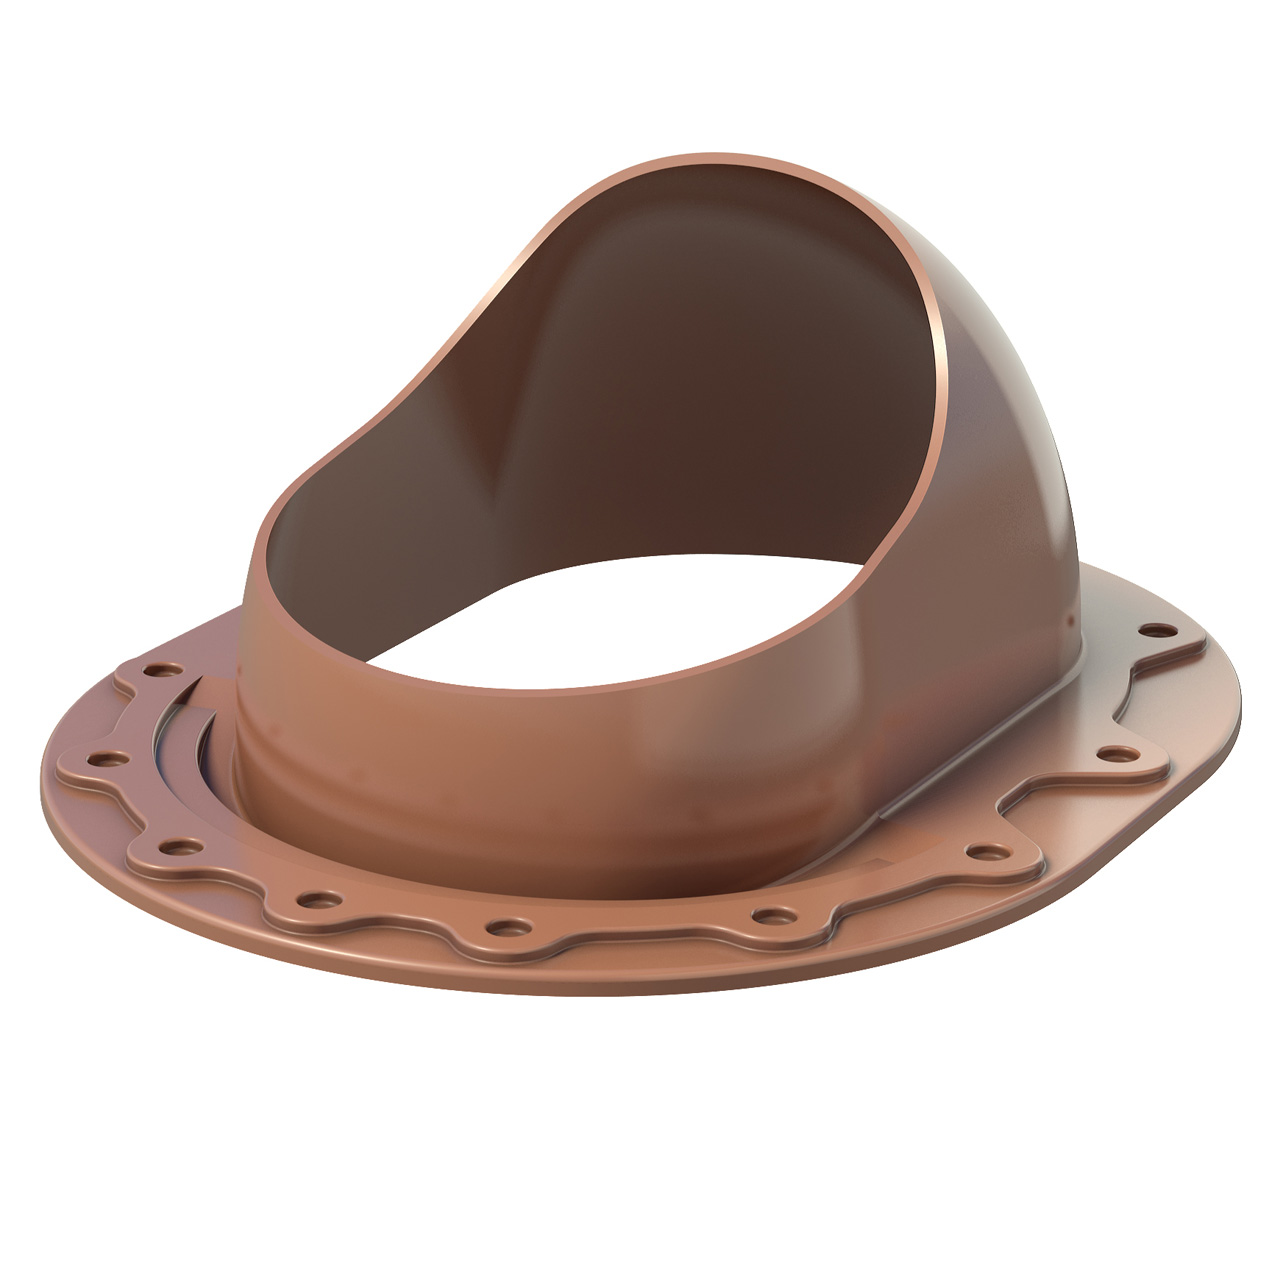
Elastic penetration
Most often in private construction they face installation metal pipes round section. To ensure the tightness of the passage, use a special device - an elastic penetration. This product is made of high-strength silicone or rubber, having the shape of a funnel with a wide flange in the form of a square or circle, called an apron. Elastic penetration, due to its properties, takes any shape, adjusting to the angle of inclination of the slope. It withstands extremely high or low temperatures, exposure to aggressive chemicals and has a wide palette.
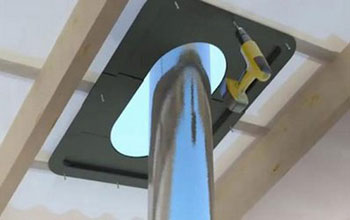
When purchasing an elastic penetration, they are guided by the diameter of the pipe and the color of the roofing material. Universal Models, in the form of a stepped pyramid, suitable for any size, adjustment is carried out by trimming the penetration to the desired level. Installing an elastic apron on the roof is very simple, you need to put it on the chimney passage, put a metal circle with holes for fasteners, process the joint with a fire-resistant sealant and fix it with a screwdriver. For roofs with steep slopes, a special type of plastic penetrations is used with a given flange mounting angle.
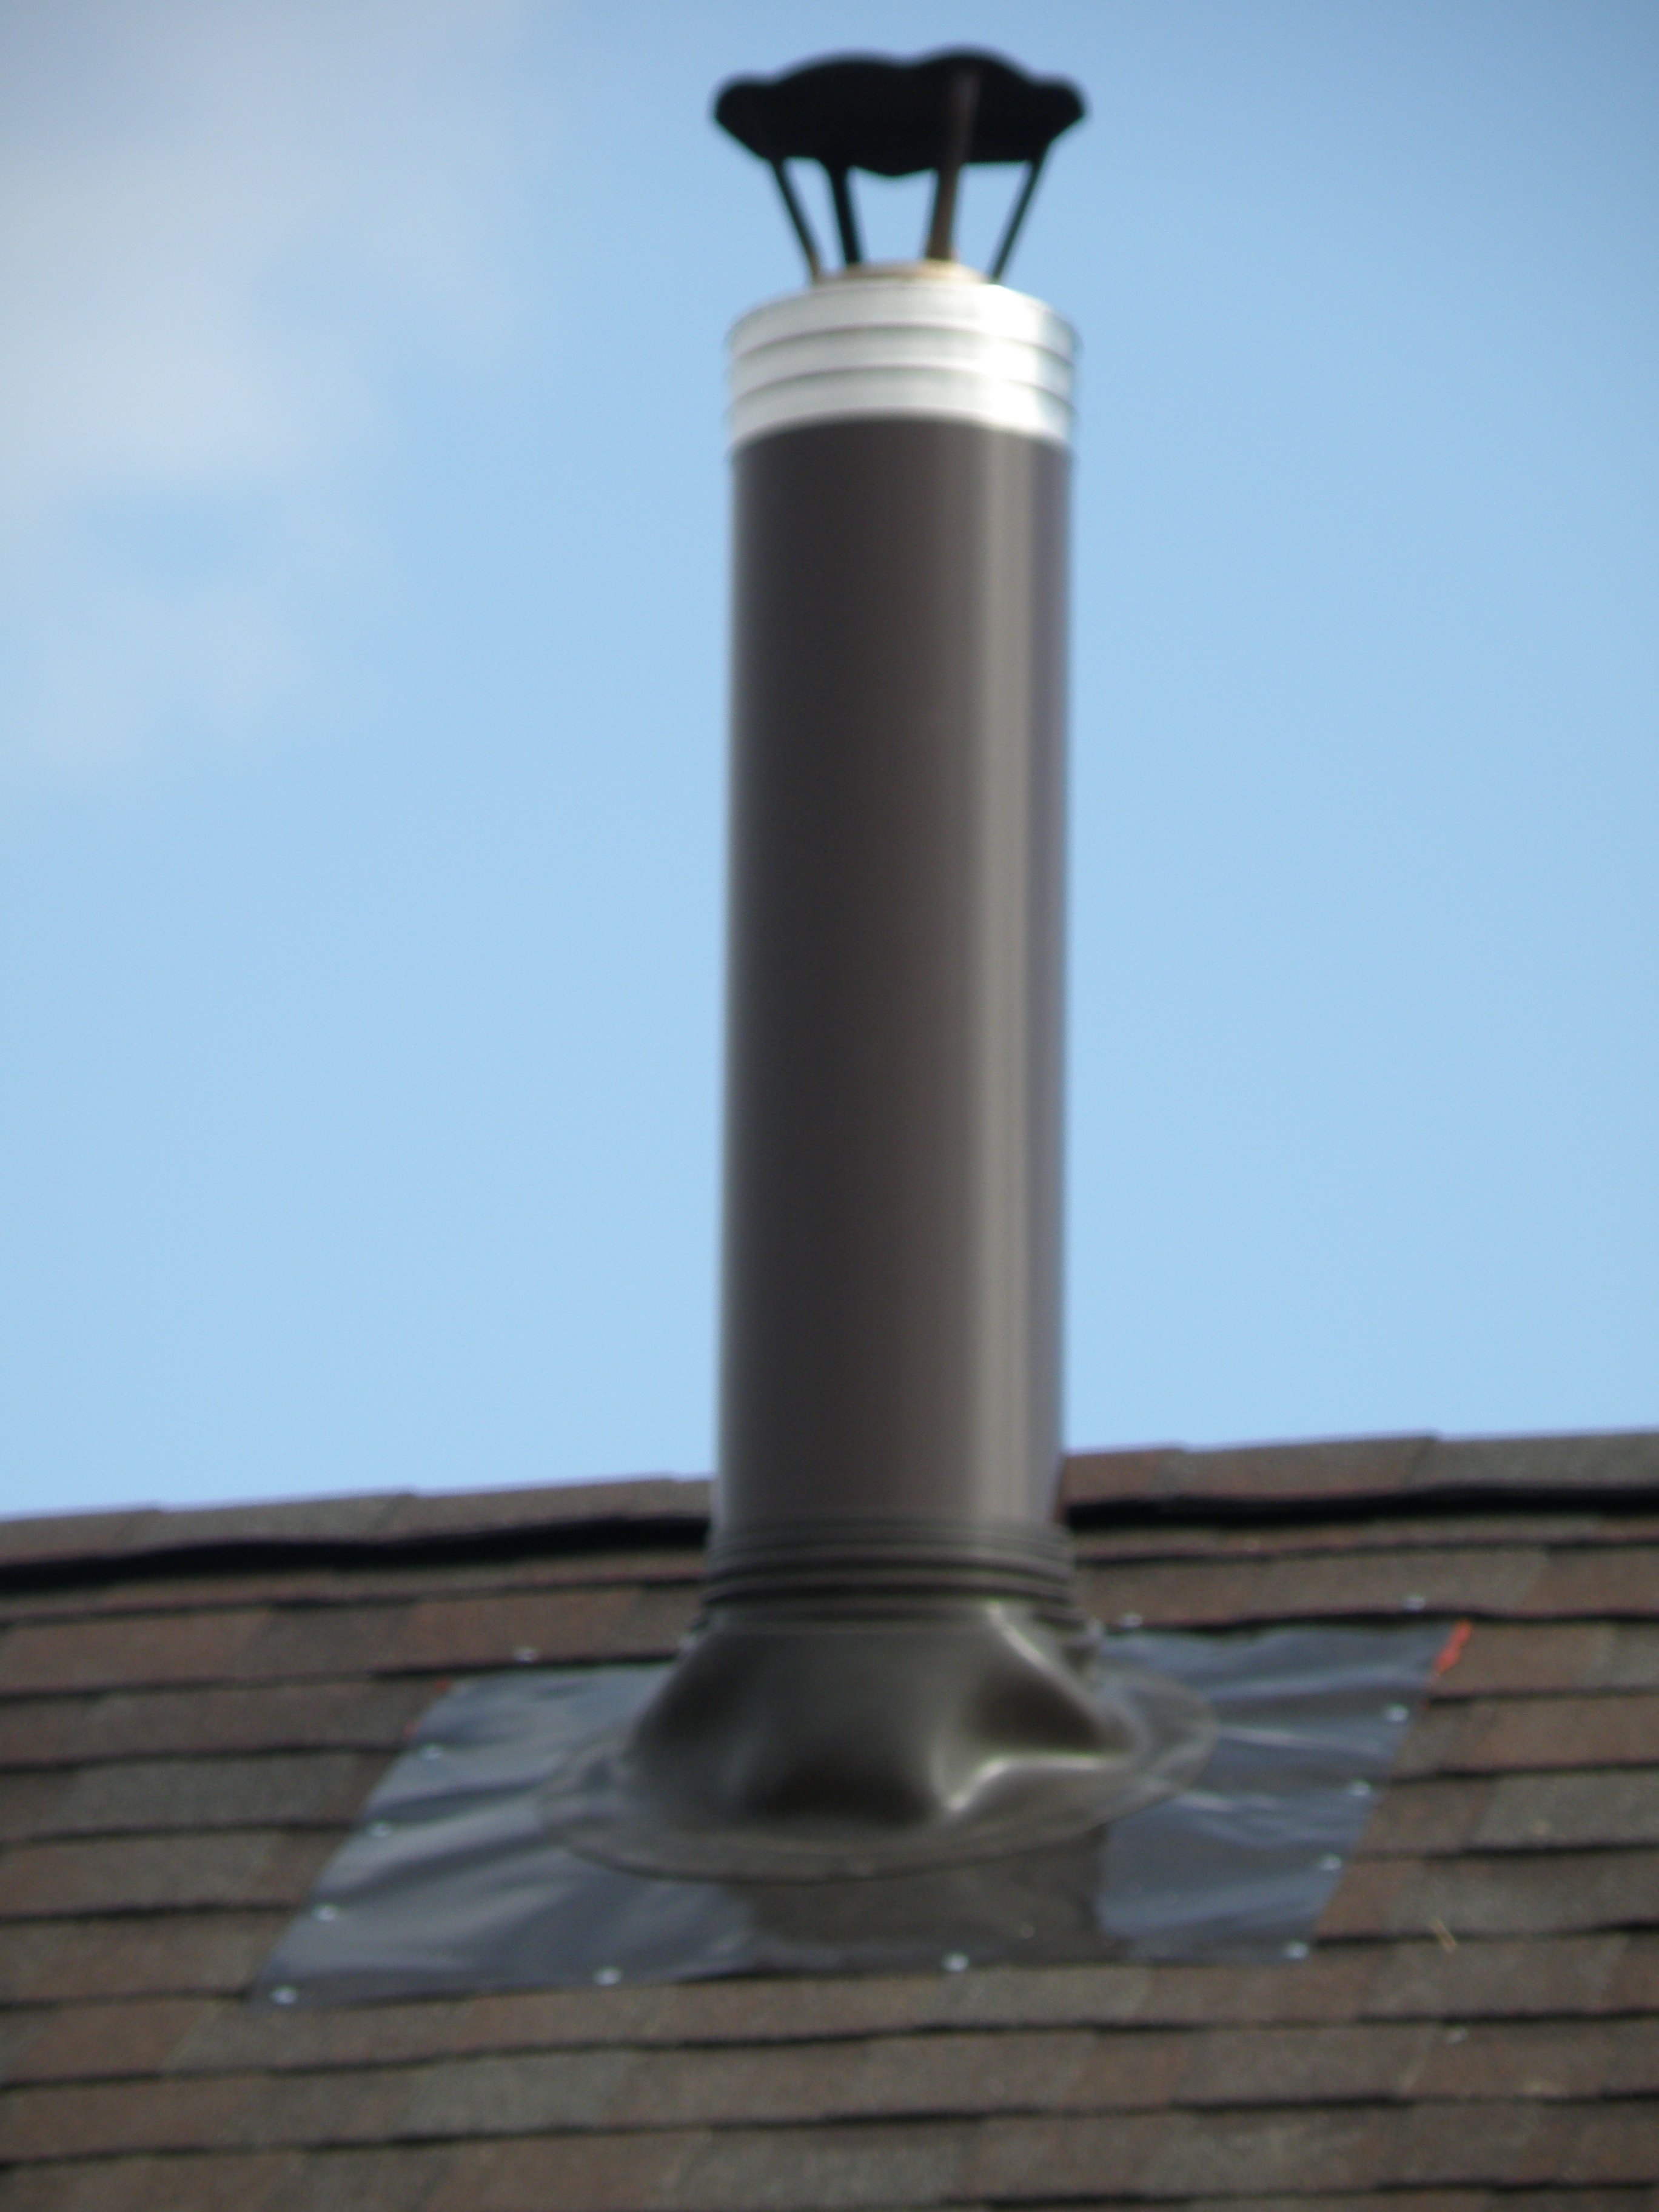
Metal spigot
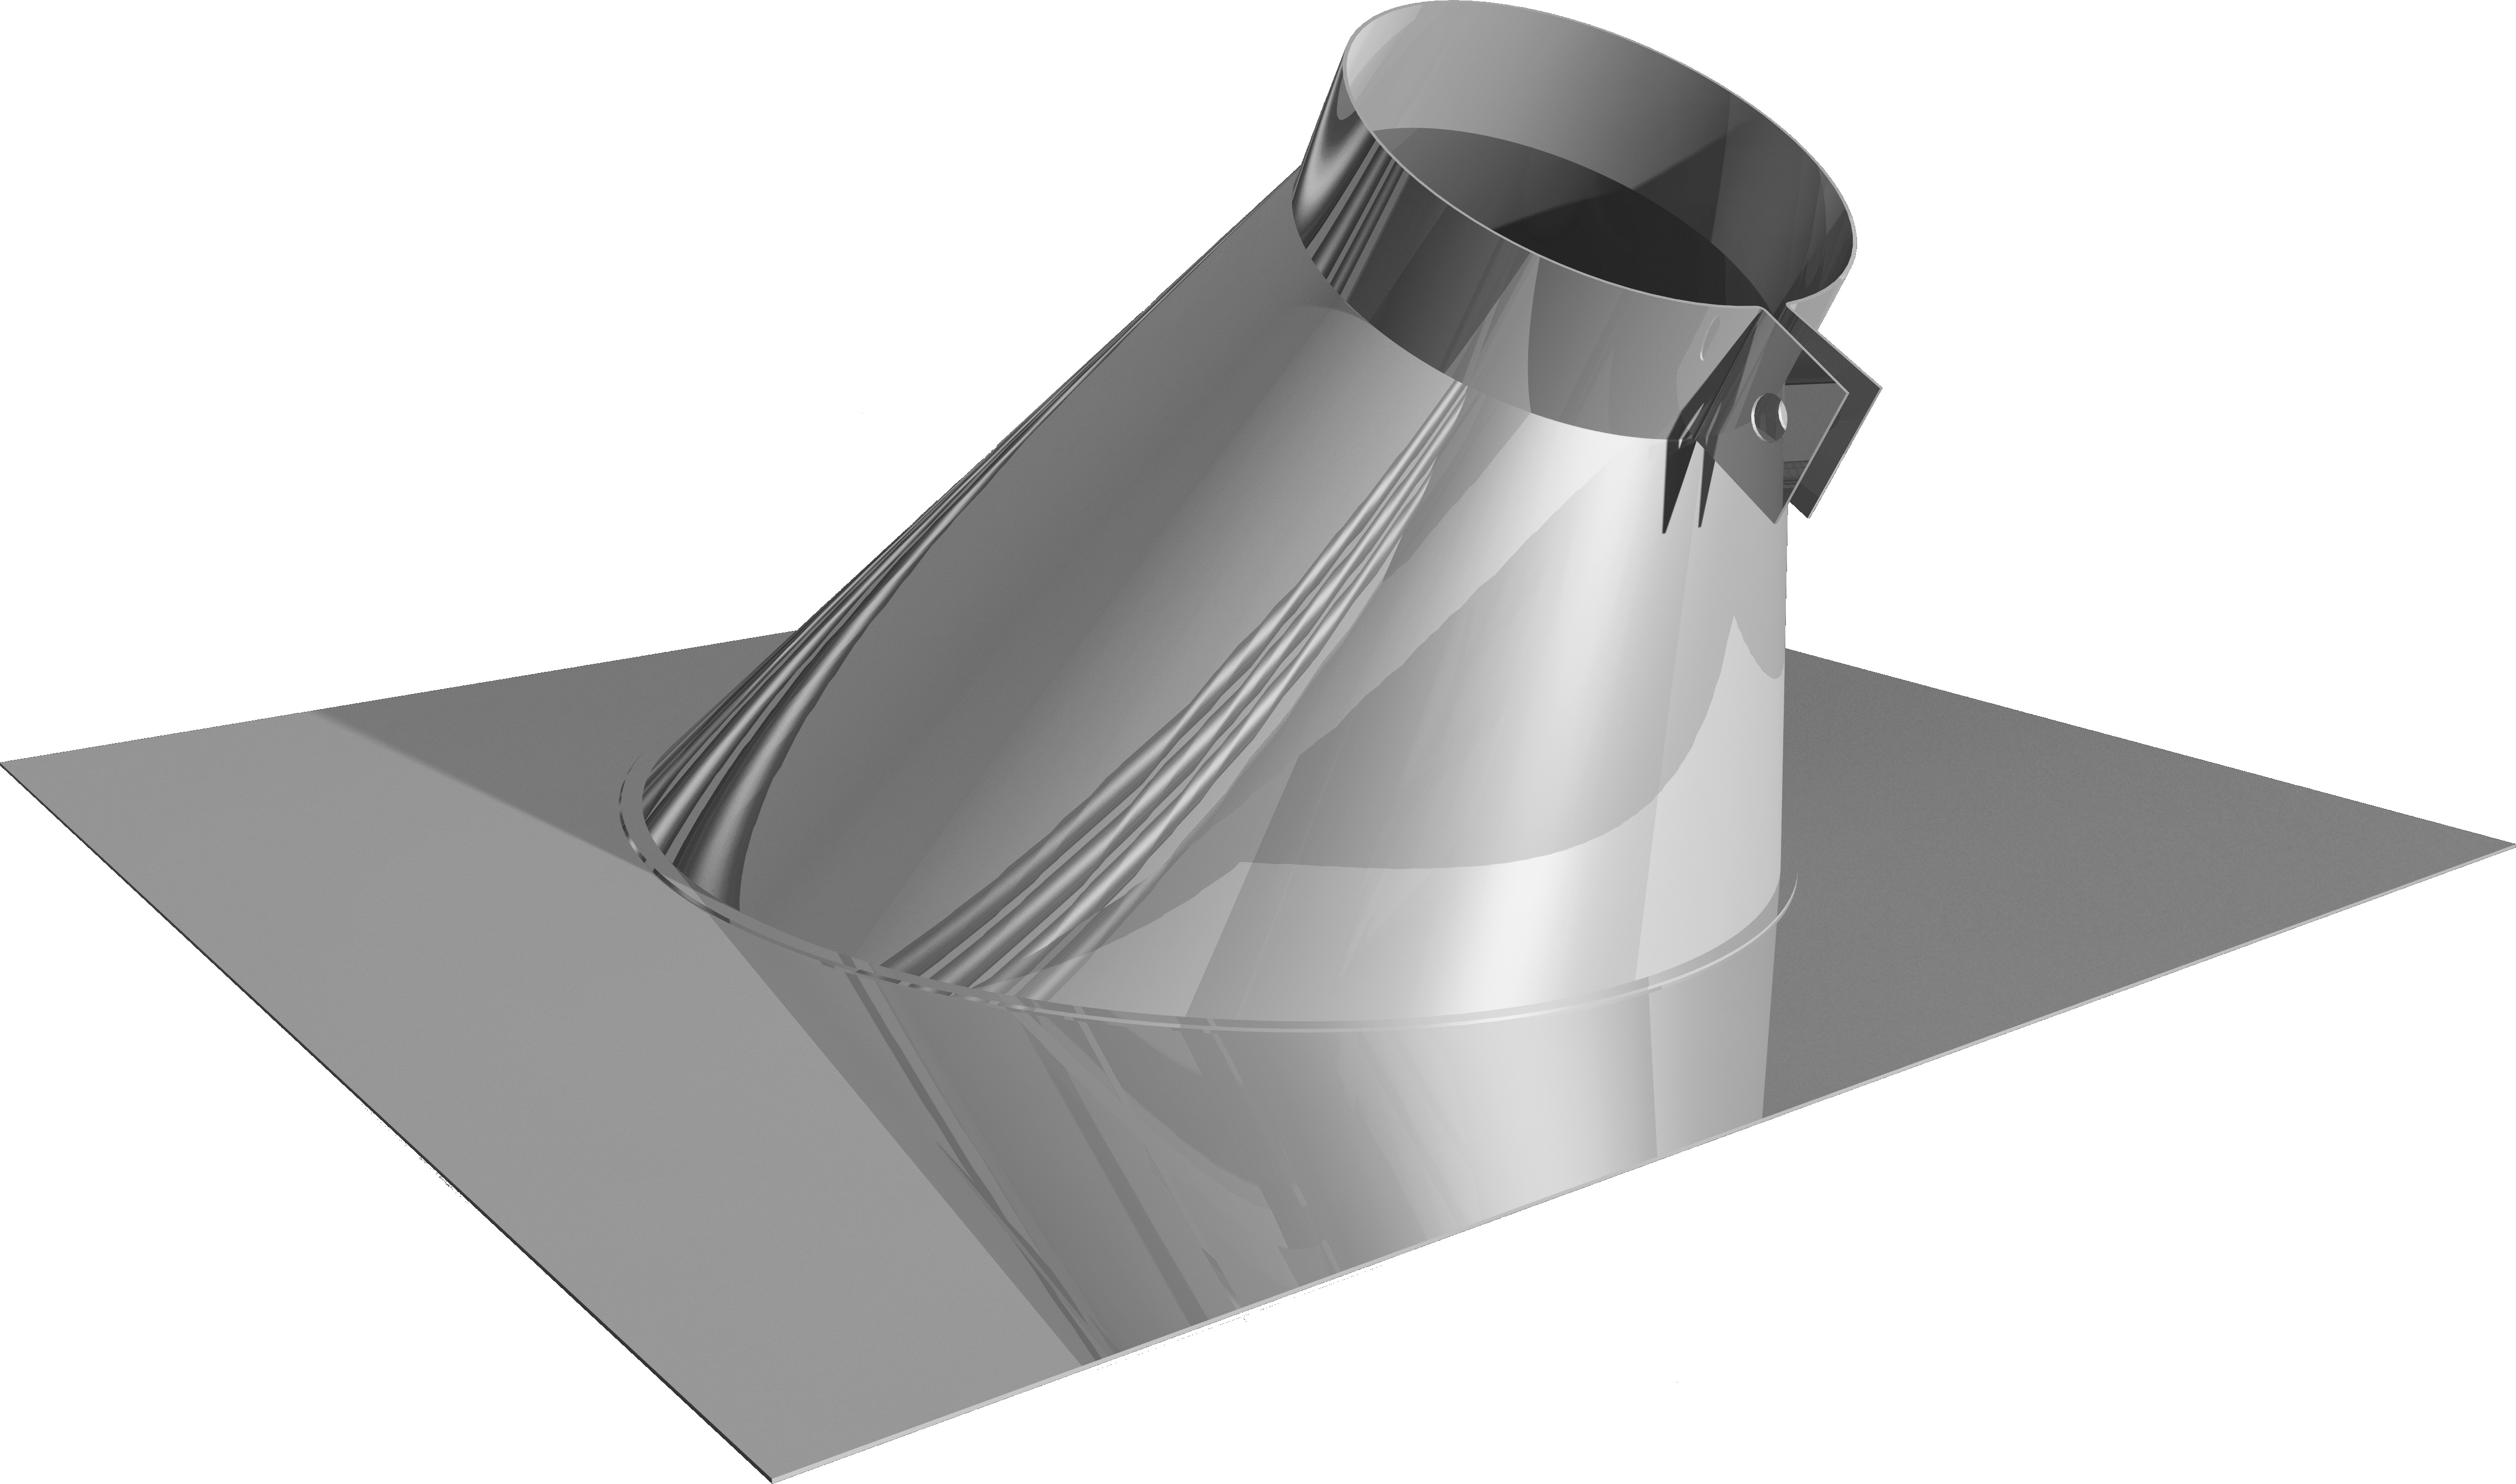
In hardware stores, you can find another type of penetration for round pipes - a metal pipe through. It is used to pass the chimney through a roof that does not have a relief. The prefabricated alloy steel spigots have a standard roof angle, which is matched to the roof slope. To complete the installation, you must:
Cut a suitable hole in the roof. To do this, using a marker, markings are applied to the surface of the roof. Depending on the roofing material, cutting is performed with a grinder or sharp scissors, stepping back 1-2 cm inside the circle.
- Remove the waterproofing and thermal insulation material from the hole made, freeing the passage for the chimney. If necessary, remove the elements of the crate by carefully sawing them off.
- On the underside of the roof, fix a sheet of fire-resistant material with a hole of the required diameter of such an area that there is a margin of 15-20 cm on each side of the chimney.
- Push the pipe module into the hole, dock it with the laid chimney, tightening the junction with a clamp.
- Put the outlet pipe on the pipe, fixing it on the slope surface with fire-resistant sealant and self-tapping screws with a rubber cap.
- Attach the pipe with new segments so that the height of the chimney reaches 0.5-1.5 m above the level of the ridge.
Some craftsmen prefer to use a different method - they pre-solder the chimney into the passage pipe, cover it with thermally insulating material, for example, stone wool, and only then this design is mounted in the passage.
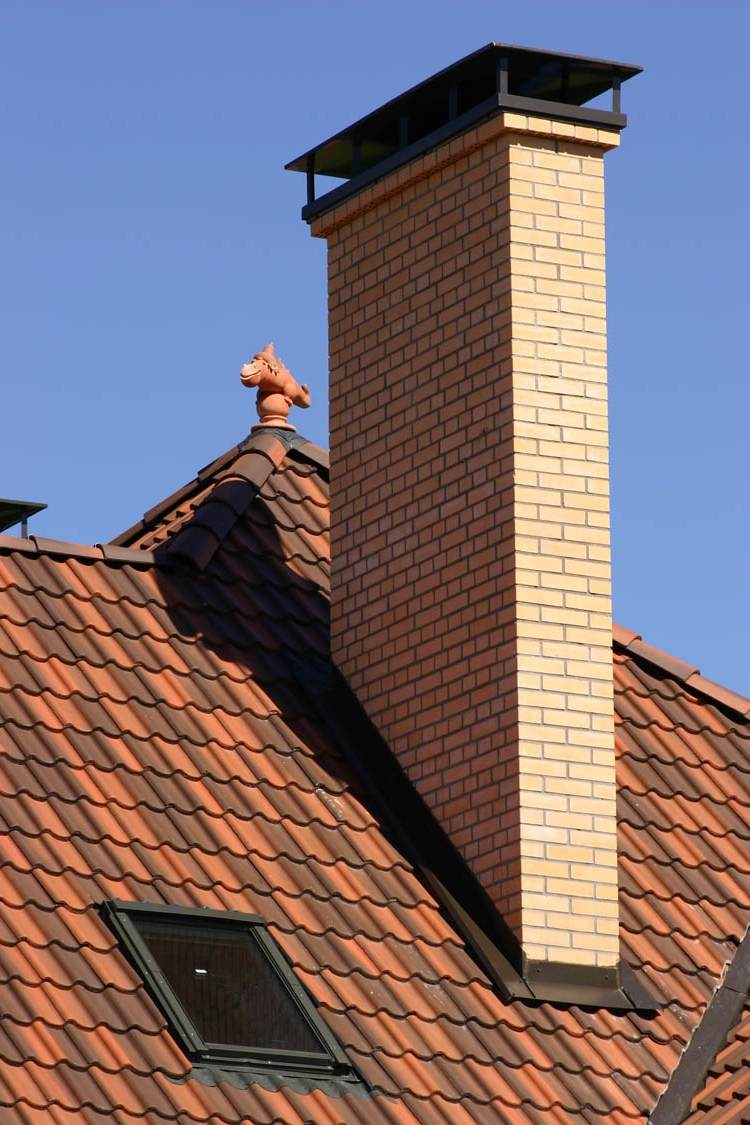
Conclusion of rectangular and square pipes
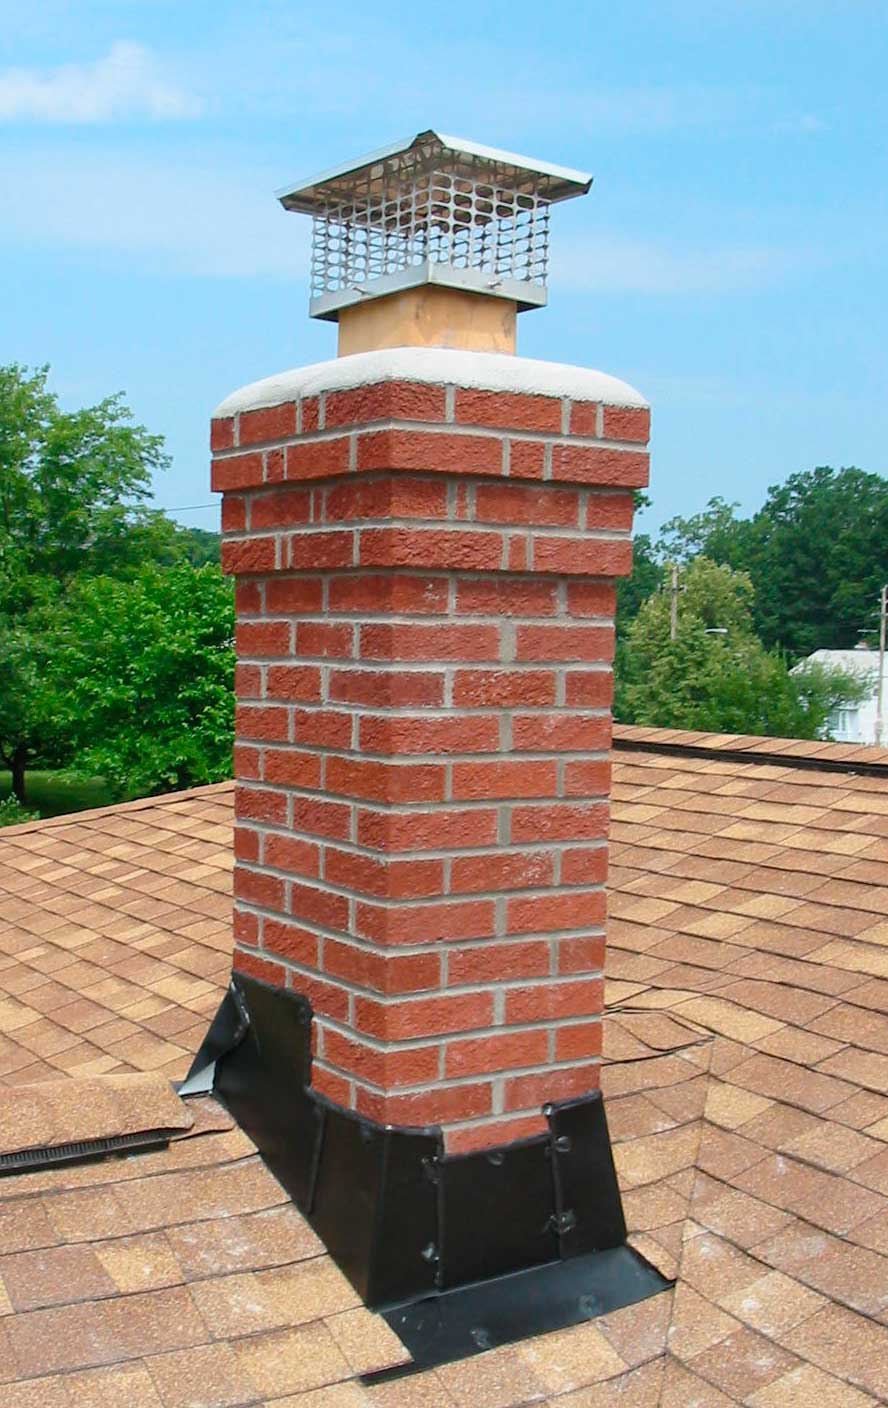
Made of brick, most often square or rectangular, so other methods are used to bring it to the roof. This task is for an experienced kiln master, and not a home craftsman, because a special masonry technique is used in the process. When the chimney approaches the roof, a hole of the appropriate size is cut out in it with an allowance of 2-5 cm, through which the stove-maker leads out. Although heat-resistant brick perfectly retains heat inside the pipe, asbestos sheets are chipped from the inside of the passage to protect the rafters from fire.
On the brick pipe using a metal profile, a soft waterproofing tape on a lead or aluminum base is attached, the lower edge of which is fixed to the roof with a sealant. After that, the unsightly waterproofing is closed with a special decorative apron. It consists of four additional parts and is installed under the roofing material, making the passage neat and well protected.
Output box installation
The roofing device consists of layers of several materials, the refractory qualities of which are expressed in different ways. While most roofing materials are non-flammable and non-combustible, truss systems traditionally made from wood do not. In order to safely lead the chimney through any material, a passage box is mounted:

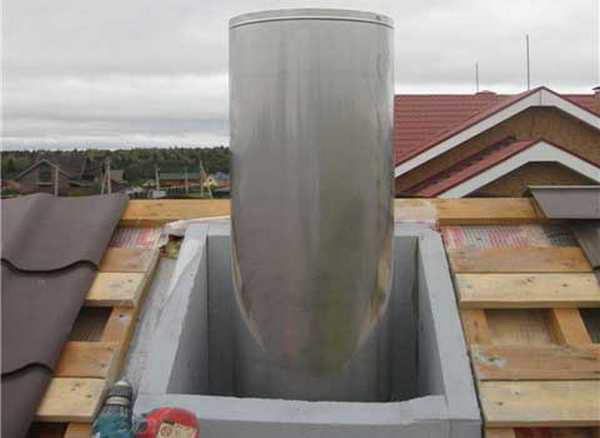
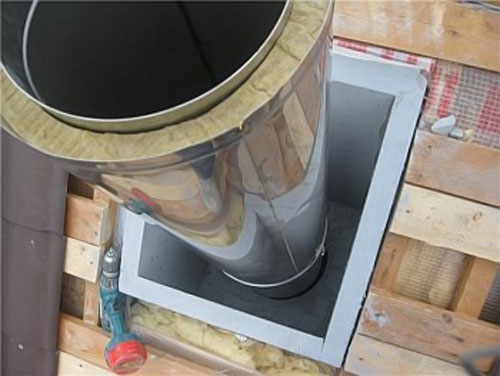
- First of all, a box is purchased or made from a refractory material, for example, metal or asbestos. The size of the box is selected in accordance with the cross section of the pipe, so that there is at least 15 cm between their walls.
- After making the hole, a box is installed in it, the upper edge is aligned with the level of the roof slope.
- The chimney is led out through the hole in the duct. The edges of the waterproofing film and vapor barrier are glued to the pipe using a fire-resistant sealant and reinforced tape.
- Expanded clay is poured inside the box or stone wool is laid to insulate the chimney. Thermal insulating materials are placed taking into account the fact that they should not impede air circulation.
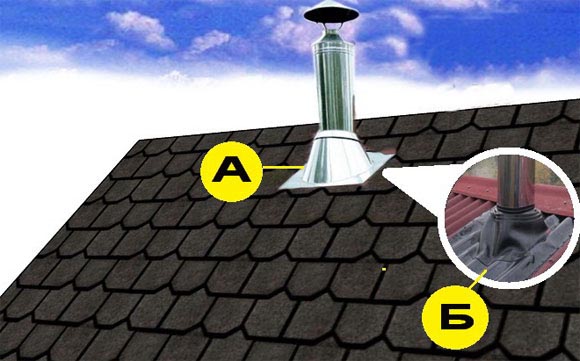
- Outside, the chimney pipe, depending on the shape and roofing material, is finished with an elastic penetration, a decorative apron or a metal pipe.
A well-made chimney outlet does not spoil appearance roof, does not allow moisture to pass through and is safe in terms of fire regulations. Follow the correct technology for passing tubes through ceilings to protect yourself and your property.
Video instruction